0
\$\begingroup\$

I am shooting pictures for our sleepwear brand but I have limited budget/equipment:

  • Nikon D40
  • Lenses: 18-105mm & 50mm f1.8
  • Flash: Yongnuo YN-560
  • Tripod

We have some lights from the top that I directed to the background that I used and the flash was directed diagonally between the ceiling and the subject with the incorporated diffuser out.

I shot with the 18-105mm using some zoom and with 400 ISO. Manual mode with an aperture setting of around f/9. I also used a tripod with the timer for the shot.

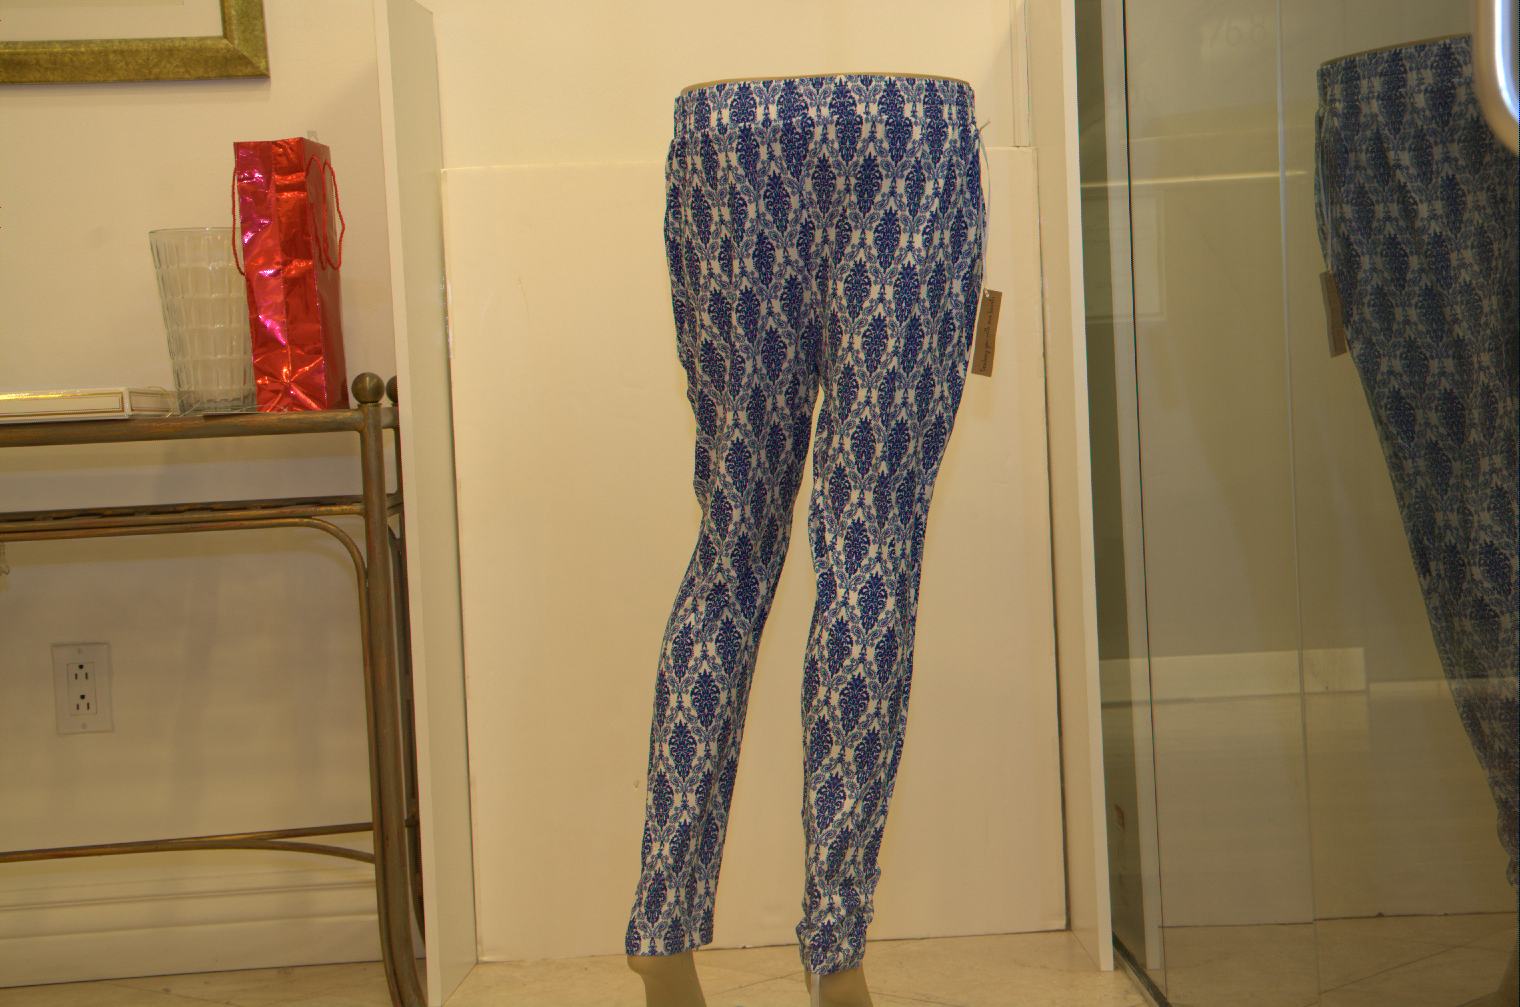
However I got very bad results: enter image description here

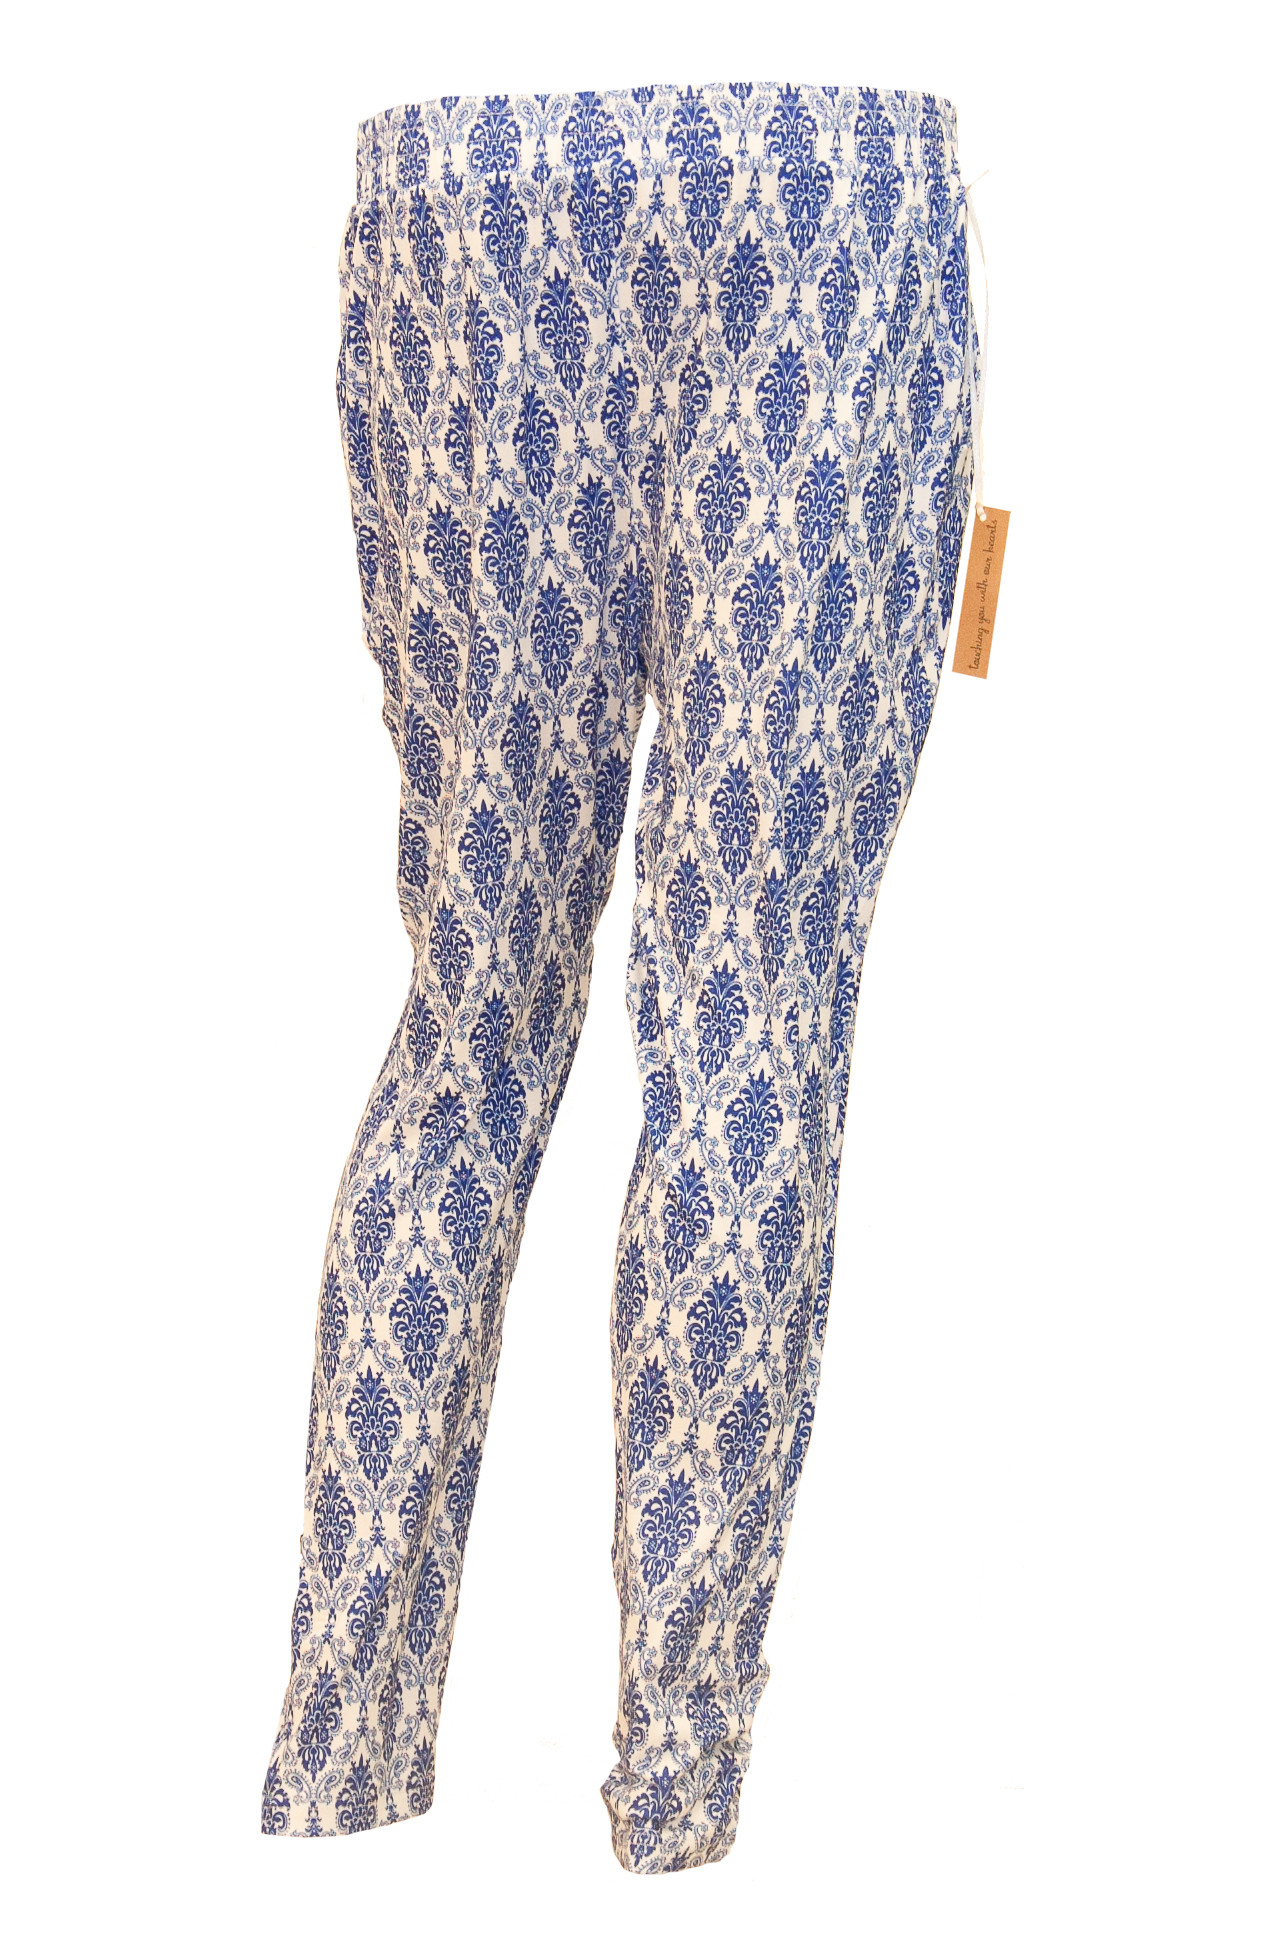
Which I could turn into this: enter image description here

But I need advise to improve my initial images and facilitate the editing. Again, limited budget. I could maybe buy some cheap lighting, cheap diffuser for the flash, etc.

\$\endgroup\$
1
  • 3
    \$\begingroup\$ Are the leggings blue and black or white and gold? (sorry, I couldn't resist) \$\endgroup\$
    – Max
    Commented Mar 3, 2015 at 15:03

5 Answers 5

2
\$\begingroup\$

Consider getting that YN-560 off-camera, Strobist-style, and onto a stand with an umbrella as your diffuser (any smaller diffuser may not be as soft as you'd like). Bouncing loses you a stop or two of light, and you need everything you can get. You'd need a stand, swivel, and umbrella, and some way to trigger the flash, but the YN-560 has built-in optical slave modes, so you could use the pop-up on your D40 as the master--just make sure the body of the flash is rotated towards your pop-up flash, while the head is pointed at the leggings. A stand, swivel and umbrella would probably be in the US$60-100 range.

You may also want to back down the aperture to f/5.6 to get more light from both the flash and the ambient, since you're definitely underexposed in the original shot. Ambient is controlled by iso, aperture, and shutter speed. Flash is controlled by iso, aperture, subject-to-light distance, and flash output power. If you don't bounce the light, and you get it on a stand closer to the subject than the camera is, you'll increase the amount of light it can put into your photo a lot.

If you can get more light on the background (say, another YN-560--you could just put it on the floor in the little plastic stand it comes with--wouldn't need a second stand and swivel) and a lot more separation between the subject and the background (say 10'), that would help a lot, too. You want to light in zones where the lights don't contaminate each other. That way, you can control how bright the subject is relative to the background. The white background is generally done by lighting the background more brightly than the subject, just as a black background is done by lighting the subject more brightly than the background.
\$\endgroup\$
1
\$\begingroup\$

Probably the best investment you could make at this point would be a decent tripod and adjustable head. Anytime possible and convenient, a picture should be taken with a tripod.

Your initial picture appears to have a tan tint to it, and the tan color shows up on the pants as well. Its tough to tell if it truly is that color, but my guess is it is not. This is likely due to the color of the tile, walls, and other objects in the room. This doesn't allow for the true color of the subject to be capture with the camera. It is best to use a room with solid color walls, ceilings, and floors. If the room can be all white, that can work well. Otherwise, you'll actually want to block out the reflected light from the room, and only use light from your flashes or spot lights. Then put your subject in front of an appropriate background (solid black works well, or a gray or white if your subject is black).

You camera settings sound like they are in the ballpark. Try and get more light onto your subject, then lower your ISO. If you are bouncing the flash off the ceiling, you shouldn't need the diffuser. The ceiling itself works as the diffuser. We use a pair of softbox strobes that are triggered with either the camera flash, or a remote trigger, and they evenly light up our photography sessions very well. We put one to the right and one to the left of the shooter, with one slightly above the subject aiming down and one slightly below, aiming up, to help reduce shadows.

One last thing, to help with removing the background in post, have the background well lit and uniform and the process can go much quicker.

\$\endgroup\$
3
  • \$\begingroup\$ Thanks, just for the record, I updated my question as I did use a tripod with timer \$\endgroup\$
    – samyb8
    Commented Mar 3, 2015 at 14:50
  • \$\begingroup\$ The ceiling is a bit high... Would it be better to point the flash directly to the subject using a diffuser? \$\endgroup\$
    – samyb8
    Commented Mar 3, 2015 at 15:45
  • \$\begingroup\$ The tint in the image looks like it can be corrected with white balance adjustments. If you are using consistent lighting in that environment, and consistent camera settings, then this may be easy to fix in post production with a preset to adjust the white balance \$\endgroup\$ Commented Mar 3, 2015 at 19:15
1
\$\begingroup\$

Flash Yongnuo YN560 - Tripod...

... Then we have some lights from the top that I directed to the background

Your picture shows orange tint in some places. I suspect that the flash and the other lights have different color temperature. If that's the case, you should get some gel filters (e.g. from Rosco) to get the temperature of the flash to the same level as the other lights.

If you don't have it already, the best investment at this point might be the book Light Science & Magic: An Introduction to Photographic Lighting.

\$\endgroup\$
1
  • \$\begingroup\$ Alternately to putting a gel on the flash, you could use "daylight" (~5500K) temperature compact fluorescent bulbs in the overhead light to more closely match the flash, which would also probably give you more working light in general. Use the "high CRI" type, which are sometimes sold as "craft bulbs" or similar. \$\endgroup\$ Commented Mar 3, 2015 at 22:45
0
\$\begingroup\$

By taking take multiple pictures under different lighting conditions and also with the clothing removed so that you have a picture of only the background (with the same focus and exposure), you have a lot of data for post processing available. This allows you to compose an ideal picture of the clothing with some ideal background that may be impossible to realize in practice.

\$\endgroup\$
0
\$\begingroup\$

Is this a business of yours selling clothing? If so you need to place your images above your competitors. If you get inaccurate colour you will get returns, not showing texture or detail like a black pocket on a black top, returns. Also if your expecting online sales these images must have a bit of "wow" factor to get clients to part with their money. Would it not then be better to invest in a photographer? Might cost more but you will sell more covering that cost anyway.

What your trying to do may sound easy and look easy but trust me it isnt. Wait until you start dealing with Moire and blocked colours.

\$\endgroup\$

Your Answer

By clicking “Post Your Answer”, you agree to our terms of service and acknowledge you have read our privacy policy.

Not the answer you're looking for? Browse other questions tagged or ask your own question.