26
\$\begingroup\$

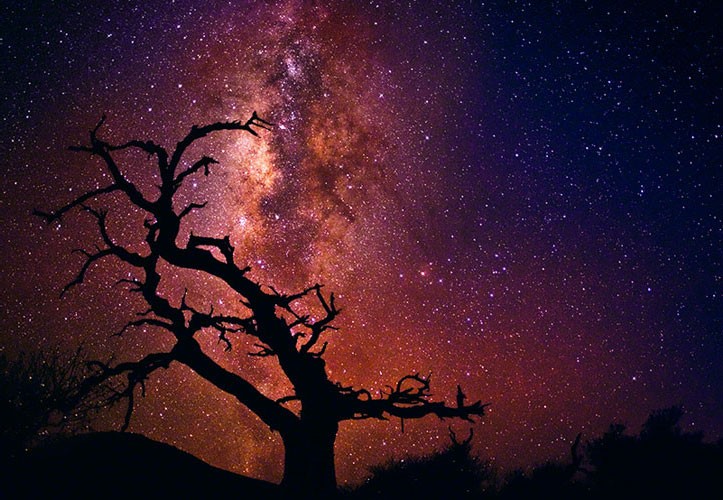
Here's the picture:

Tree of the Universe

I'm curious to know what techniques (i.e. shutter speed, aperture, ISO, etc...) he uses to capture the stars so vibrantly (assuming it wasn't Photoshopped). I'm guessing it was taken with a long exposure but I'm sure there's more to that. Was any special equipment and/or lenses used? Are photographs like this possible on prosumer DSLRs (i.e. Canon 7D)?

\$\endgroup\$
3
  • 2
    \$\begingroup\$ I think adding in "assuming it wasn't Photoshopped" deters from the question. \$\endgroup\$
    – dpollitt
    Commented Dec 28, 2011 at 20:43
  • 1
    \$\begingroup\$ I have read somewhere that this is a heavily composted shot, with something like 50 images combined. If I find the actual reference, I will post an answer \$\endgroup\$
    – cmason
    Commented Dec 28, 2011 at 23:16
  • 1
    \$\begingroup\$ Photos from Peter Lik should be taken with a grain of salt. He is well-known for wildly embellishing, and often flat-out lying, about how he took his shots. He has also been caught on at least one occasion blatantly stealing the work of other very popular photographer/bloggers. I can easily see this photo being heavily composited. If his "Once in a lifetime moon shot" is any example, the foreground was taken separately, silhouetted, and composited onto the background. The background itself was probably layered, and heavily saturated. \$\endgroup\$
    – jrista
    Commented Feb 5, 2013 at 22:26

6 Answers 6

26
\$\begingroup\$

A very long exposure doesn't help with shots like this due to the rotation of the Earth. Depending on your field of view you can get star trails (where instead of individual points of light you get lines where the stars have moved relative to the camera) with exposures of only 10 seconds. With a wide angle lens you can get away with longer exposures, e.g. 30 seconds.

A tracking mount can eliminate star trails for pure astro shots, but this shot has a sharp foreground element which means short exposure (unless multiple exposures/tracking mounts and photoshop were involved, benefit of the doubt let's say they weren't). Fortunately modern DSLRs are far better in low light than film cameras ever were, and to make up the short exposure you can amplify the signal (by raising the ISO setting). Even a really noisy image can look good when resized for the web so don't be afraid to set the ISO as high as you need for a proper exposure.

In summary this sort of image can be shot using a 7D with the following conditions:

  • Cloudless skies
  • No light pollution (a long way from any human settlement)
  • Fast lens, ideally f/1.4
  • Single exposure 10-30 seconds
  • Crank up the ISO!
  • Noise reduction + massive downsize for the web.

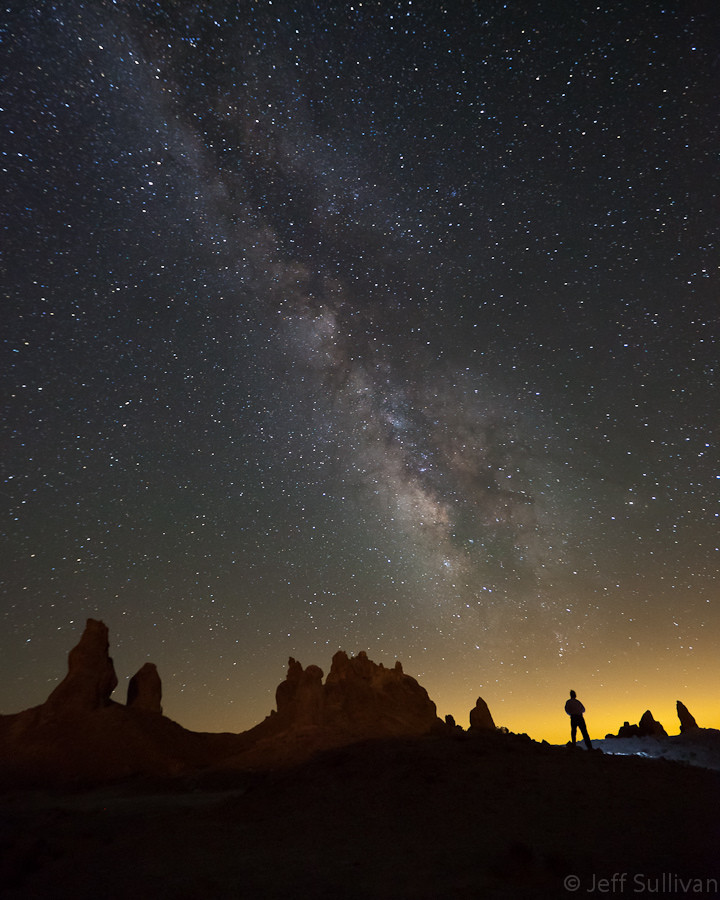
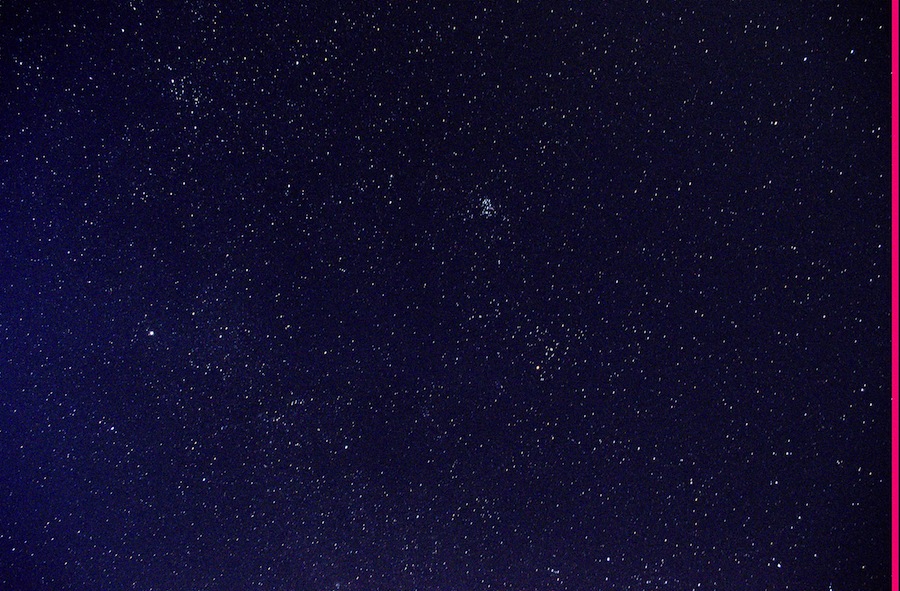
For an example of what is possible with a single exposure and no special equipment see the following image by Jeffrey Sullivan:

(c) Jeffrey Sullivan

(c) Jeffrey Sullivan

30 seconds at f/2.8 and ISO 6400

\$\endgroup\$
3
  • \$\begingroup\$ What exposure/lens/F-stop/ISO did you use for that? Did you use a self timer so that it's you taking a leak in the foreground? \$\endgroup\$ Commented Dec 29, 2011 at 0:16
  • \$\begingroup\$ @Olin that's not my image but I've added the exposure details to the bottom of the answer. The lens was most likely the 16-35 f/2.8 \$\endgroup\$
    – Matt Grum
    Commented Dec 29, 2011 at 16:07
  • \$\begingroup\$ @MattGrum Was that 30 second exposure done with or without an equatorial mount? \$\endgroup\$
    – jp89
    Commented Dec 30, 2011 at 1:45
23
\$\begingroup\$

Short of asking Peter Lik himself, or finding he posted the techniques online, I could only speculate on which techniques he actually did use. I am assuming he did post processing. Some possibilities include:

  1. Start with a good dark sky location. The Australian outback has a lot of that. Some places elsewhere are also good (at times).
  2. Use prime focus premium quality fast lenses, shot fully open, or nearly so (a stop or two back), with a well calibrated infinity focus.
  3. Filter out the spectral peaks common to artificial light sources (sodium and mercury lines, for example).
  4. Use a telescope motorized polar mount to keep each exposure better aligned.
  5. Take multiple shots and do realigned stacking in post processing.
  6. Use focus bracket post processing (even though you did not change focus during shooting) to select each pixel from the stack for best sharpness.
  7. Add the silhouette foreground in post processing to avoid it being blurred relative to the stars.
  8. Post process for best contrast and color.
\$\endgroup\$
4
\$\begingroup\$

I want to give you my own perspective, trying to fix something in the answers above.

  1. I will not recommend high ISO because higher ISO introduces considerable noise in my images. examples are below.
  2. 30 Sec exposure is too long. With that exposure, you will actually see trails of star not just a point star.

I would recommend

  1. A clear bright sky. You see abundant of stars with naked eye esp big ones are really bright.
  2. You have a good quality lens
  3. Full frame sensor camera
  4. 10 Sec exposure
  5. Low ISO (keeps the dark dark)
  6. Manual focus (auto focus will likely not work as in my case)
  7. Correct lighting condition set ( I don't know which one but may incandescent?)
  8. Enhance the image later after you take the shot.

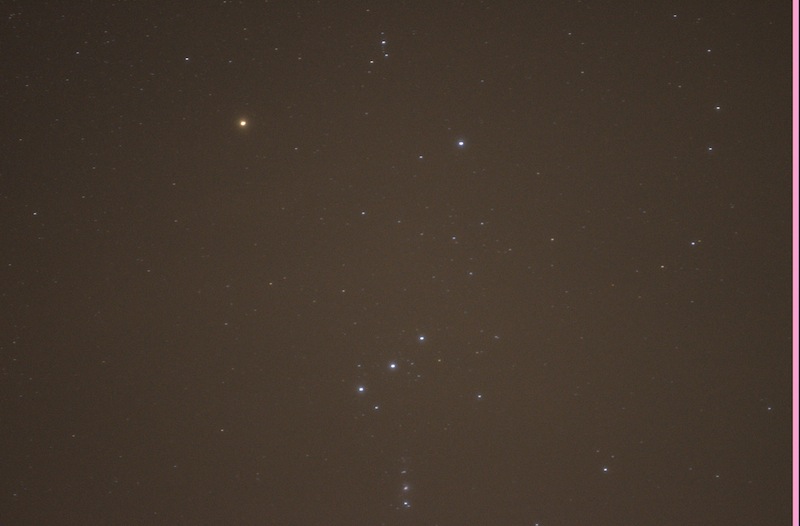
Here are my images now.

enter image description here

15s, f/5.6,ISO 1000

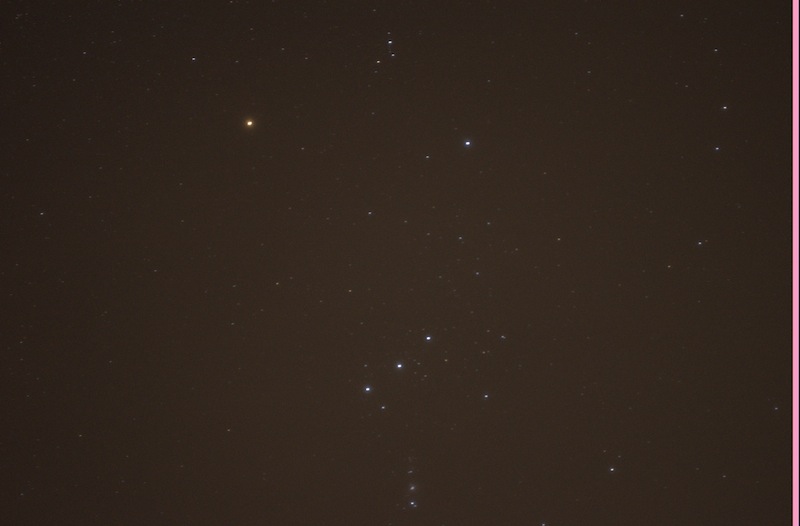
enter image description here

15s, f/5.6, ISO 640

You can see significant reduction in radiant light at ISO 640 vs ISO 1000 (2nd image is better than first).

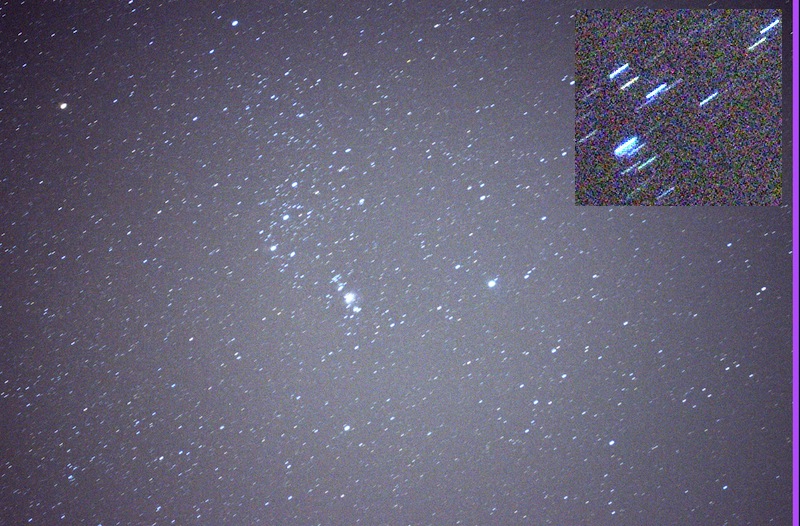
The following I took at 30s, f/5.6, ISO 2500. With this long exposure you can clearly see the star trail as they move (shown at top right corner)

enter image description here

30s, f/5.6, ISO 2500.

Edit Here is another pic that I took on the same night after some photo editing in Picassa.

enter image description here

\$\endgroup\$
1
  • \$\begingroup\$ Yes, the sky is brighter in the first image than the second, but both of them need to have their black points adjusted, as a routine processing step. The sky background level is not, in and of itself, a problem. What you want to do is see what faint objects are visible after appropriate adjustments. Regarding the 15 vs. 30 seconds exposure time, the maximum exposure time will be longer for a very wide-angle lens (as in the question, and in Matt Grum's answer) than in your example with a longer lens. (Also, Orion is a worst case for exposure time, since it's on the celestial equator.) \$\endgroup\$
    – coneslayer
    Commented Dec 29, 2011 at 18:10
2
\$\begingroup\$

I've recently asked a friend how did he managed to take this kind of pictures, just out of pure curiosity, here is all the process:

"I use a motorized equatorial mount. You do not do a single exposure but several which are then overlapped using software. Because of high noise levels which is one hour of exposure, one has to make various types of pictures: LightFrame (with light), Darkframes (to mitigate the noise (making the same ISO and same exposure time), and still flatframes (these are used to remove dust from the image sensor or optical elements. All in all, this photo was taken nearly 800 photos in raw. Thus, lights 120 + 120 + 120 darks flats. The lights and darks logically have 30" each, the flats are made with the maximum shutter speed with the field of view uniformly illuminated. It takes a lot of work but it also gives much joy to get a picture that without all this work would not resemble anything :)"

Be sure to know, that a sky like that and foreground in the picture requests photo editing software, there is no way to get details of a night sky like that in a exposure time that wouldn't create trails.

The picture that made me ask him his method his here, the method:
\$\endgroup\$
1
  • 1
    \$\begingroup\$ Shooting deep sky objects, like a galaxy or nebula is very different from shooting wide angle. Look at Matt Grum's answers for a single shot, without trails. Both are impressive BTW! \$\endgroup\$ Commented Jan 11, 2012 at 13:36
1
\$\begingroup\$

I think the Tree Of The Universe as Peter calls it was a series of shots created with HDR software or maybe Deep Sky Stacker. D.S.S. is free on the net for downloading. I also think he got that photo with one of his Mamiya cameras. Mucho dollars !

\$\endgroup\$
-1
\$\begingroup\$

These are all good inputs, but Lik posted the equipment used on his site. Yes, he used a stacking technique (involving multiple cameras - YIKE$$$!), yes, the dark sky exposure stuff is all great advice, but the real trick is he used Nikon's D810A Astrophotography camera. It's special feature: no infrared filter. This allows more color from stars to get recorded on the sensor. So to answer your question, no, a prosumer camera, or (currently) any Canon camera, could not achieve these same results.

\$\endgroup\$
3
  • 1
    \$\begingroup\$ How could he have used the D810A (released 2015) for a photo taken in 2011? \$\endgroup\$
    – Philip Kendall
    Commented Feb 24, 2016 at 20:28
  • \$\begingroup\$ Yes, stacking with multiple cameras can be very useful and it doesn't have to be very expensive. You can e.g. take pictures with a large group of people... \$\endgroup\$ Commented Feb 24, 2016 at 20:51
  • 3
    \$\begingroup\$ Downvoted for incorrect statements: 1, as noted by @PhilipKendall, the shot could not have been taken by Nikon D810A unless time travel was involved. 2, even a current picture taken by a D810A can be matched by a comparable Canon or other camera if the IR filter was removed. Many people do this precisely for astrophotography. It's a common enough thing that Nikon just cut out the middle man and marketed the D810A for this reason. \$\endgroup\$
    – scottbb
    Commented Feb 24, 2016 at 23:52

Your Answer

By clicking “Post Your Answer”, you agree to our terms of service and acknowledge you have read our privacy policy.

Not the answer you're looking for? Browse other questions tagged or ask your own question.