14
\$\begingroup\$

What is split toning?

Some questions that seem highly related to the strict definition and might fit into an answer include:

  • Why is the technique used?
  • Is it achieved differently for digital vs film images?
  • Is it different for color vs black and white images?

Examples of the term:

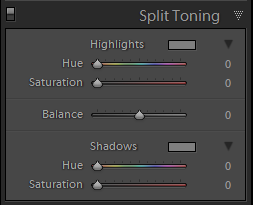
  1. Adobe Photoshop Lightroom:

    Lightroom Split Tone Example

  2. Tag on this site -
  3. Popular answers on this site mentioning split-tone (1,2,3)
\$\endgroup\$
4
  • \$\begingroup\$ It would be good to show the context where you saw "split toning" used. \$\endgroup\$ Commented Aug 13, 2015 at 23:03
  • \$\begingroup\$ Should we try to answer with a tutorial-like answer using Lightroom and examples (at least for digital pictures) ? \$\endgroup\$
    – Olivier
    Commented Aug 15, 2015 at 8:41
  • \$\begingroup\$ @Olivier I'm not sure that a tutorial is necessary but certainly examples of results always make sense on a photography site ;) \$\endgroup\$
    – dpollitt
    Commented Aug 15, 2015 at 13:03
  • \$\begingroup\$ As you illustrated your question with a panel from Lightroom, I figured we could show the effect of each slider. The answer of Mark doesn't cover that part. \$\endgroup\$
    – Olivier
    Commented Aug 15, 2015 at 14:04

2 Answers 2

11
\$\begingroup\$

Split toning is a method that is used to introduce a colour tint(s) into the highlights and/or shadows of an image.

It is used purely for aesthetic reason, and could be used to recreate the look of a particular film or just a completely unique look.

Many films have colour casts in their shadows and/or highlights. This forms part of their "look", which you may wish to recreate in a a digital image. I don't know anything about applying split toning to colour film (though I am sure there is a way), but there are several printing/toning methods that were commonly used for monochrome film, for example sepia toning and cyanotypes. This too can be emulated in Lightroom with the split toning panel.

In lightroom the toning effect is similar to that achieved by painting over with a solid colour using the adjustment brush, but the strength is dependent upon the luminosity level - i.e. it is stronger in lighter areas for the highlight tone and stronger in darker areas for the shadow tone. In lightroom, the position of the balance slider determines the cutoff between "shadows" and "highlights" for the purposes of the split toning.

One commonly used example of split-toning is to have yellow in the highlights and blue in the shadows. This yields a fairly natural looking result, as this would occur naturally when brighter areas are lit by the sun, and darker areas in shadow are lit by skylight,

\$\endgroup\$
1
  • 2
    \$\begingroup\$ This answer would really benefit from a pictorial example if you have one to share. \$\endgroup\$ Commented Aug 17, 2015 at 17:09
2
+50
\$\begingroup\$

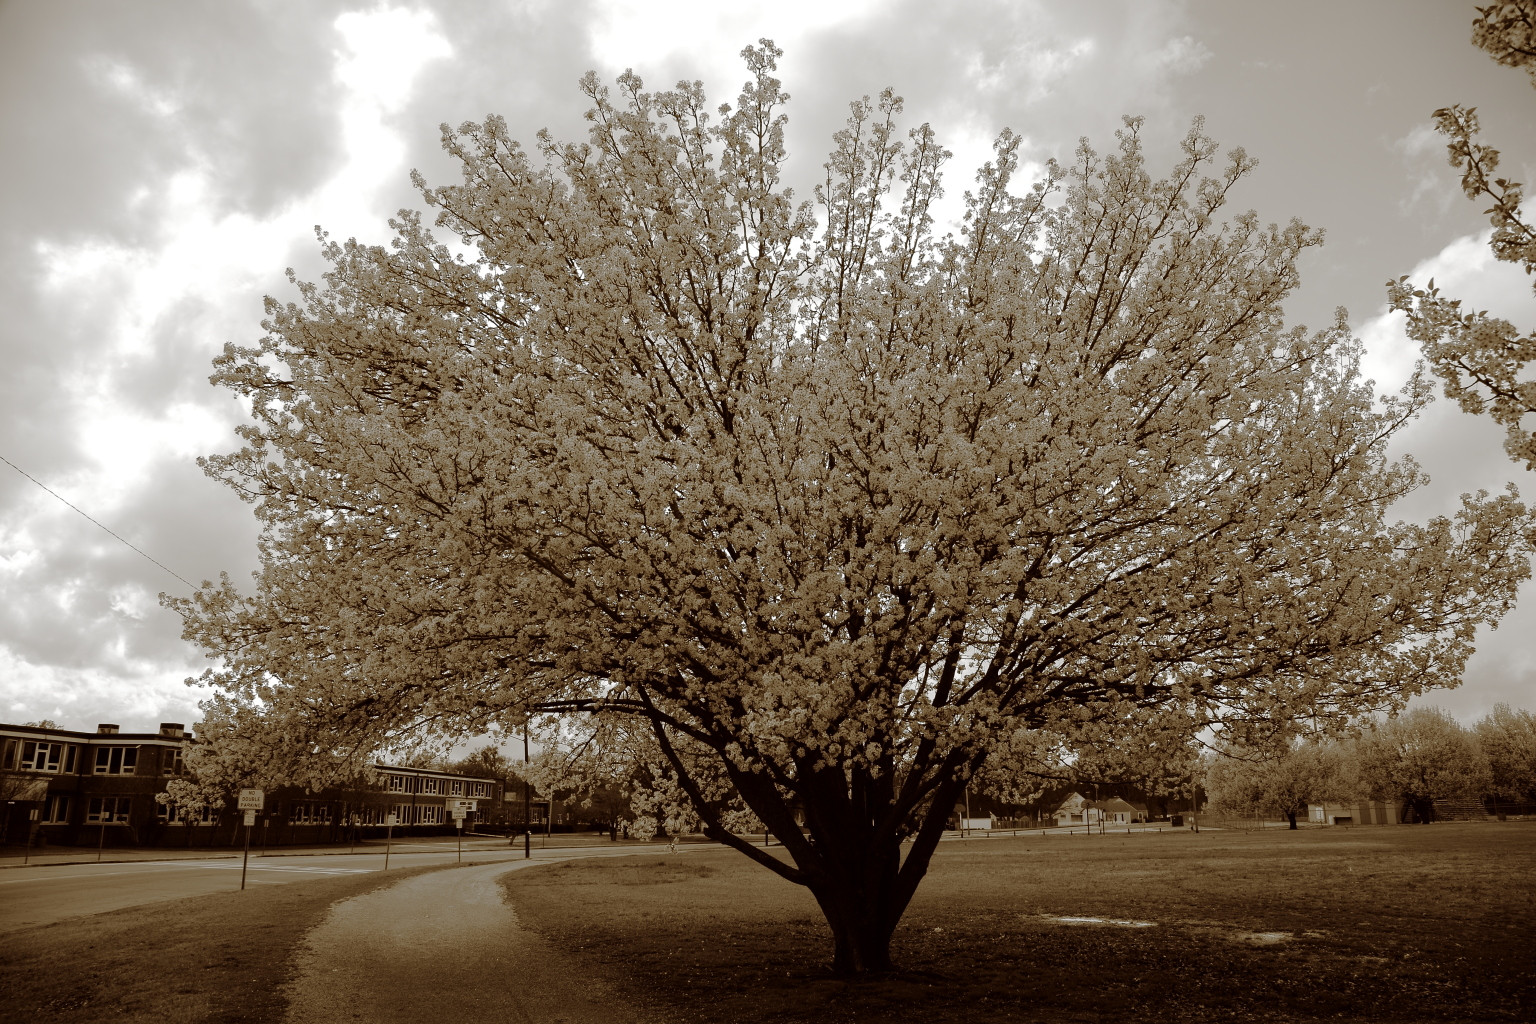
Split toned tree

Here's an example of a split toned monochrome image. The image was simply rendered in monochrome and a sepia toning effect added. In the areas of highest brightness (what would have been the areas with highest density on negative film) the sepia cast is bright enough that all three color channels (R,G,B) are still fully or near fully saturated. Hovering the cursor over a medium grey area in the clouds gives an (R,G,B) value of (206,204,201). Note that the values are very close for all three colors:
grey area RGB
In a darker area near the lower left corner the sepia tone is more pronounced. Note the widely different (R,G,B) values of (48,27,14):
dark area RGB

The image was processed in Canon's Digital Photo Professional 3 with the following raw conversion settings:
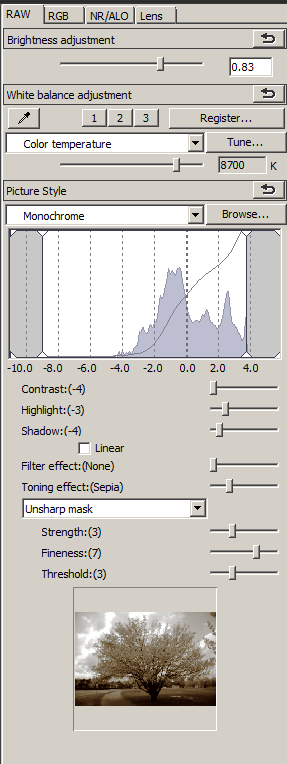
settings screenshot
By simply increasing or decreasing overall brightness the sepia tone is respectively added to the highlights or removed from the shadows. With brightness decreased to a value of -2.0 the same area in the clouds now shows (R,G,B)=(132,117,90):
dark sepia tree
With brightness increased to a value of +2.0 most of the sky is completely blown out and has an RGB value of (255,255,255). The midtones of the tree's blossoms which had RGB values of around (137,119,91) in the original image posted above are now raised and demonstrate RGB values of (163,159,150). They still show a slight color cast, but it is not nearly as pronounced as before.
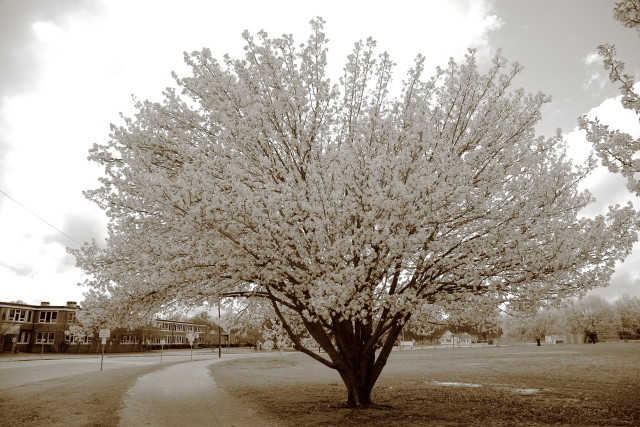
light sepia tree

\$\endgroup\$
3
  • \$\begingroup\$ Would you consider the example and its results that you provided a "real world" example of split toning or one that is just for academic purposes? I don't work with sepia images nor split toning at all so I'm curious as to your view on this. Thanks for the answer! \$\endgroup\$
    – dpollitt
    Commented Dec 25, 2015 at 20:21
  • \$\begingroup\$ Controlling density/exposure was the way it was done with film for decades. In the digital age no one seems wants to think about things like that until they're working with the image in Lr/Ps/Gimp/etc. \$\endgroup\$
    – Michael C
    Commented Dec 26, 2015 at 1:45
  • 1
    \$\begingroup\$ Not sure what you mean by "real world", but this was an actual image I published as part of an online album a couple of years ago. It was the only split tone image in the set, but there were several other monochrome images as well as tone-mapped color images. During the shooting session my process including capturing images for each of those uses. A dark foreground/subject with a bright sky or the reverse, a bright foreground/subject with a dark background is always a good candidate for a split tone treatment. \$\endgroup\$
    – Michael C
    Commented Dec 26, 2015 at 1:50

Your Answer

By clicking “Post Your Answer”, you agree to our terms of service and acknowledge you have read our privacy policy.

Not the answer you're looking for? Browse other questions tagged or ask your own question.