8
\$\begingroup\$

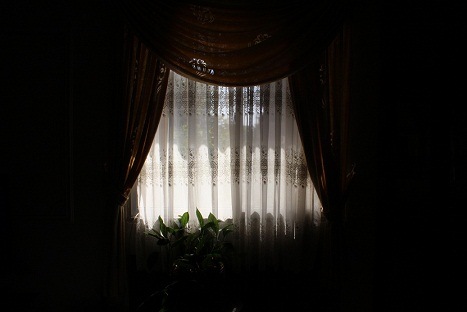
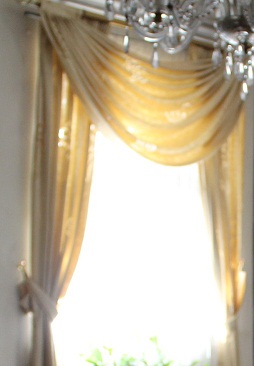
I am shooting a window with heavy sun light on it. When I get far enough from the window, the yellow curtain does not become too dark and is somehow visible (the second image). But as I get closer to the window, the whole scene becomes dark. I tried reducing the aperture size so that I get less light but it had no effect. What should I do to make the following dark image brighter with curtain and wall completely visible?

dark

Properties of the dark shot:

Camera: Canon EOS 650D
Aperture: f/22
Shutter: 1/40 sec
ISO: 320
Focal Length: 35mm
Exposure Bias: 0 step

bright

\$\endgroup\$
4
  • \$\begingroup\$ How about flash pointed to ceiling ? \$\endgroup\$
    – GoodSp33d
    Commented Sep 14, 2012 at 9:50
  • \$\begingroup\$ @kantu Unfortunately I do not have an external flash. \$\endgroup\$
    – Meysam
    Commented Sep 14, 2012 at 10:00
  • \$\begingroup\$ @Meysam which metering mode did you use in the second shot? \$\endgroup\$ Commented Sep 14, 2012 at 11:56
  • \$\begingroup\$ @vivek_jonam Evaluative (Matrix) metering \$\endgroup\$
    – Meysam
    Commented Sep 14, 2012 at 13:21

5 Answers 5

11
\$\begingroup\$

The challenge is that you have a scene with very large dynamic range.

When you photograph the window from a distance the camera is exposing for the overall scene and you get the curtain somewhat over-exposed and the external scene through the window is fully washed out.

As you approach the window the camera is tending to expose for the central light = external scene and illuminated curtains. The exposure is reduced to approximately correctly expose the window and curtains and the room exposure is now too low.

The overall dynamic range present is such that you will not be able to expose every part of the scene correctly in a single photo bit you can make decisions re what parts of the scene will be exposed in what manner.

To expose the curtains and internal parts of the room more correctly as you approach the window you need to meter on the sides of the scene, lock the exposure to this setting then recompose the scene as required. Most cameras have the ability to lock exposure either by toggling or by holding an exposure control button down - AEL on Sony / Minolta. ?? on your camera. OR you can change to manual exposure and adjust accordingly. In this case, using say f/8 to f/16 and leaving ISO and shutter speed as is will move you in the right direction.

If you want a final photo that has detail internally and externally you can use multiple exposures with different settings and combine them afterwards (HDR type effect) or you can try exposing for the outside conditions and then using fill flash to illuminate the room interior. If you use flash the results well depend on how much intelligence your camera tries to apply and it may be easier to use wholly manual control of camera settings and flash than to fight the cameras 'brain'. Depending on the camera, if using auto settings you may need to push flash compensation up substantially to illuminate the interior correctly.

An interesting method which is more in the enthusiast area than liable to be of use casually is to set the camera for a very long exposure (say 10 seconds+) with the interior exposed correctly and then place a "mask" in the window area for part of the exposure to reduce the window exposure. Such masks are usually hand made to suit the scene, have the edges "feathered" to produce softer edges and are then "waved round" by hand to remove the effects of the borders. Those suitable skilled in the art can achieve quite good results BUT for a beginner, taking multiple exposures at different exposure levels and post-combining them is liable to be easier.

If your camera has an inbuilt HDR facility then this is the time to try it!.


Super super super rough !!!!!!!!!! - example only:
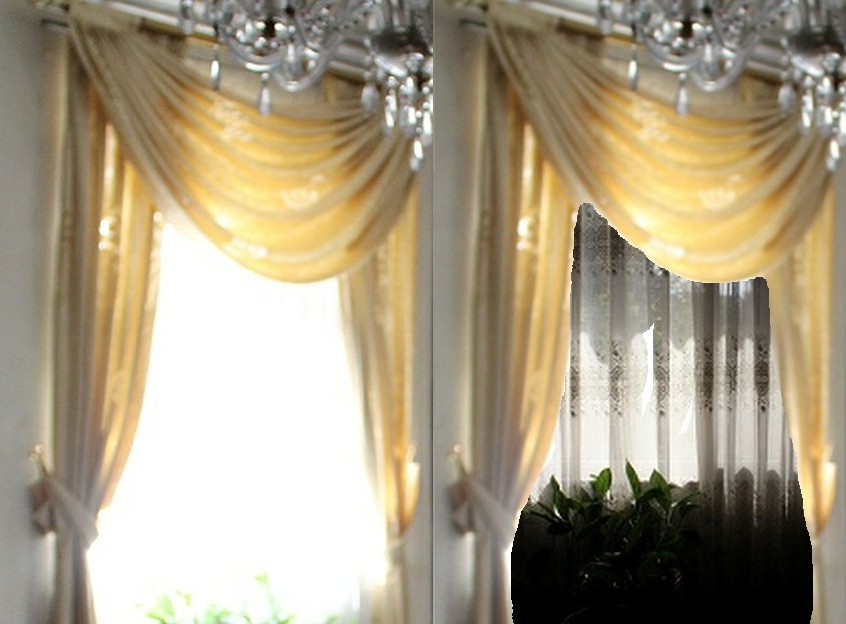
enter image description here

\$\endgroup\$
2
  • \$\begingroup\$ Thank you for detailed answer! I updated my question with a new shot! \$\endgroup\$
    – Meysam
    Commented Sep 14, 2012 at 11:11
  • 2
    \$\begingroup\$ Just for the sake of historical interest: we used to tackle this task by taping (or tacking) large CTO + ND gels over the outside of the windows to reduce the intensity of the exterior light and bring it into balance with the (usually tungsten) interior light. The cine types still do this. It takes time, usually two or three people, ladders or a cherry picker, and was never what you would call cheap. Combining exposures, or multiple developments of a single RAW exposure, may seem like an imposition, but only if you have nothing to compare it to. \$\endgroup\$
    – user2719
    Commented Sep 14, 2012 at 18:18
5
\$\begingroup\$

I would recommend the following settings:

  • Set your camera to use aperture mode (A on Nikon, and Tv on Canon) and set it to F4.
  • Force the flash to fire. On the left hand side of the camera there is a button that looks like a lightening bolt. Press it.
  • Use Matrix metering mode.
\$\endgroup\$
3
  • 1
    \$\begingroup\$ "force the flash to fire" - yes! good oldschool photographer handycraft, instead of all those modern computer tricks. \$\endgroup\$ Commented Sep 14, 2012 at 11:11
  • 1
    \$\begingroup\$ Simon's response was very good. The other thing I like to do it shoot in Raw format. Then import the photo to Lightroom and adjust the Exposure, Shadows and Highlight sliders. The results can be amazing. \$\endgroup\$ Commented Sep 14, 2012 at 18:04
  • \$\begingroup\$ I think his scene is too extreme to be fixed by meddling with the extra bits in the raw. In the video I posted I show in my similar scene (which is less extreme than his, how it looks if I bring down more of the dynamic range (it is basically pink) and if I boost the low region it is too noisy. \$\endgroup\$ Commented Sep 15, 2012 at 9:42
2
\$\begingroup\$

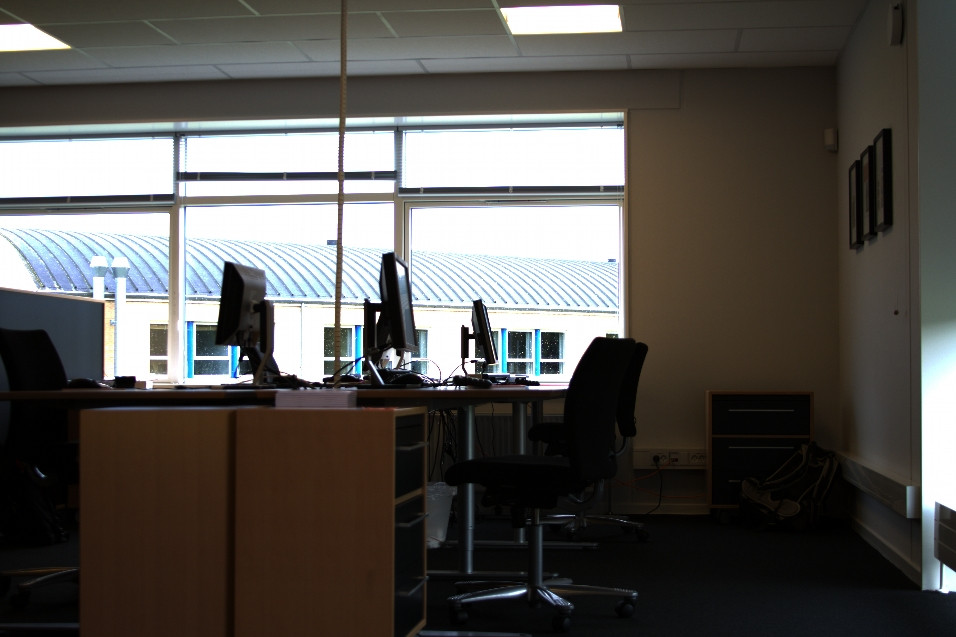
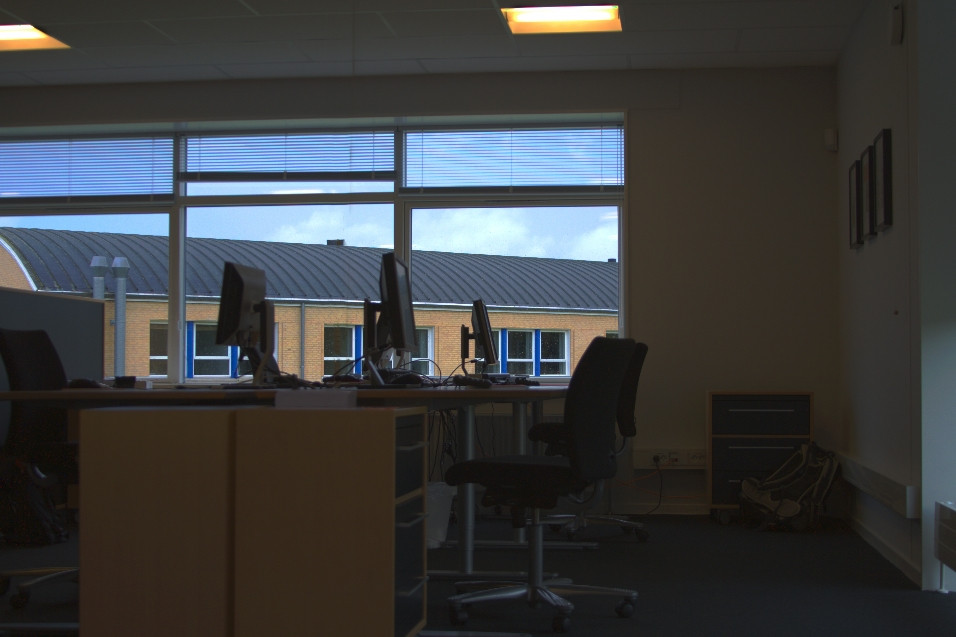
You scene is very suitable for fixing your camera on the table or a tripod, setting your camera up to do bracketing - e.g. +/-2 and then combine those exposures into a HDR image. If it doesn't have bracketing, use the exposure compensation yourself, or use manual settings where you double or quadruple the exposure (or aperture) between the shots. Take 3 for this scene.

when you combine the images, it might show some artifacts that you can fix using blending and clone tools, especially if there are people in the scene. I show it in this video tutorial - both in a static scene like yours and with people:

Video Tutorial - HDR and fixing it with blending and clone

enter image description here

enter image description here

\$\endgroup\$
1
\$\begingroup\$

With the given conditions, You should use the light meter on the wall and curtain instead of the window.
Its the limitation of the Dynamic range of the camera.

Try using the Matrix metering mode instead of spot metering as it decides the exposure based on the whole frame instead of the center frame.

Other probable solution is to make use of an additional light source inside the room to get the details of the curtain and the wall. Use the setup, satisfying using your need and the resources.
If you don't have external flash, then try Lightscoop, a simple flash redirector.

\$\endgroup\$
1
\$\begingroup\$

You may want to consider HDR for this, as it will allow you to capture all the detail at various exposures, and mix them into on "normalised" image.

I am not going to explain the process - just search for HDR.

\$\endgroup\$

Your Answer

By clicking “Post Your Answer”, you agree to our terms of service and acknowledge you have read our privacy policy.

Not the answer you're looking for? Browse other questions tagged or ask your own question.