6
\$\begingroup\$

Background

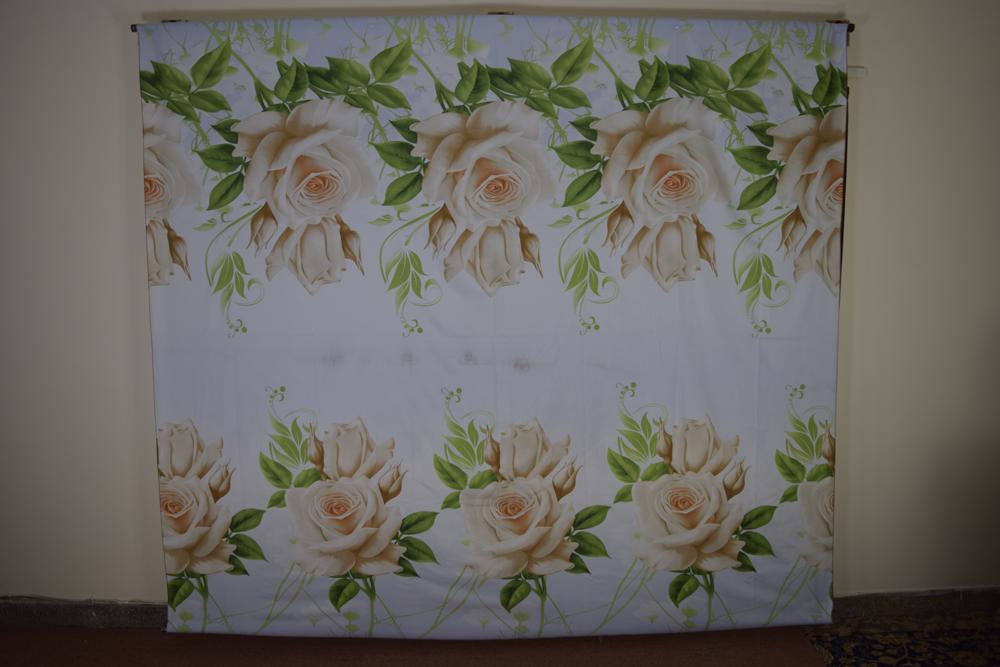
I sell bed sheets, I usually get product images with complete bed room set, while I wanted just bed sheet digital print image that I can use in any bed room mockup, to test different angles.

I hanged bed sheet (like backdrop) with couple of home-made soft lights, however the end result is not good.

Questions

  1. Is this a normal way to create fabric's image?
  2. Any suggestion how to improve this picture? lighting, iso/aperture etc
  3. Any cost-effective way to get low cost frame that could hold this bed sheet (to avoid wrinkles)

Bed Sheet Photography: how to light & bring details

Raw Image Information

  • Camera: Nikkon D3300
  • F-stop: f/3.5
  • Exposure time: 1/60 sec
  • ISO Speed: ISO-220
  • Focal Length: 18mm
  • Max aperture: 3.6
  • Flash mode: No flash,auto
  • 35mm focal length: 27

Setup

Setup

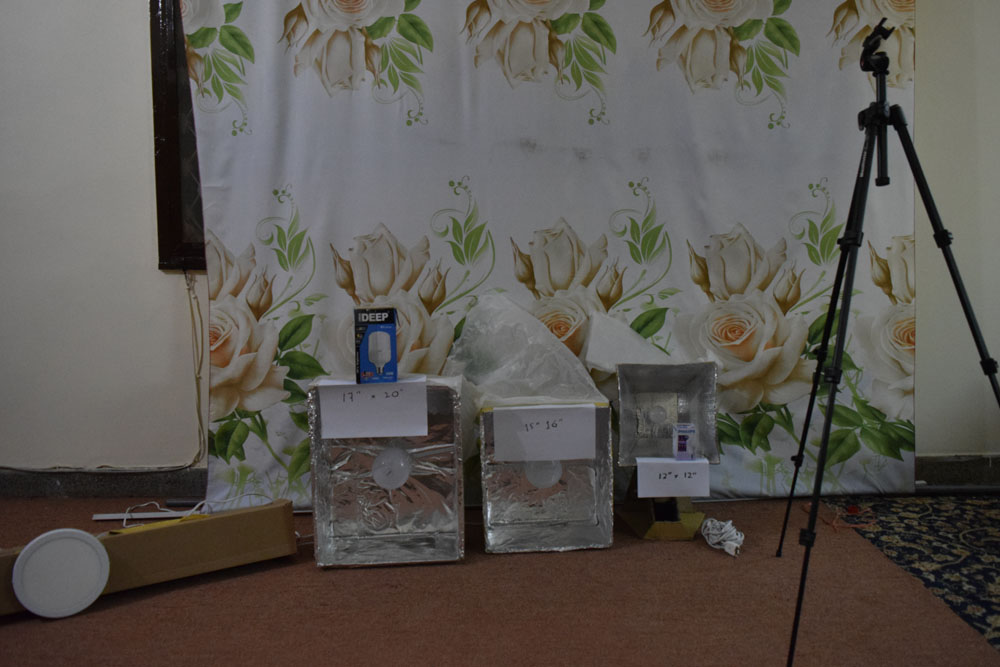
  • 17" x 20" softbox with 35W LED Bulb
  • 15" x 16" softbox with 35W LED Bulb
  • 12" x 12" softbox with 12W LED Bulb
  • Open LED Round Bulb - 18W SMD Surface Light
  • Tripod
  • Lens: Nikkon DX/VR - AF-S NIKKOR 18-55mm 1:3.5-5.6G II
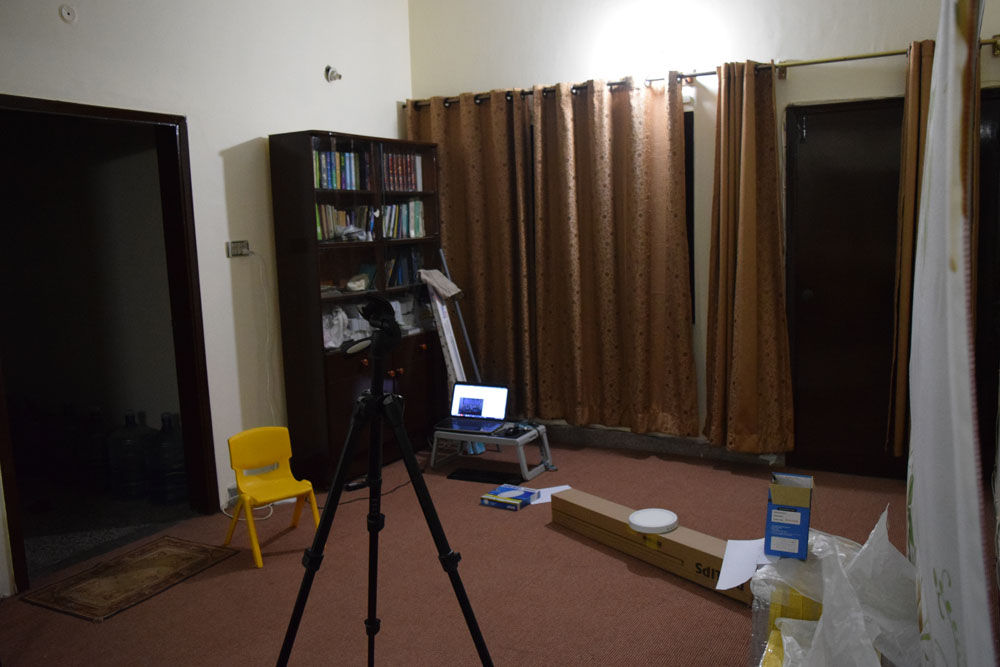
  • There are other tube-lights in the room, but I've experimented with selective/all off
  • The color of the room is off-white
  • The doors are dark-brown

How much space I've in front of my subject I've placed my tripod around 10' away

Space opposite my subject

Update Look at my comment under accepted answer.

\$\endgroup\$
12
  • 3
    \$\begingroup\$ What about the image is "not good" for your purposes? IMO, it's decent enough to start - just has some exposure/vignetting/curvature issues to fix in post. But, without knowing what you think is wrong with the shot, I can't say for sure... \$\endgroup\$
    – OnBreak.
    Commented May 30, 2018 at 2:19
  • 5
    \$\begingroup\$ Please don't put "SOLVED" into your question -- this is a Q&A site, not a web forum. Instead, you can answer your own question with the solution you've found. \$\endgroup\$
    – mattdm
    Commented Jun 1, 2018 at 16:11
  • 4
    \$\begingroup\$ seconding @mattdm Please, either accepts someone else's answer (the most helpful) or post your solution as answer to you own question, then accept it. These are ways this website works \$\endgroup\$ Commented Jun 1, 2018 at 16:47
  • 1
    \$\begingroup\$ @AhmedMemon mattdm's and aaaaaa's main quibble wasn't with subject line. Rather, please don't edit the original question to include the solution. Just cut out the edit you made with the solution, and post it as answer to your own question. That's what they were getting at. =) \$\endgroup\$
    – scottbb
    Commented Jun 2, 2018 at 6:15
  • 2
    \$\begingroup\$ Awesome, thanks (and thanks for sharing what worked for you!) \$\endgroup\$
    – mattdm
    Commented Jun 2, 2018 at 15:43

3 Answers 3

11
\$\begingroup\$

I can see several things you could do, based on the previous answer & comments, as well as the original question. [Some are repeats.]

  1. You need more light.
    Longer exposure if you have a tripod or higher ISO if you don't.
    As your subject is static, you can go really long on exposure. Get a wired remote [10 bucks on eBay] & set the camera to 1s Exposure Delay Mode, to minimise shake.
    If you can't afford a good tripod, put the camera on a table.

  2. Stand back further & zoom to fill the frame.
    This will lessen the curved appearance.
    If you're struggling for space behind you, consider moving the display around until you can stand in the hallway & shoot in through the door. No-one has a home studio big enough for photography - so get inventive ;)

  3. Try the soft-lights behind you, over your shoulders or just off to your sides.
    This will reduce the overall lighting level [see 1.] but ought to even it out a lot.
    [If you're in the hall, put them just inside the door instead]

  4. Am I seeing a bar through the bottom of the sheet? Get a heavier bar.
    To even out the vertical creases the heavier pull will generate, peg out the top & bottom edges on the bar.

  5. Most important for product presentation...
    Iron it before you hang it.
    ...or steam it, or water spray it & let it dry in situ.

Late edit
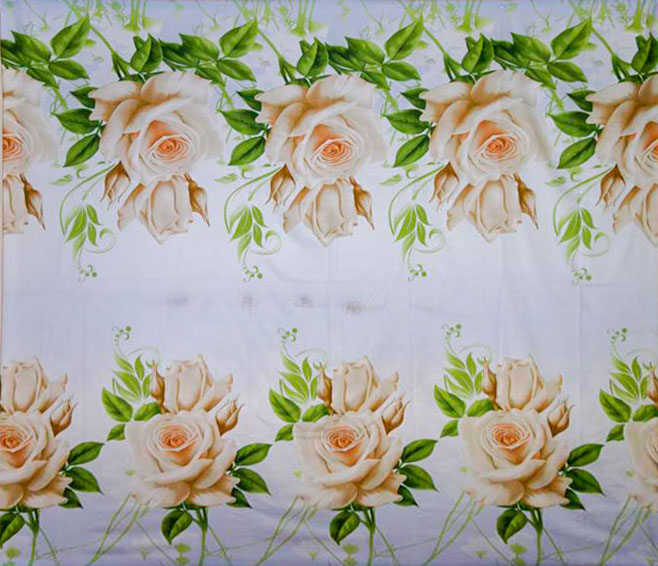
I ran it through Photoshop [very quickly]
This is what you can easily do in post-process. My guess at the colour & contrast are just that - a guess. I've never seen the original to work to.

Remove the barrel distortion, then Perspective crop [next time make sure you're exactly square to the centre of the sheet]
Some lightening & rebalance to make it appear to be white, at least in the centre.
I didn't go for 'digital white', or you wouldn't still be able to see it's a piece of fabric.
I'm trying to decide whether it is actually blue at the edges or if that's variation on the lighting.

What's left really, is the work you need to do before hanging it.
Iron it & make sure it has no grubby marks in the middle.

enter image description here

\$\endgroup\$
2
  • 1
    \$\begingroup\$ +1 to all that. I'd add that something in the setup is giving inaccurate colours before the image hits the camera. Contributing factors will be the room colour (which needs to be black/white/grey) and the home-made lightbox. The light box is probably built with CFLs (I've asked for clarification) and if so, a change of bulbs will help. Some investigation is going to be needed with a colour chart. \$\endgroup\$ Commented May 30, 2018 at 20:51
  • 2
    \$\begingroup\$ Solved - Iron - Placed 2 Softlights high above my shoulder - Used custom wooden frame 10'x8', used PVC C-Channel at 3-sides - Color corrected & removed stains in Photoshop - Winner Shot details - f-stop: f/4 - Exposure time: 1/8 sec - ISO: 200 - Focal Length: 25 mm - No Flash ![Winning Shot]i.sstatic.net/51lM6.jpg ![Mockup]i.sstatic.net/RHrzN.jpg \$\endgroup\$ Commented Jun 2, 2018 at 14:42
7
\$\begingroup\$

I think this is a fine start for most online sales. However, there are two easy improvements you could make.

First, the exposure is rather low. Assuming you are using a tripod, increase the shutter time, because since your subject isn't moving there is no downside. If you are hand-holding the camera, consider a tripod, or just increase ISO — at sizes used for online sales, that won't matter.

Second, crop out the surrounding area. Just show the fabric. For something like this, no one cares about seeing the edges. They just want to see the pattern.

Third, if you have room for it, move back and zoom out so your lens is at a focal length where it exhibits minimal barrel distortion. Probably somewhere in the middle of the zoom range instead of all the way wide as you have now. But, this is less important if you crop the edges.

\$\endgroup\$
1
  • \$\begingroup\$ Thanks. Had some versions where I used Tripod, I've tried playing with ISO and exposure, however, because my soft light source are those boxes (DIY), it feels like if middle part is too bright prntscr.com/jod584. I've tried adding/moving up/down, more & less lights, but feels like I am unable to get details of the print. Plus wrinkles are annoying me. \$\endgroup\$ Commented May 30, 2018 at 4:10
1
\$\begingroup\$

My answer to question 1 is that as a buyer I would prefer to see the bed sheet on a bed to give me a reference point about the size of the pattern in relation to the bed etc. Seeing the sheet hanging on a frame doesn't tell me much about the size of the sheet or pattern. Also, it needs to be lighter, brighter, and have the dirty marks removed to make it look more appealing.

\$\endgroup\$
1
  • \$\begingroup\$ Thanks. However my requirement was to snap the bed sheet and then lay that within a mockup, that I did. Yeah I removed those stains using Photoshop. \$\endgroup\$ Commented Jun 6, 2018 at 23:38

Your Answer

By clicking “Post Your Answer”, you agree to our terms of service and acknowledge you have read our privacy policy.

Not the answer you're looking for? Browse other questions tagged or ask your own question.