1
\$\begingroup\$

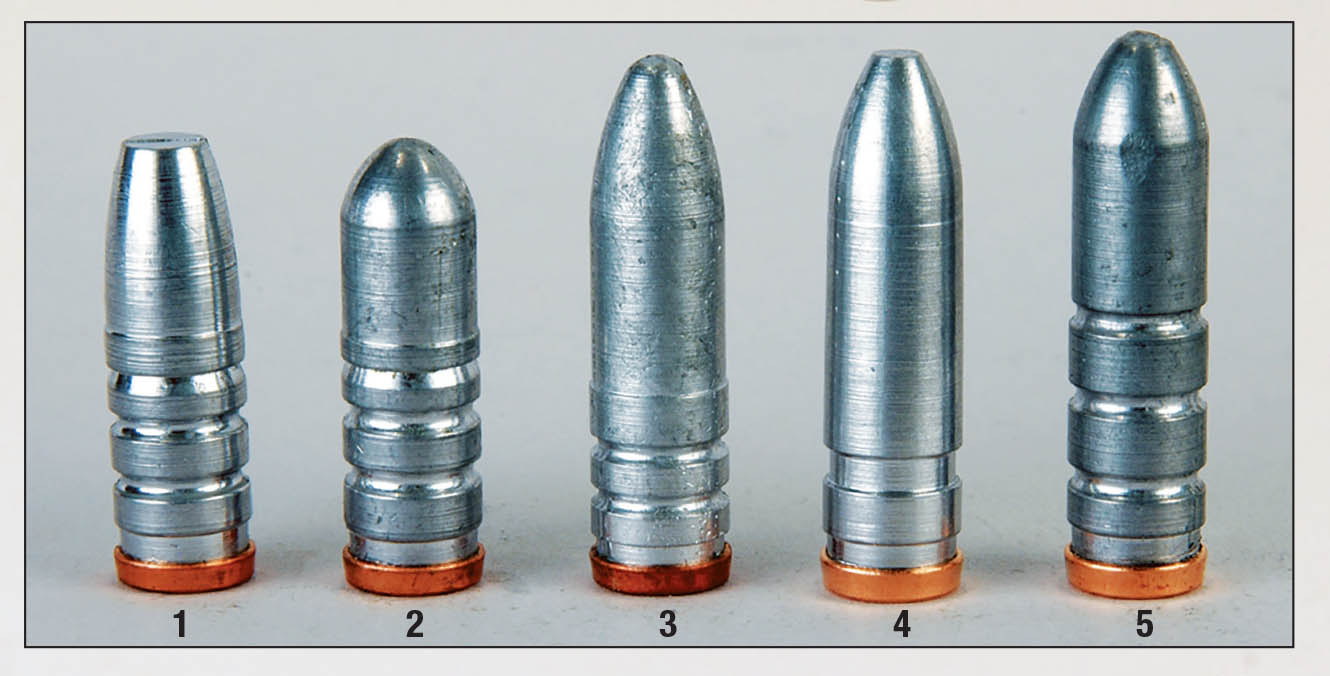
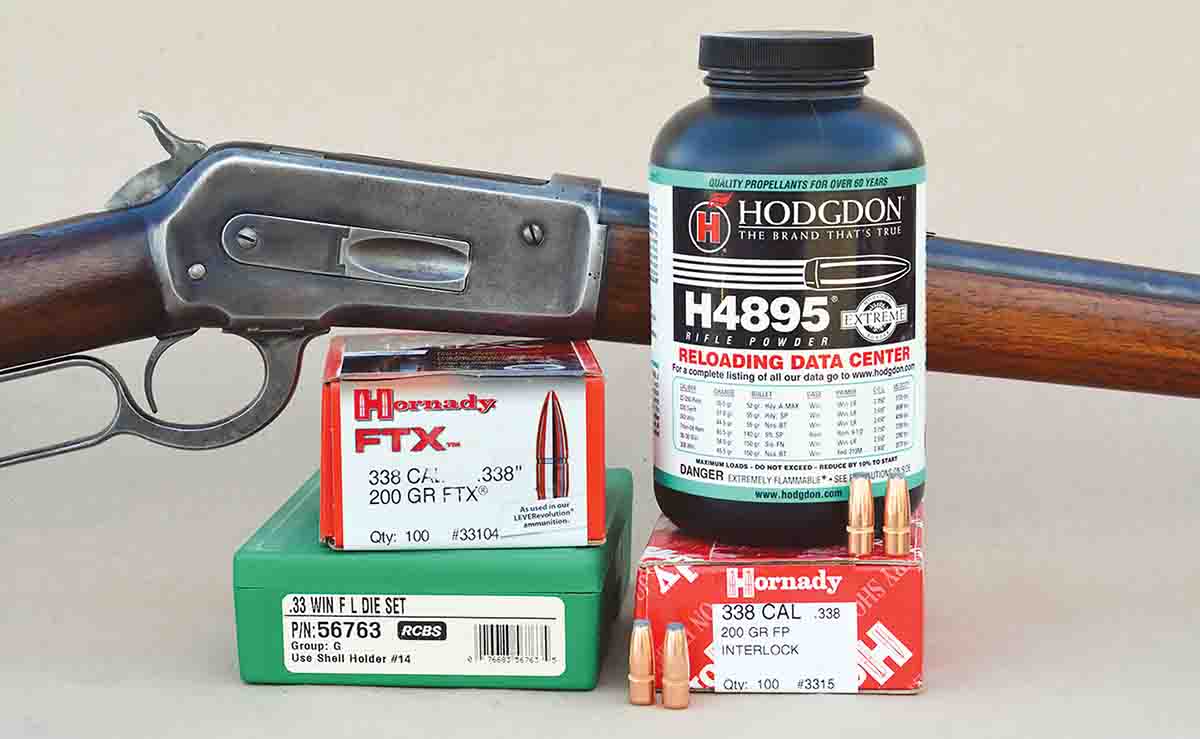
I need to take photos of a bunch of bullets for a project, and I want to attempt to reproduce how this photo looks. I've taken photography classes in college so I'm not a total rube, but that was a very long time ago, and I only own an iPhone currently but I'm open to buying/renting(?) something if I can achieve 80% of the result without breaking the bank.

enter image description here

Specifically I'm referring to:

  1. the background has no "back edge"
  2. the angle is slightly above and very close up, but there's no distortion.
  3. Probably most importantly, the detail of the bullets is amazing. I tried using an iPhone as an experiment and there is heavy distortion, as well as blocking the light source. If I zoom, the photo gets very, very blurry at a micro level... I would imagine because the object is small. As if its a 2MP camera from 2001
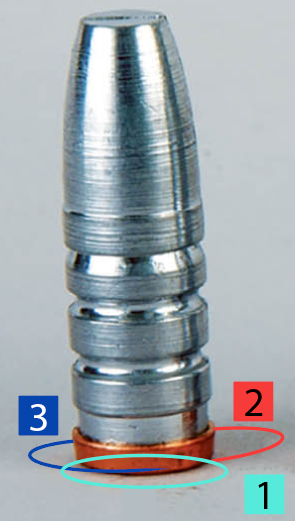
  4. The lighting appears to be coming from 2 sources, with a "daylight temperature" bulb of sorts, is that right?

Now, Question: First, I'm hyper self aware of this idea of people wanting to do ridiculously involved things with a budget of 1 trip of groceries. I'm hoping to not offend anyone if I get this way wrong, but is there any way I can get photos nearly as good (maybe 80%) for less than $500? I suspect the biggest money would just be the lens. I imagine lighting would be super cheap with amazon junk.

  1. I don't own a camera body. Is there any body + lense combo that might do the trick? If that's 100% out of the question, what's the cheapest I could get out the door with? I can potentially find someone to loan me a camera body but I don't want to rely on that. I'm hesitant to rent gear as I don't want to feel rushed on this project.

  2. What do you call this type of lighting box and bulb? That way I can search and try to find them on a budget. I know the importance of lighting but luckily the objects respond pretty well to lighting so I imagine it would be OK with 2 cheapie things from amazon. Please correct me if I'm wrong.

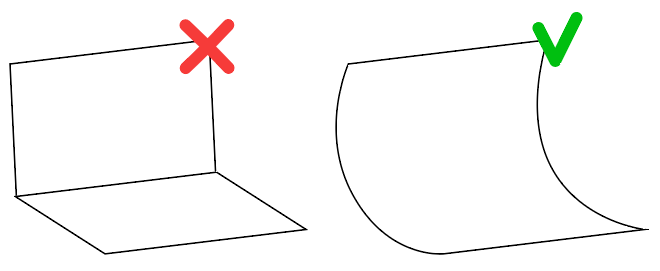
  3. How do I achieve the backdrop light gray without any visible 90 degree angle?

  4. There's going to be a ton of these, and I ideally don't want to do a ton of post processing on them unless it can be automated. Is there any free program I can use to assist, or do I need to buy something like Lightroom?

  5. Finally, Is there a way I can re-use the same equipment to take photos of slightly bigger objects with nearly the same feel, like this photo? Or does that require an entirely new lens?
\$\endgroup\$
1
  • \$\begingroup\$ Hi. I'm sorry I didn't get to this earlier. Clearly some good answers have been given already. But this is several questions, all of which are worthy of being their own questions (which may or may not have already been answered on Photo-SE before). Please edit this down to one focused question per post. You can link your subsequent questions back to your first/main one, so you don't have to re-explain all of the background info. But each question should aim to be mostly standalone. \$\endgroup\$
    – scottbb
    Commented May 2, 2023 at 3:34

4 Answers 4

2
\$\begingroup\$

75% of the problems raised in the question can be solved by buying or making your own shooting light box. I made mine with a cardboard storage box bordered on each side and the top with a strip of led lights covered with semi-transparent white paper to avoid glare. This is less than ten percent of the amount referred to in the question.

With that light it is enough to eliminate the separation between the floor and the wall, but if you still do not trust the result, instead of putting a Cartesian background, use one without a fold like a white PVC:

bakground

Regarding the brightness of the original photo, in addition to the ambient light provided by the light box LED, there are (at least) three spotlights, one on each side, the one on the left more powerful (or closer, nr. 2) and a top one, deduced by the projected shadows.

lights

About the type of photo, it can easily be done with an iPhone, but I would recommend a tripod to adjust the frame as much as possible. With a tripod, zoom, and good angle you can avoid or at least hide the perspective distortion.

\$\endgroup\$
5
  • \$\begingroup\$ Wow thanks! What material do you use for the bendable part of the shooting lightbox? Is that just art hobby card stock or something? \$\endgroup\$
    – Tallboy
    Commented Apr 30, 2023 at 16:45
  • \$\begingroup\$ Answer updated with details \$\endgroup\$
    – Danielillo
    Commented Apr 30, 2023 at 16:50
  • \$\begingroup\$ awesome, thank you. and last 2 questions: 1) do you know off hand if i need to change a camera setting, like "RAW" mode or something? if youre not sure i will google. 2) regarding the "spot light"... do you happen to have an example of something from amazon that might work? i tried searching that term and it brings up actual spot lights \$\endgroup\$
    – Tallboy
    Commented Apr 30, 2023 at 17:25
  • \$\begingroup\$ Just for the lights: Amazon \$\endgroup\$
    – Danielillo
    Commented Apr 30, 2023 at 17:37
  • \$\begingroup\$ Cool!! Thank you again \$\endgroup\$
    – Tallboy
    Commented Apr 30, 2023 at 17:51
2
\$\begingroup\$

Others have covered the lighting aspects, but one thing no-one has mentioned yet is perspective

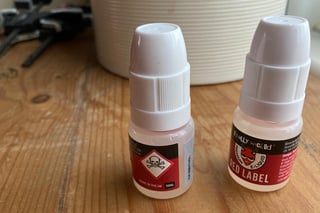
Please excuse the abysmal quality of these examples, they are merely to illustrate one point - that you cannot do close-up photos with a phone*.
From close up - the same as if you do a selfie - you get a huge amount of distortion due to the percentage difference in distances from the lens. In a selfie, that's why you always get that 'big nose, little ears' look.

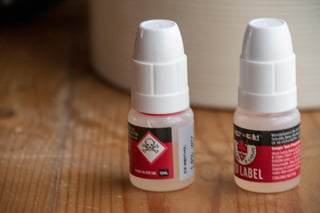
I don't just happen to have any bullets in my drawer, but I do have a couple of vape refills. These are about 65mm tall. My intent, though very, very approximate, is to show what happens with anything not in the centre of the image when you get too close. These pictures attempt to get one item in the centre & one on the edge of frame… nothing else.

iPhone photo, taken from maybe 100 mm away. I'm not quite as square to the subject as I should be, but it nicely accentuates the failure, and anyway the tops of the bottles look 'bigger' than the bottoms from this close…

enter image description here

A phone camera is about an 18mm, give or take, if you use approximate 'proper' camera [35mm frame] equivalency. Look how much 'lean' & 'smear' [lack of squareness] there is on the bottle on the right. The table is, of course, to all intents & purposes… flat. You'll see this effect any time you try with a phone to take a group shot of half a dozen people having a fun night out ;) From the distance needed to get a 'party group shot' you won't see so much of the lean, but you will see the smear, a widening of things & people at edge of frame. This is to do with the lens as much as the distances involved.

I did the same, positioning in [roughly] the same line as the last shot, but from much further away, using a 350mm lens [35mm equivalent]. This meant that to fill the frame the same way, I had to be about 1m away. Ten times further away, meaning all my percentage differences in distance to object became insignificant.

enter image description here

Ignoring all other aspects of this photo, look how 'straight' the right hand bottle is now, compared to the phone photo.
This apparent 'straightening' is not entirely because I used a longer or even a 'better' lens, but predominantly because I was further away. The white background being apparently closer is an additional aspect of this perspective change. It is actually the same distance.

You can attempt the same with a phone only by increasing your distance to subject, then cropping afterwards. This is 'the same' as using a longer lens, but you lose definition by cropping.

*You might have a get out of jail free card if you have a 'posh' phone with multiple lenses.

\$\endgroup\$
3
  • \$\begingroup\$ This is awesome, thank you. I'm going to re-read this again later, that was super insightful! \$\endgroup\$
    – Tallboy
    Commented Apr 30, 2023 at 22:15
  • \$\begingroup\$ yes, this is what i was afraid of. do you have any suggestion then for a < $500 camera + lense combo that will do the trick? TBH im spread thin on all these other things to spend hours researching equipment. i know tehres probably a solid budget option out there thats re-recommended 100 times. if i attempt to google its just endless infinite pages of blog spam and affiliate links, so nothing that i can trust. \$\endgroup\$
    – Tallboy
    Commented May 7, 2023 at 15:07
  • \$\begingroup\$ I'd go find a bricks & mortar high street camera shop & pick their brains. They'll let you test some stuff out. Take some of your samples with you so they know what you're wanting to do. Then, thanking them heartily for their time & promising to return when you've fully thought it through, go find something similar on eBay, second hand, a generation older …or of course, exactly what they recommended if they can come in under budget - you get the warranty that way. \$\endgroup\$
    – Tetsujin
    Commented May 7, 2023 at 15:11
1
\$\begingroup\$

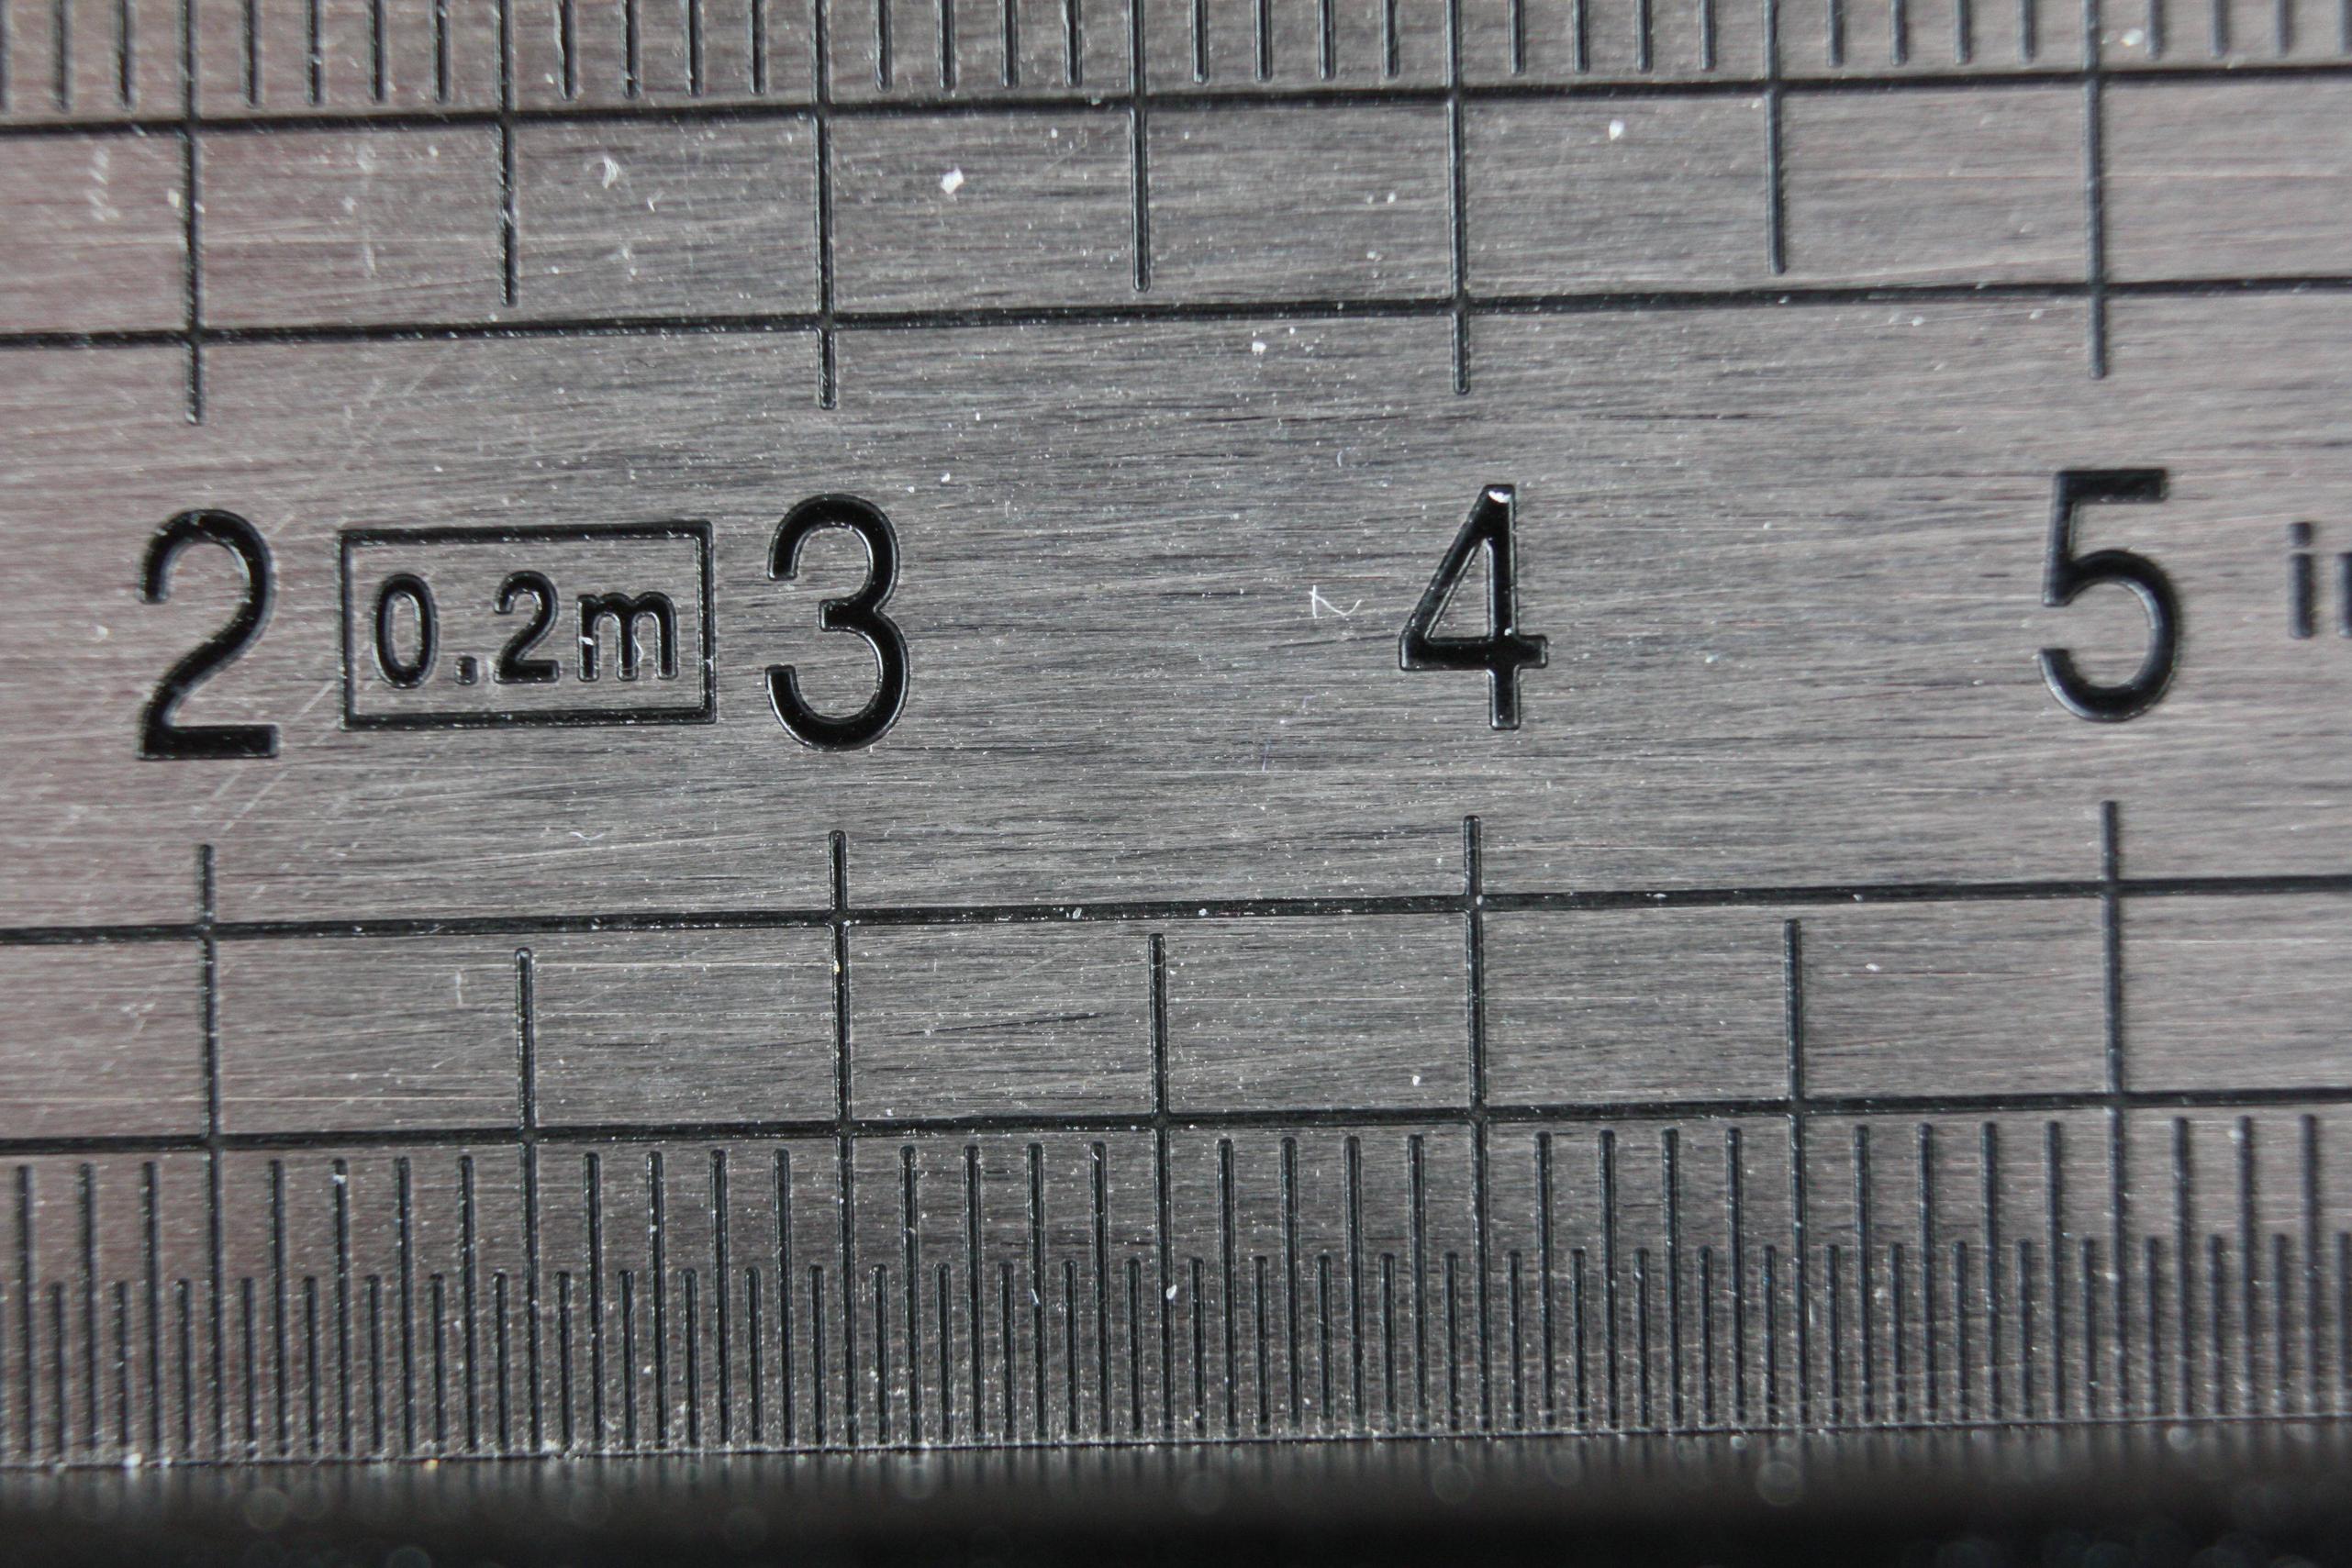
Coming to the camera & lens, I have no bullets but a steel (metric) ruler, and I tried to shoot it with the cheapest equipment at my disposal: an aging EOS 450D (corresponding to the current low-end Canon DSLRs) and its "kit" EFS 18-55mm. Not good enough to get a decent close-up shot, but with a 21mm extension ring I can get close enough (though the sides are a bit blurry)(the field of view is roughly 36x24mm, so 1.5" by 1").

enter image description here

(full-size, but had to reduce quality to 84 to fit the 2MB limit).

To be a bit more realistic and work in acceptable conditions, the camera body is mostly irrelevant (any cheap DSLR will do), but using a true macro lens is better. if you use an APS-C body there are many 50 or 60mm prime macro lenses that aren't too expensive and are easy to find 2nd hand. Another cheap solution that could give better results than above is a quite cheap prime 50mm f/1.8 with macro ring.

\$\endgroup\$
2
  • \$\begingroup\$ Interesting, this is great info. I hate to ask this, but do you have a suggestion for the brand and model numbers? I only ask because googling for photography things is insufferable with "blog spam" just touting "9 BEST ____!!!!!!!!!!!!!!!". Its hard to find actual solid recommendations that arent just affiliate links \$\endgroup\$
    – Tallboy
    Commented Apr 30, 2023 at 17:55
  • 1
    \$\begingroup\$ Above is done with a Canon 450D (look for Canon 1200D these days). Canon EF 50mm 1.8 STM is pretty cheap (around $120). Otherwise 50-60mm macro lenses from Canon/Tokina/Sigma are quite affordable. One think to look for in cheap Canon camera is a center contact in the host shoe if you want to control plain flashes, otherwise you'll have to fork for the more expensive Canon-compatible equipment. But you can also use continuous lighting. \$\endgroup\$
    – xenoid
    Commented Apr 30, 2023 at 19:12
1
\$\begingroup\$

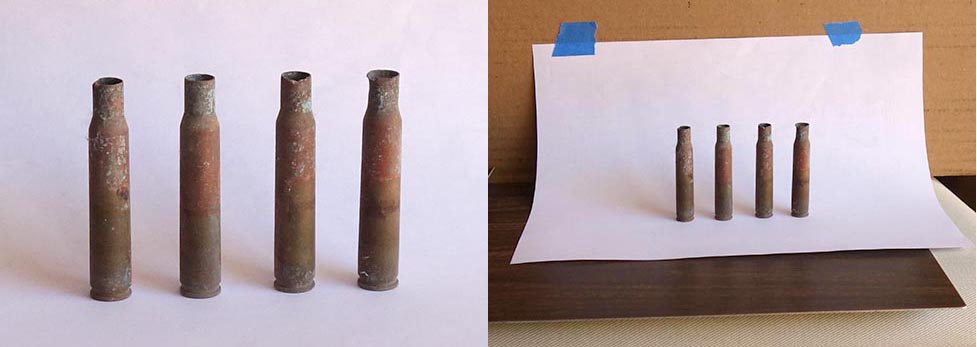
This is a 5 minute setup using window light and a piece of paper as a continuous background. If you're not familiar with "window lighting", do an Internet search for "window light photography". To minimize distortion, you want as much distance as practical. If your cell phone has different focal length lenses, use the largest focal length.

enter image description here
I cheated and used a point & shoot camera set to the lowest focal length (equivalent to 28mm on a full-frame camera).

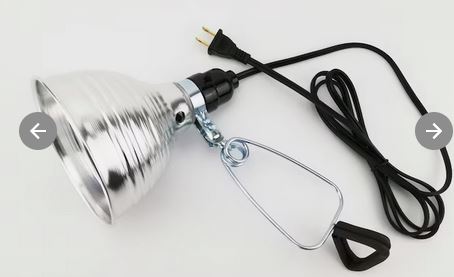
For larger shots like the lever-action use a larger sheet of heavy paper. I use old plastic banners from trade shows printed on white plastic. You can use inexpensive work lights with LED 1600 lumen daylight bulbs (5000 to 6000°K). Use an old white bed sheet to make a diffuser (creates broad area light).

enter image description here
Work light found at Lowe's web site. Use a bed sheet to diffuse the light.

You will need to use exposure compensation since the white background will cause the shot to be underexposed. If you have manual exposure mode, this will give you better control. Shooting in raw is helpful with post processing, but you need to have the software to deal with raw formats.

\$\endgroup\$
1
  • \$\begingroup\$ Amazing, thank you!! I am on my phone but I will read again when I get back. \$\endgroup\$
    – Tallboy
    Commented Apr 30, 2023 at 22:16

Not the answer you're looking for? Browse other questions tagged or ask your own question.