I linked a photo to better visualize what I’m talking about but I get a weird pattern of colors or pixels in my photos. I don’t see it so much in Lightroom Classic but when I added the affected photos to a collection in CC mobile, the weird patterns appear. I also uploaded the same images to a cloud site for a client and the patterns don’t appear (as much). When I jump back into Lightroom to develop module, the patterns appear for a second and disappear. Sorry I don’t have a better description for the effect my photos are having but I have attached a photo. Hope someone can help me get rid of it on all platforms.
-
1\$\begingroup\$ Hello! I currently don't have the time to write an answer, but this artefact is called "banding". \$\endgroup\$– jng224Commented Dec 19, 2020 at 8:53
-
1\$\begingroup\$ Also, in addition to the excellent answer, you might enjoy this video \$\endgroup\$– jng224Commented Dec 19, 2020 at 10:28
-
\$\begingroup\$ Related: switched to RAW and seeing ugly light bands in Lightroom \$\endgroup\$– Michael CCommented Dec 20, 2020 at 17:31
-
\$\begingroup\$ Is your source file raw or JPEG? Something else? \$\endgroup\$– Michael CCommented Dec 20, 2020 at 17:31
-
1\$\begingroup\$ Are the artifacts also visible in exported images? \$\endgroup\$– ArjiCommented Dec 20, 2020 at 18:05
2 Answers
As mentioned in comments, this is called 'banding' - it's caused when there are not enough colours available to provide a smooth transition from one to the next.
This is most commonly seen in 8-bit images & those that have been compressed, eg jpgs. A way to potentially avoid the issue at the onset is to work in 16-bit RAW, or at least TIFF. If they're not available, then the highest quality jpg you can save.
One further issue is that, even though your image may be 16-bit & now capable of many more colours… your screen likely isn't. Computer displays are predominantly 8-bit.
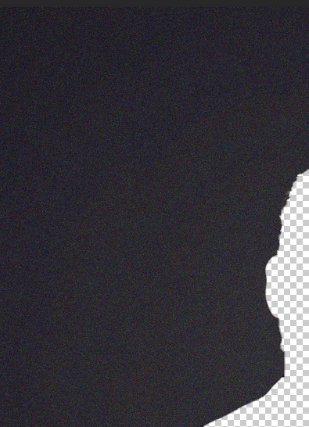
Ways to hide this after the fact usually involve first upscaling to 16-bit, then adding noise. I'm not sure it's too successful here - maybe better on your original image
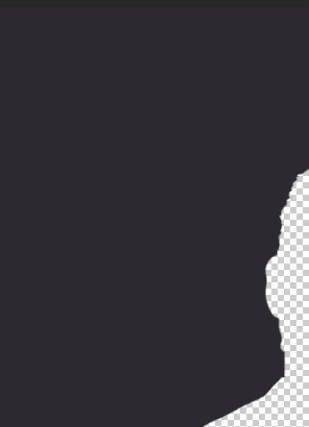
Another way would be to completely average the background, so it's all exactly the same colour
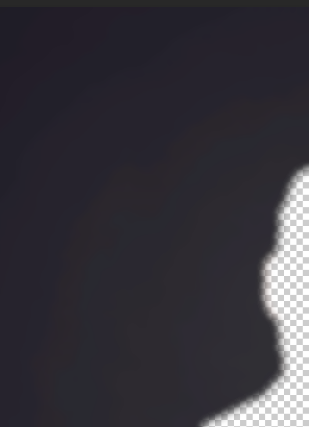
A further option could be to use blur - but again on a small jpg, it's unsuccessful in this case
These are just screenshots from Photoshop, not final images.
All these methods could work better on the original larger, uncompressed image, but all will be subject to the display capability too. Overall, it can be better to try avoid the situation occurring in the first place.
Try to get the lighting more even, or avoid single-colour backdrops - as soon as there's some visual 'movement' in a background, this artefacting will quickly be hidden.
-
1\$\begingroup\$ Thank you so much for the thorough explanation. I will explore these options and try again. Really appreciate the feedback! \$\endgroup\$ Commented Dec 19, 2020 at 10:21
-
\$\begingroup\$ Welcome - I've added a 3rd method, blur \$\endgroup\$– TetsujinCommented Dec 19, 2020 at 10:21
-
\$\begingroup\$ I'm not sure which blur you used, but there is also a "surface blur" option in photoshop \$\endgroup\$– jng224Commented Dec 19, 2020 at 10:27
-
1\$\begingroup\$ @Jonas - the image posted is Gaussian, but in this case, surface doesn't really gain much over it. I'd suspect it's because we're right down in the shadows; perhaps on a blue sky or generally lighter background, the difference might be more apparent. \$\endgroup\$– TetsujinCommented Dec 19, 2020 at 10:41
-
1\$\begingroup\$ Based upon the description, I think the issue is due to scaling (dynamic compression for smaller sized view). Lightroom also uses a less accurate display other than in the develop module (no idea about CC mobile, but likely). Because it disappears in the LR develop module, I don't think the banding actually exists in the image file. \$\endgroup\$ Commented Dec 20, 2020 at 17:24
I do agree with the "banding" result, but in my experience is it not caused by compression(*) but by heaving post processing:
- If you start with a JPEG image, the dark parts of your images are coded with very few bits, so there aren't very many possible color combinations, which isn't much of a problem because our eyes don't see much color in dark areas. If you do some color analysis on your picture, it contains 13K colors... but only 180 in the background, with only about 50 colors in any 200x200 area.
- When you lighten these parts, you don't add more color combinations but the color themselves, being less dark, are more identifiable as colors, and the 1-bit differences between dark colors have become much wider value jumps. So where the value jumps in contiguous pixels groups you see a hard limit.
Away to avoid this is to "dither" the colors before processing. If the 8-bit picture is loaded as a 16-bit (or more) image, pixel values can be fuzzed a bit to take advantage of the full range of values (a bit as if you added random decimals to integers). This suppresses areas where all pixels have the same values and so value jumps occur at more random places and become invisible.
(*) heavy compression can cause it but it also comes with other artifacts that aren't visible in the submitted picture.
-
\$\begingroup\$ Thank you xenoid, appreciate the info. Good to know for when I’m working on future edits. \$\endgroup\$ Commented Dec 20, 2020 at 11:08


