2
\$\begingroup\$

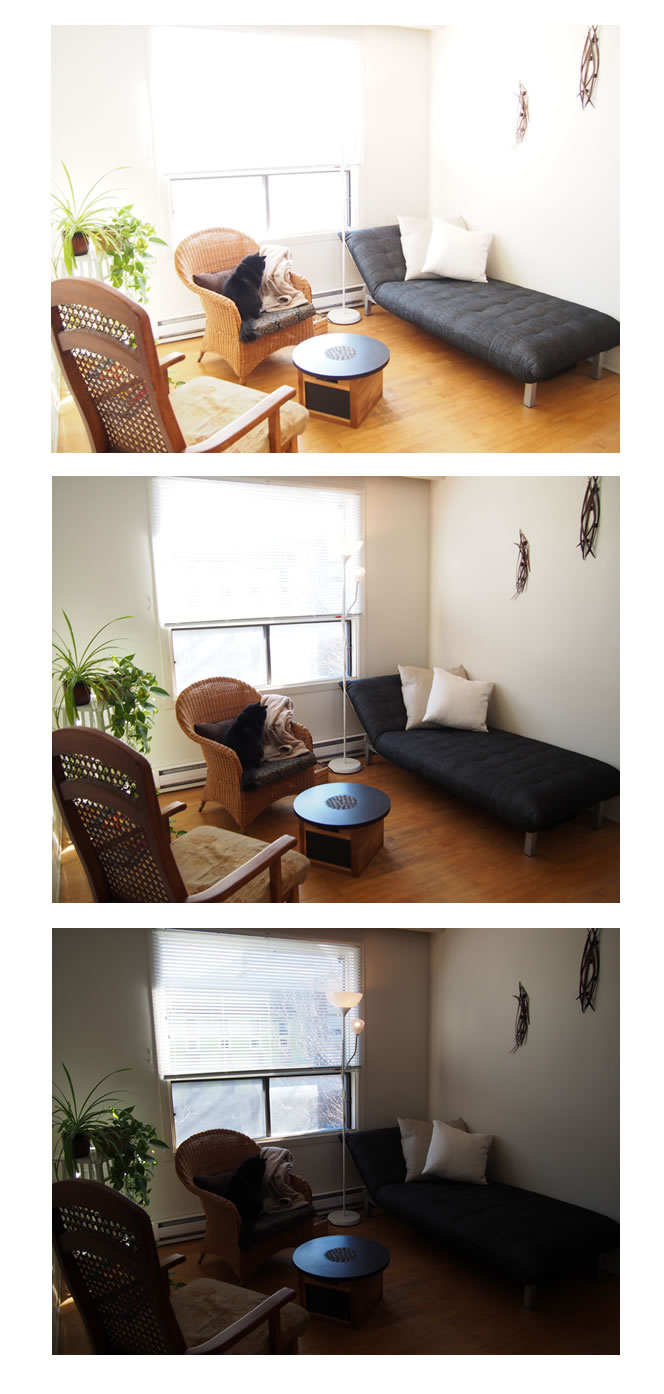
I am not a pro by any means, I just want to take a nice shot of my apartment for a rental listing. I am using a default setting on my camera to take 3 shots with bracketed exposure and then I assemble them in Photoshop through File->Automate->Merge to HDR.

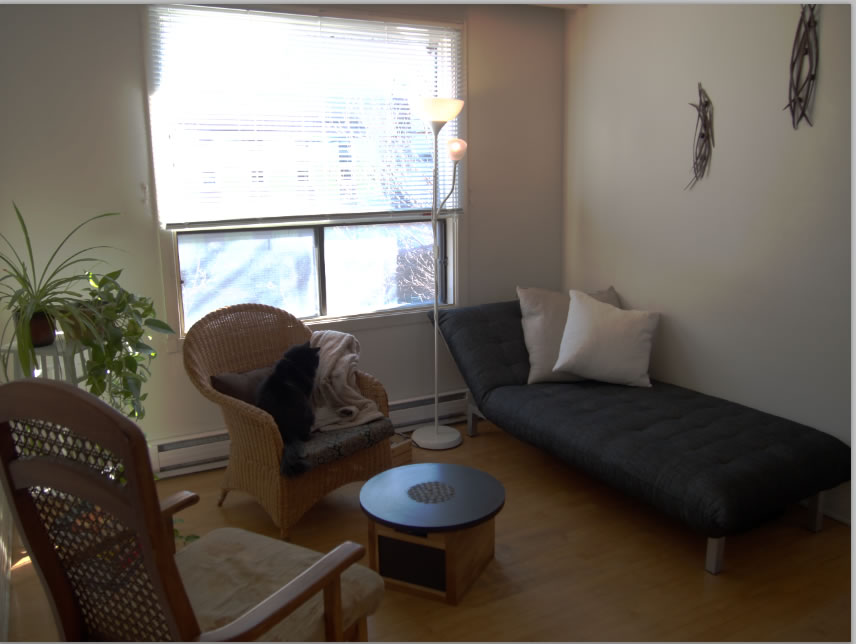
Instead of vivid, almost glowing colours of HDR, I get a muddy, grey shot, which is not an improvement by any means. Again, I am not expecting pro results, but I would like to get a better picture than I started with! Any ideas?

Originals: original

HDR: enter image description here

\$\endgroup\$
1
  • 1
    \$\begingroup\$ Take the middle image in RAW, reduce lights, encrease shadows, make some sharping etc. That will be enough for a rental listing, there is no need in HDR for that. \$\endgroup\$
    – Zenit
    Commented Nov 10, 2015 at 8:42

2 Answers 2

3
\$\begingroup\$

Any High Dynamic Range image has to composite itself with just the right amount of Highlight, Shadows and Midtones that you will find acceptable as to what you envisioned or saw when you first took the image.

The challenge is that how do you get this from an automated process?

The answer is; the automerge will generally produce an image based on its preprogrammed algorithms and produce a final image that may not be quite what you are looking for.

The best option is to manually control the process in Photoshop.

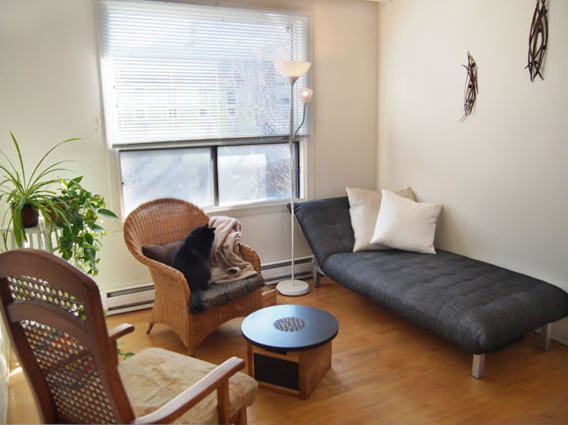
Load all three images as layers and use masks to keep the best bits of each image to create your own HDR. IE. the furniture with the top image, the walls with the second and the window and lamp with the third.

If you wish for even a more advanced option in Photoshop and one that Real Estate retouchers use, then the only option is Luminosity Masks.

Here you can either create your own, or download a pack of extra channels with highlight, Midtone and Shadows each of which can have a further 3-5 gradients of their own.

Then by selecting each channel, you can create a very natural looking high dynamic range image, but with no tell tales signs that is an HDR.

I have loaded all images into 3 layers and applied just very basic Layer masks (not luminosity Masks) to your current image and then done a basic delete and of items that I don't want. Hope this helps and you don't mind me tampering with your image. enter image description here
\$\endgroup\$
2
  • \$\begingroup\$ ok, will play around :). Nice to have a sample to work towards, thank you very much for that! \$\endgroup\$
    – Natalia
    Commented Nov 9, 2015 at 20:07
  • 1
    \$\begingroup\$ For those that come across this question, as soon as I converted the HDR composite image to 16 bit, "HDR toning" dialog came up with a bunch of option where I was able to make the image look pretty much like the one in the answer above :) \$\endgroup\$
    – Natalia
    Commented Nov 10, 2015 at 16:28
1
\$\begingroup\$

Complementary to any answers about better ways to merge the images, you might also try adding some lighting, so that the indoor scene isn't so dark relative to the window to begin with. Bouncing a flash off the ceiling might work, maybe carded to prevent window reflections. I suspect this is why the auto-merge is struggling to produce a bright image; the dynamic range involved is pretty extreme.

\$\endgroup\$

Your Answer

By clicking “Post Your Answer”, you agree to our terms of service and acknowledge you have read our privacy policy.

Not the answer you're looking for? Browse other questions tagged or ask your own question.