24
\$\begingroup\$

I live in a small urban apartment with my wife, two children, two cats, a goat, and a flock of chickens. Or, at least it feels like that sometimes.

I'd like to set up an area for basic portrait photography, for my family and friends who are willing to let me experiment on them. However, we really do consume every available square inch with living space.

How can I set up a "portrait corner" under these circumstances? The walls are brightly painted in a variety of colors, and decorated nicely, so a backdrop will be required, in addition to light stands and whatever else. My wife puts up with enough, so a key requirement is that whatever solution I have can get out of the way and out of sight quickly. But it also needs to be quick to set up, or else the practical details of life mean that everything will just stay packed away except for rare occasions, which both misses the point and makes things worse because it's not like we've got a lot of storage space either.

Simply throwing up a backdrop hides the background, but I'm looking for more than just hiding the walls. How can I control and shape light within these limitations?

Guen
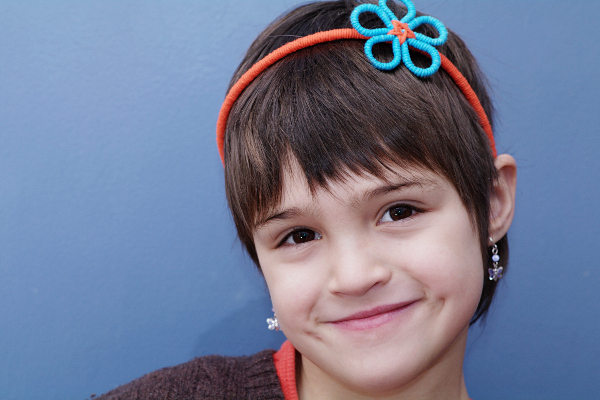
Guenevere, with unwanted shadow to the left, and simple broad lighting — I've got some practicing to do.

Are there pre-made solutions that might help me? (Perhaps gear designed for traveling professionals?) Or are there clever D.I.Y. suggestions I might follow?

\$\endgroup\$
4
  • \$\begingroup\$ Don't have a complete answer but I remember seeing studio lights attached to a rail system on the ceiling. They were extremely easy to unfold and point in various directions. I was told it cost under $1K USD. Then you have to take care of finding a goat-proof background... perhaps you can make double-use of curtain rods already there and install sliding backgrounds. \$\endgroup\$
    – Itai
    Commented May 2, 2011 at 15:14
  • \$\begingroup\$ Can you give some estimates of the size of space we're talking about? \$\endgroup\$
    – rfusca
    Commented May 2, 2011 at 15:42
  • \$\begingroup\$ @rfusca: what, is "zero" not specific enough? :) Seriously, it's a < 1000 sq-ft city apartment, with typical poorly-planned hallway layout, odd-shaped rooms, and retrofitted fire exits. Once things like beds and bookcases, desks and toychests, tables and chairs are accounted for, there's nowhere left to be a dedicated space. It is ours, though, so we can paint or put holes in things as need be. \$\endgroup\$
    – mattdm
    Commented May 2, 2011 at 16:30
  • \$\begingroup\$ And I don't mind displacing the chickens. :) \$\endgroup\$
    – mattdm
    Commented May 2, 2011 at 16:31

6 Answers 6

14
\$\begingroup\$

As with most "big boy" hobbies, the WAF (Wife Acceptance Factor; similar XAFs exist for other types of relationships) is an elusive thing. At least in the photography realm (unlike, say, the world of the audiophile), the impact on the decor is transient and forgivable. Well, unless you start attaching curtain rods all over the living room, that is. (I have no idea what the heck those other guys were thinking. Ah, yes -- "other guys". And geeks to boot. I think that's the answer.)

Here, your best options for a quick set-up and tear-down (and actual lighting control, etc.) are going to involve what may lie outside of the Acceptable Outlay Parameter (one of the key terms of the WAF equation, along with Persistence in Visual Field, Ugliness Quotient and Wiring Ratio).

Pop-ups (or collapsibles) are your best bet for the "now you see it, now you don't" part of the equation. That can include the background, as well as reflectors. And the key to getting anything like modelling from lighting in a very small space is your new best friend, the black "reflector" panel*. And, as it happens, that is the off-the-shelf professional location solution.

Now, before you start to imagine a world in which every imaginable square inch is occupied by a light stand, understand that many of these pop-up reflectors and backgrounds are available with "feet" -- and that there isn't a whole lot to creating something similar if your panels' maker doesn't happen to offer them. A background panel can often just be leaned against the wall with neither feet nor stand.

These panels come pretty big if you want big (like for the background -- 6'x7' and 7'x8-9' are common enough sizes); but they are also available in a "rather tall but not too terribly wide" (approximately 1m x 2m) size that will take up less storage space. You'll probably find that if you can control the bottom six feet of the space you're in, you can at least get some directionality and dimensionality in your images. (Full-figure pictures are probably not in the cards anyway if the space is really small.) You'll still get more fill than you'd probably like from overhead, but it's better than uncontrolled reflections from too many walls that are in too close. A perfect solution -- except that it's not quite free, and the DIY version (PVC pipe and fabric panels) either takes up too much space (and is difficult to transport) or starts to get a bit fiddly in the set-up/tear-down space because of the number of joints.

If you are sticking to torturing your immediate family, they'll quickly get used to humoring you for short stretches. That means that you can make your subject space really very small, with the lights and reflectors in a lot tighter than you might imagine they ought to be. Really, most people keep the lights and so forth way too far away. The closer your lights, the more rapid the falloff at the subject position, and the more control you gain when making fill decisions and so on. The space may be a bit claustrophobic for some, but, honestly, it's the best thing you can do for your portrait lighting short of renting 400-600 square feet with 16-foot ceilings whenever you get the itch.

When you reduce the space around your sitter (subject), you can move them a little farther away from the background and stand a better chance of effectively flagging off unwanted foreground lighting (and shadows). What light leakage you do have will have had plenty of chance to fall off if you're using black "reflectors" to contain your key and fill lighting.


*Now, when I say "black 'reflector' panel", I actually have a preference for a dead-black collapsible background in tiny spaces. The velour/velvet panels stop light dead in its tracks; the standard black panels still reflect an appreciable amount of light. That reflection is a Good Thing in a more open space, but when coupled with the unavoidable fill from walls and ceiling in a small space, it really isn't enough light deadening for my tastes.
\$\endgroup\$
6
\$\begingroup\$

I'm afraid "zero space" and "studio" don't go together particularly well. Without space the lights you set up will reflect back off everything, filling in the shadows you try to create to define your subject. Also it's very hard to light your background and subject separately when close together.

This isn't to say you can't use your home, or get good results, just warning you will lose a lot of control over your light, and there will be some images you simply wont be able to replicate. Are your brightly painted walls a neutral colour? If not you're reflected light will be a different colour to your key compounding the problems.

Clamps are better than stands for compact spaces, especially if you have shelves etc. that you can fix lights and gobos onto. A small background is a must, it would be ideal if it can hang instead of using stands as you'll be able to get it closer to the wall. Curtain rails are good for this.

\$\endgroup\$
2
  • \$\begingroup\$ Gotta agree, lack of space means a large loss of light control. \$\endgroup\$
    – Joanne C
    Commented May 2, 2011 at 14:36
  • \$\begingroup\$ Good point; let me add that to the question.... \$\endgroup\$
    – mattdm
    Commented May 2, 2011 at 15:21
6
\$\begingroup\$

I remember seeing, on some site, a studio set up in a room filled with furniture that is not a good background for a picture. This mostly involved using clamps to hang fabric backdrops over closets and bookshelves (and pushing chairs and tables out of the way).

You can solve color problems due to reflections off the walls by covering them with fabric (clamp it to some furniture or to the "system" in the first link below).

You can use smaller, less powerful lights closer to your "model" — this should save space both while photographing and in storage.

You can also clamp your lights to a shelf on the "far" wall instead of using lightstands. (Why not take advantage of the fact the wall is too close?)

And, finally, you can use a harness and a 1/4" screw to attach lighting equipment to the goat.

While looking for pages about the living-room-turned-studio, I found some links that maybe useful:

  1. Low Profile, Low Cost Backdrop Wall Mount - a simple way to hang backdrops over walls that don't have a convenient shelf you can clamp to.

  2. Going From Bedroom To Studio To Bedroom In 108 Seconds - just what the title says. :-)

\$\endgroup\$
2
  • \$\begingroup\$ +1 for the harness suggestion. But how do I get it to hold still? :) \$\endgroup\$
    – mattdm
    Commented May 5, 2011 at 4:16
  • \$\begingroup\$ @mattdm - if you tell me how to get my children to hold still when I'm trying to photograph them I'll tell you how make the goat hold still :) \$\endgroup\$
    – Nir
    Commented May 5, 2011 at 19:39
3
\$\begingroup\$

I'd recommend to instead look for some light-weight portable lighting gear (Strobist kits being a good starting point) and scouting for visually interesting locations nearby. In a crammed space, you won't be able to get enough variability, separation and attractive perspective. And the goat will eat your cables :)

If you (or your loved ones) insist on staying inside, I'd suggest a large piece of black cloth with some (DIY?) stands to set it up in designated corner will be most useful as both reflections control and a demure background. Somehow I doubt you're willing to actually paint your walls black.

\$\endgroup\$
1
  • \$\begingroup\$ With the nice weather, outdoors is definitely the way to go. It's the other 11 months of the year in Boston that this is really needed for. :) \$\endgroup\$
    – mattdm
    Commented May 2, 2011 at 19:48
2
\$\begingroup\$

I recently put up a pure white roller-blind over a fairly large window at my wife's request (she didn't like the curtains we had previously - not that you wanted to know that. sorry).

This turns out very nicely because the blind can go all the way to the floor, and makes a perfectly acceptable background.

Of course, the blind could potentially be another colour (depending on wife-related parameters).

Don't know if that helps.

\$\endgroup\$
2
  • \$\begingroup\$ Hmmm; we might have one window were this would be applicable. It's a good suggestion. \$\endgroup\$
    – mattdm
    Commented May 31, 2011 at 14:28
  • \$\begingroup\$ I was going to suggest the same. I live in a similar situation and recently found the need to turn the end of our living room into a makeshift "studio". The white roller bind pulled all the way to the floor became the backdrop, and I have two portable stands to support the flashes and modifiers. It worked well enough as a practice space. if needs be, you could tape paper backdrops to the roller blind if you need a different colour or texture to that of the blind. \$\endgroup\$
    – mooie
    Commented Jan 21, 2019 at 0:40
1
\$\begingroup\$

If you are serious about a home studio, you could install a ceiling-mounted hanging-system for backdrops. Essentially you just need a dowl of an appropriate length supported at both ends by brackets attached to the ceiling. It's something you could DIY easily enough, or there are plenty of commercial systems available.

For supporting flashes and largish modifiers you could use clamps and magic-arms to attach your flashes to whatever furniture you have. A sturdy stool or chair, with a magic-arm clamped to it would provide a reasonably versatile lighting support. The only drawback I can really see is it'd be hard to get the light up high. But, if you need height, then perhaps you have a bookshelf you could attach a clamp to? Or, failing that you could screw or glue a couple of blocks of wood to the wall that you could then clamp on to.

The studio could then be set up by pulling down a backdrop, and attaching a couple of clamps. To breakdown the studio, you'd just need to roll the backdrop back up, and un-clamp your lights. The lights, arms and clamps could all be stored together. There'd be no real need to break them down further.

Use a couple of collapsible softboxes as modifiers to reduce light spill and you'd have a pretty reasonable basic studio ready to use in minutes.

\$\endgroup\$

Your Answer

By clicking “Post Your Answer”, you agree to our terms of service and acknowledge you have read our privacy policy.

Not the answer you're looking for? Browse other questions tagged or ask your own question.