3
\$\begingroup\$

What techniques can be used to change the perceived contrast within a single colour only, in post processing? For example, how can I change the contrast of the blues to affect the sky, or the green to affect the appearance of vegetation, without impacting other colours too much?

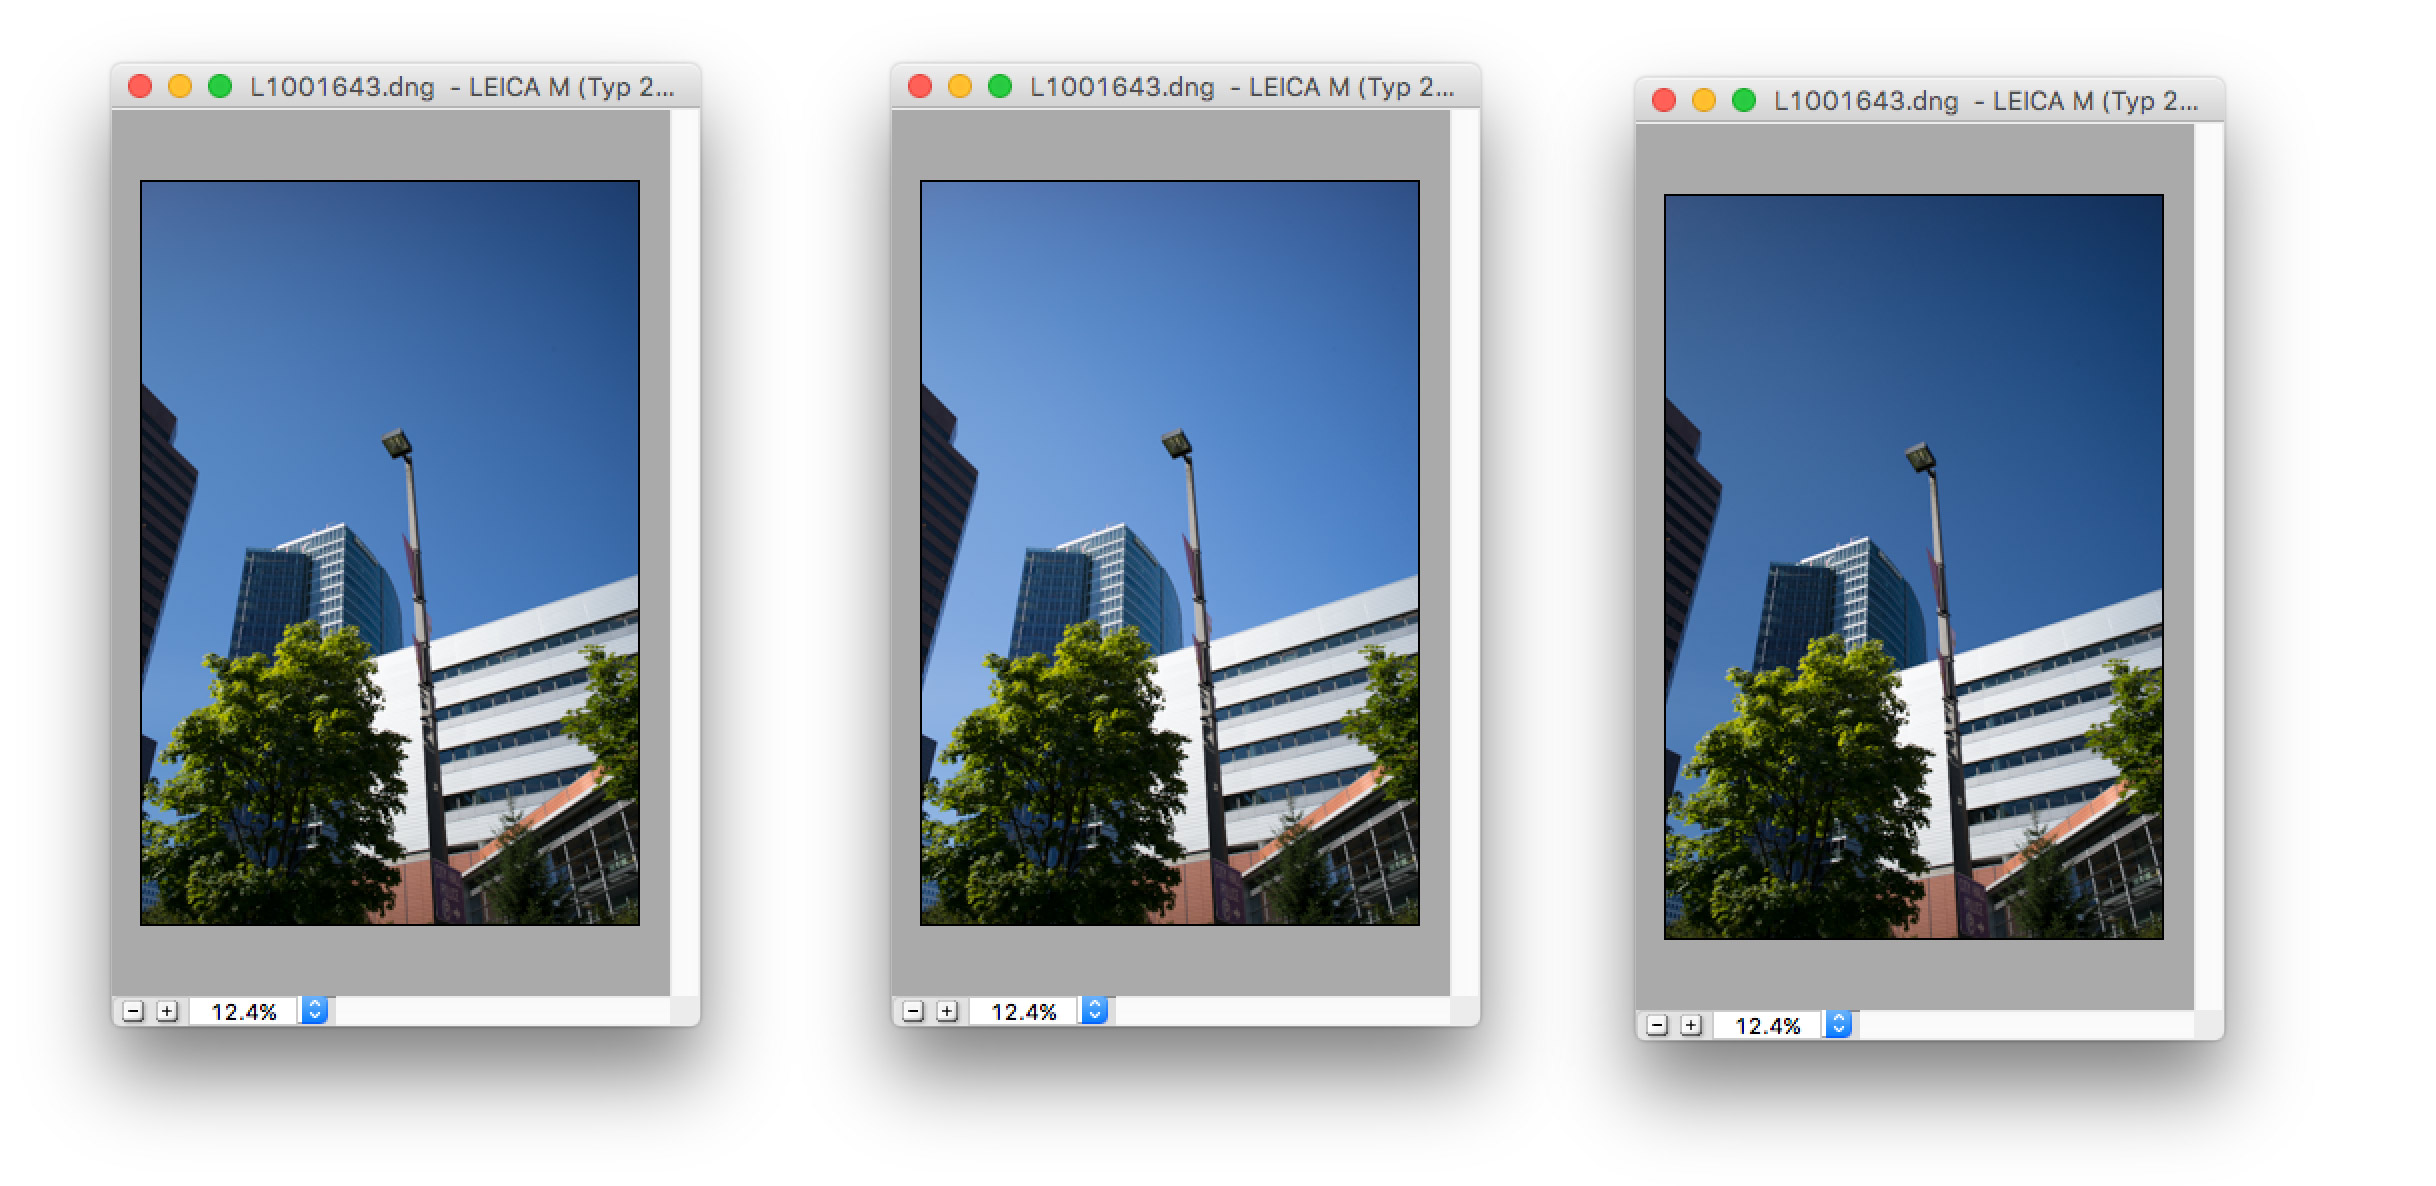
I noticed that with Nikon raw files and Lightroom, selecting the "Adobe Standard" profile causes the contrast in the blues to be quite noticeably higher than the "Camera Standard" profile. But I couldn't manage to approximate the same effect without changing the camera profile (or without masking, but masking is not what I am looking for).


Update

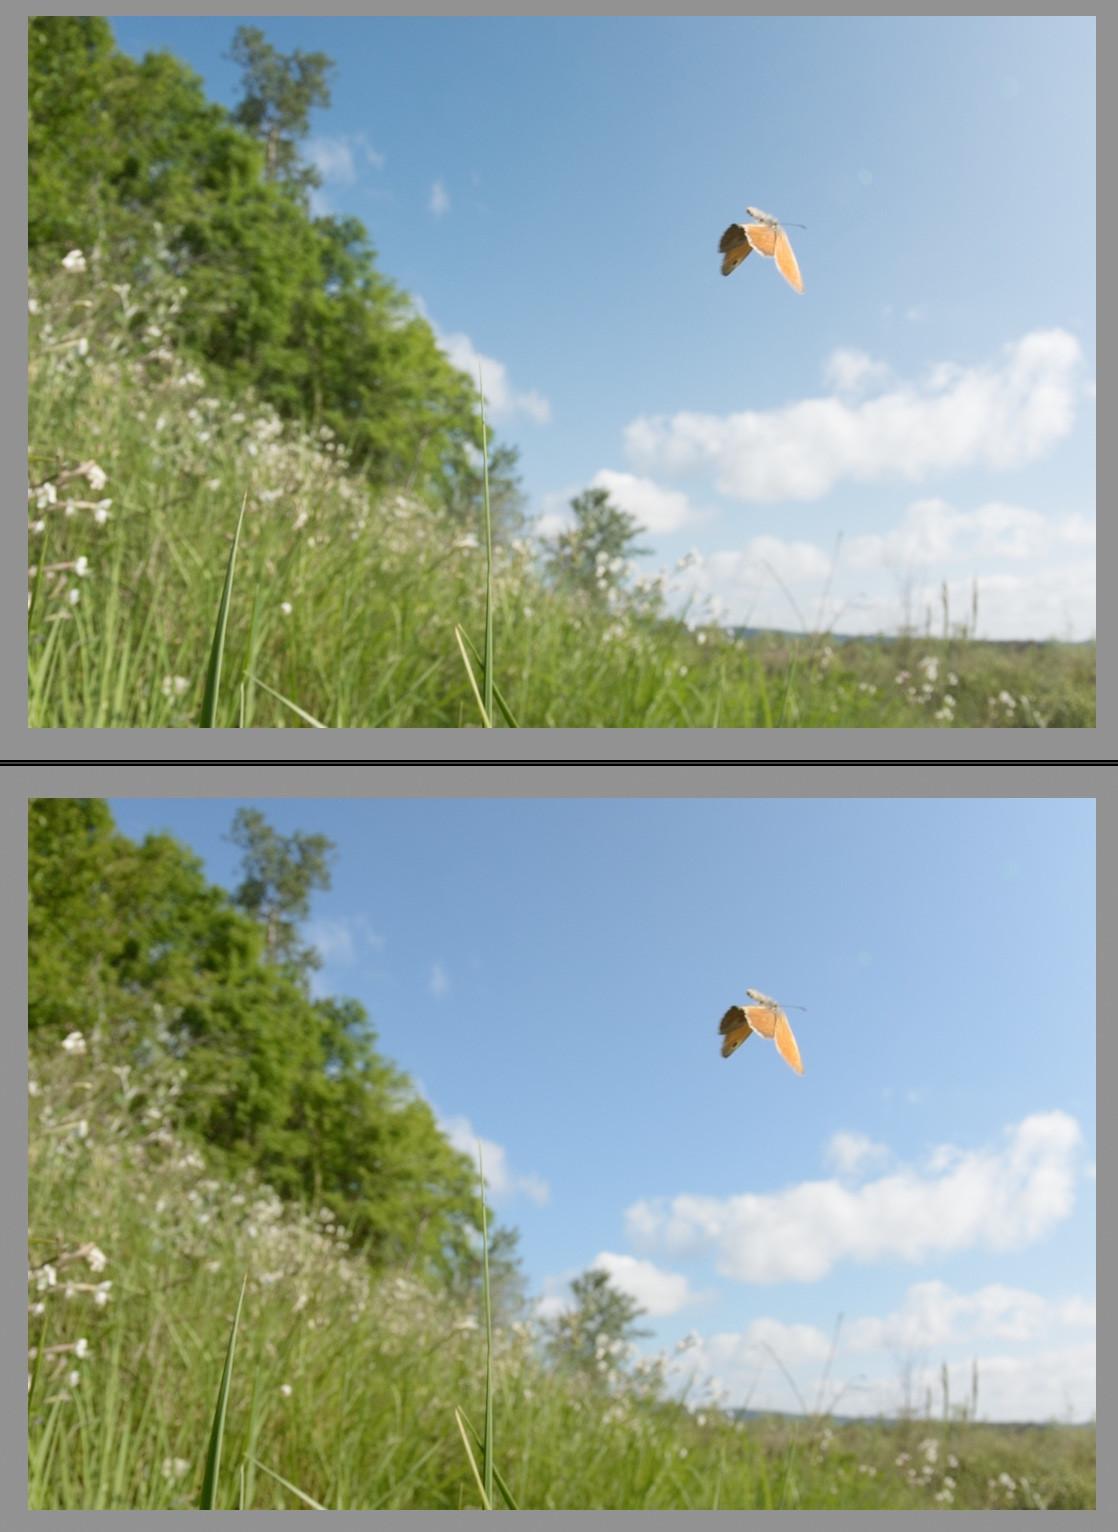
To clarify, here's an example showing the same photo with "Adobe Standard" (top) and "Camera Standard" (bottom). Notice how the difference between dark and light in the blues is greater on the top than on the bottom.

How can a similar effect be achieved using in a controlled manner, using other adjustments (i.e. not changing the profile, nor manually masking the sky)? For example, given the image at the top, how could I edit it in Lightroom or other similar programs to reduce the difference between the darkest and lightest blues and make it more similar to the bottom image?

enter image description here

\$\endgroup\$
3
  • \$\begingroup\$ Do you want to change the contrast of one specific color (one hue) or one color channel (R or G or B)? \$\endgroup\$
    – TFuto
    Commented May 16, 2016 at 13:11
  • \$\begingroup\$ @TFuto One hue. For one colour channel it's easy with programs similar to Photoshop. But that introduces unwanted colour shifts in other colours, or tints grey/white regions. \$\endgroup\$
    – Szabolcs
    Commented May 16, 2016 at 13:15
  • 1
    \$\begingroup\$ This looks like less of a contrast shift in the above images, and more like a hue/saturation shift in the blues, cyans, greens and/or yellows. Easily done using a Hue/Saturation adjustment. \$\endgroup\$
    – digijim
    Commented May 16, 2016 at 15:46

5 Answers 5

6
\$\begingroup\$

You could change contrast of individual channel by curves. I'm not sure if this is what you want though, because it will throw out the image color balance.

Instead of changing contrast you can change lightness or saturation. This can be easily done in LR - there is a set of individual HSL color sliders for that.

If you still want to change contrast and maintain the overall color balance, you can do it in Lab mode. Select curves, select individual a or b curve and make it more (or less) steep making sure that the center point does not move. Keeping the center point intact ensures that the color balance does not change. This will cause change in color only, not lightness. In my opinion, avoiding Lab and editing the lightness or saturation of individual color looks more natural and does not require switching to Photoshop and giving up raw editing.

Update: You gave two camera profiles as examples. DNG profiles do not have a direct way to change contrast. They have look up tables for individual colors where you can specify HSL values. So in Adobe DNG editor (free download) you could create a profile based on your image where you specify that this blue should have this lightness and that blue should have that lightness. Changing lightness only in the table does not change overall color balance. This is very powerful and you could probably achieve exactly what you want, but at the cost of creating an individual profile for each image... Attaching an example.

enter image description here

\$\endgroup\$
3
\$\begingroup\$

selecting the "Adobe Standard" profile causes the contrast in the blues to be quite noticeably higher than the "Camera Standard" profile

I suppose that you should shift blue primary towards magenta and make it less saturated in camera calibration tab.

Adobe profiles are essentially a combination of matrix and HSL map. The main difference between camera standard and Adobe standard is matrix and you can change it to some extent in Camera Calibration tab of Lightroom and ACR (does not require profile switch). This won't change the HSL map though - you may transfer the HSL map from one profile to another using dcpTool if you think that HSL map matters in your case (I may describe it in details upon request).

You can also remove HSL map (hue twists) for arbitrary profile. There are reasons for some people to do this: http://dcptool.sourceforge.net/Hue%20Twists.html

Adobe DNG Profile Editor lets you to adjust an HSL map and export it to .dcp profile.

I may describe those methods in details upon request.

\$\endgroup\$
2
\$\begingroup\$

You are using the wrong term to define what you wish to accomplish. The examples you show are different due to the increased SATURATION of the hue of the sky. Sliders in most every software for image manipulation allow you to choose the specific colour channel and to effect the change you wish.

There are three variables when talking about any specific "colour."

The first is the Name of the colour known as the Hue.
Red, Orange, Yellow, etc.

The second is the amount of the colorant known as the Saturation.
Blush, light tint, rich, full, deep, etc. Many times it is expressed as a %. 0% being the minimum and 100% being maximum.

The third is the amount of Lightness if printed or Brightness if it's a source.
White ranging to practically black.

\$\endgroup\$
1
\$\begingroup\$

I think the quickest way to do that would be to use the adjustment brush and draw the effect in the desired area.

Choosing the area by globally selecting the desired color (or hue, for example), means all areas with that color in the image are affected. This can lead to strange situations like changing the contrast in the sky means changing the contrast in the blue eyes of the subject.

Even if generating the mask by color is easy, often further subsets of that mask have to be chosen by hand. In general, the area to be selected is often a local consecutive patch of the color or a group of such patches that belong to each oether. That is: select all blues, but only those in the sky Given that automatic selection by color needs manual tweaking anyway, you're probably better off making the selection manually in the first place.

\$\endgroup\$
1
\$\begingroup\$

The answer would always strongly depend on the tool you are using, but what you need to do logically is

  1. separate the color you want to work with out, for example by using more or less sophisticated selection tools in your software; or by splitting to three separate images for R, G, B (even elementary software can do that, like PSP 7)
  2. modify the contrast of the selected area or in the single color image
  3. if you used separation, merge them back together.

Note, as others mentioned, adjusting contrast for one color might not really be what you need for the desired effect.

\$\endgroup\$
1
  • \$\begingroup\$ If you go with essentially hand-coded image manipulation, then you need to bracket the range of RGB combination values (aka hue/sat range) which comprise the sky, and apply a weighted curve to those values. I'd view that as a fun home project :-) but not easy to do well. \$\endgroup\$ Commented May 19, 2016 at 12:23

Your Answer

By clicking “Post Your Answer”, you agree to our terms of service and acknowledge you have read our privacy policy.

Not the answer you're looking for? Browse other questions tagged or ask your own question.