5
\$\begingroup\$

First of, i'd like to say that i'm partially colour blind which makes this task more difficult for me. I'm wondering if it is possible to change a person's skin tone in photoshop from something pretty common to look (in terms of color and contrast) like the image below:

https://500px.com/photo/102402623/felix-by-sergey-fedotov enter image description here
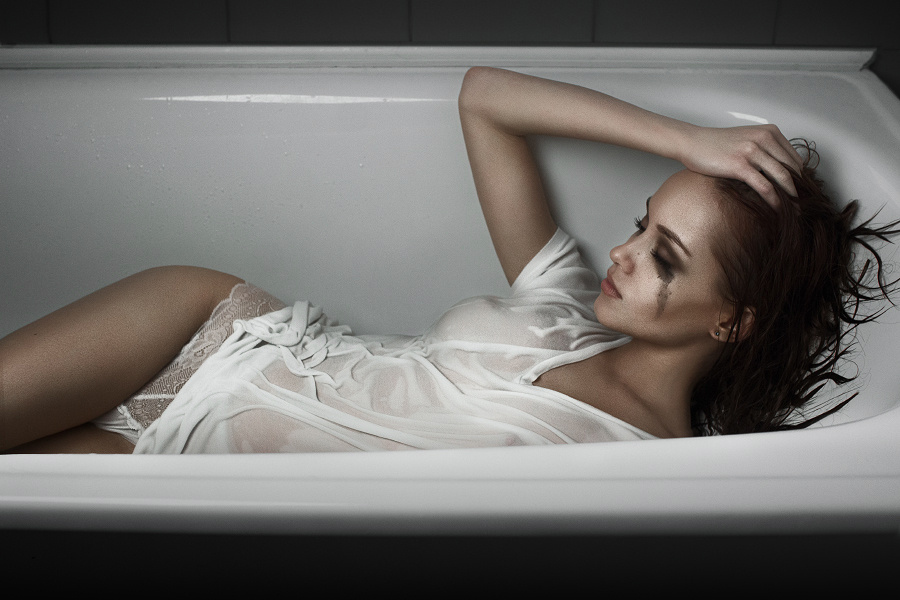
Do you think this is done by using some light modifiers and then just a touch of post-processing? Or could i just take some relatively pale skin and do the same just in photoshop?

I've noticed that a similar thing happens when you raise the blacks in curves and then lower some dark colours to create some contrast. It creates a beautiful effect in terms of contrast, but the colour is still off.

Here's another example of a more usual skin tone:

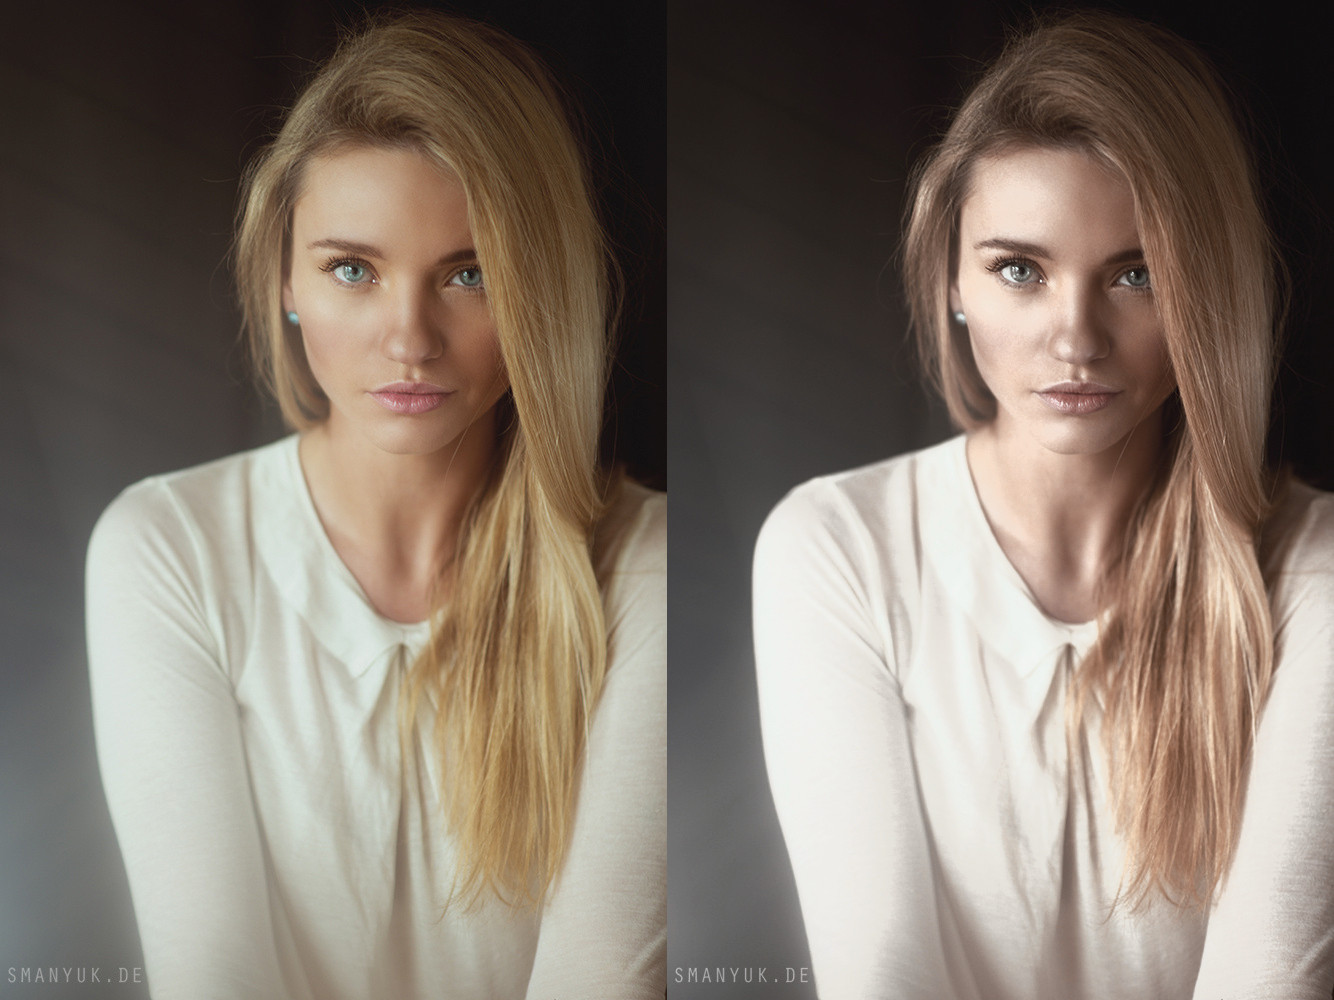
https://500px.com/photo/105117951/kate-by-anastasia-smanyuk?from=popular&only=People enter image description here
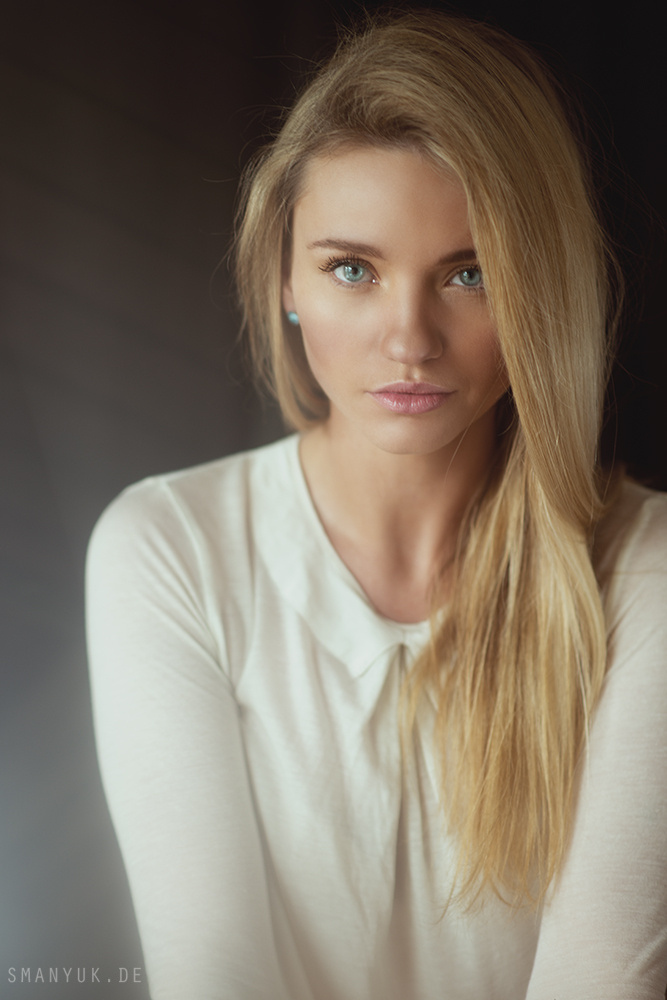
Would it be possible to match skin tones in terms of color and contrast in the image 2 to look like the first image?

Thanks for your tips.

\$\endgroup\$
10
  • 1
    \$\begingroup\$ Please see meta.photo.stackexchange.com/questions/3881/… and edit your question accordingly. This is particularly important with external links, because we never know when it will vanish. Having an example is good, but please make your question understandable from the text. \$\endgroup\$
    – mattdm
    Commented Apr 16, 2015 at 8:51
  • 2
    \$\begingroup\$ On your edit — just inlining the image does not really help. Please describe the effect you see. \$\endgroup\$
    – mattdm
    Commented Apr 16, 2015 at 9:35
  • \$\begingroup\$ @mattdm I've stated in the question that i'm looking merely to color correct skin tones to look like the one in the image. That's all there is to it, as i don't think this kind of skin tone is natural and straight out of camera. \$\endgroup\$
    – Marius
    Commented Apr 16, 2015 at 11:09
  • 1
    \$\begingroup\$ What does the skin tone in the image look like to you? Why and in what way do you think it is unnatural? \$\endgroup\$
    – mattdm
    Commented Apr 16, 2015 at 11:14
  • \$\begingroup\$ @mattdm Like i said .. i'm partially color blind and i simply don't know how to answer it. The colors look somewhat desaturated and "metallic brown" (like i said - i have a problem with colors so it might not really be brown). Usually skin tones are lighter and less contrasty. And maybe there are people with skin tones like that, but i'm sure you can just take any white person and do something in PS to match this look as well. I've added another picture to show the difference. \$\endgroup\$
    – Marius
    Commented Apr 16, 2015 at 11:25

4 Answers 4

2
\$\begingroup\$

I think the metallic looks mainly comes from the dodge and burn technique. This video shows the technique well. How to Dodge & Burn in Photoshop by Elena Jasic.

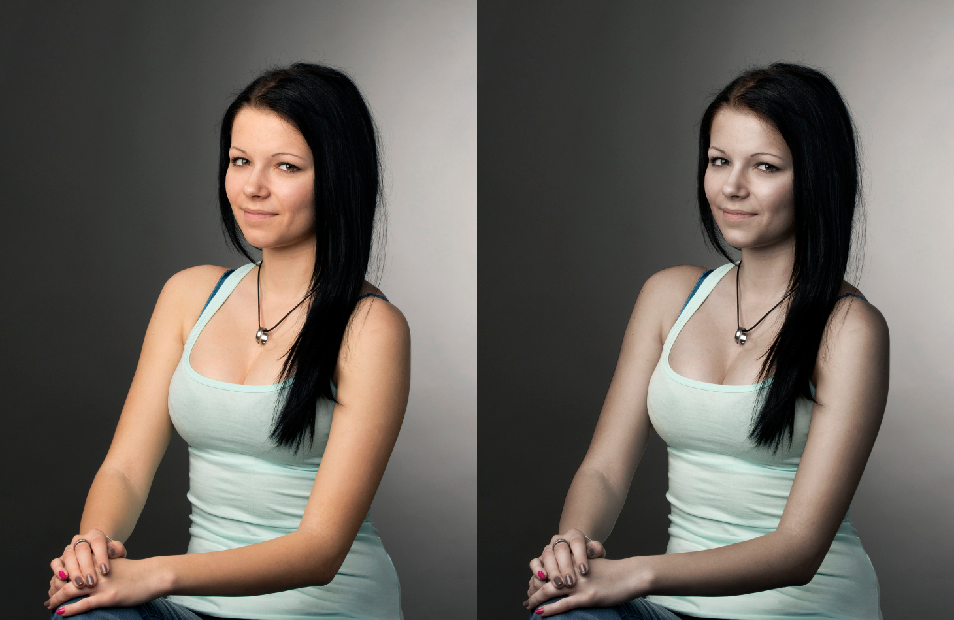
I tried to achieve the similar effects of the first image you provided. The left image is before any edits, and right image is after the edits. I hope this is the effects which you are trying to achieve! enter image description here

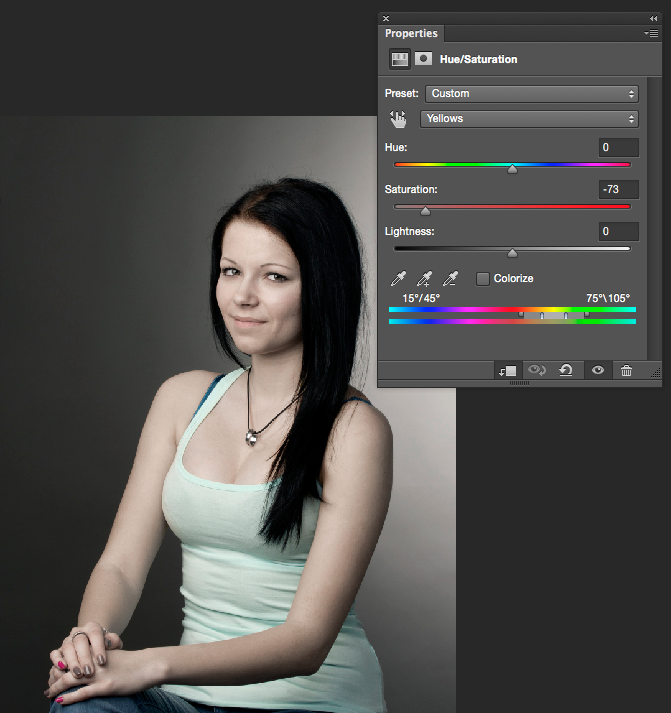
  1. Lower the saturation by colors. Especially lower reds and yellows to achieve brown skin tone.

enter image description here

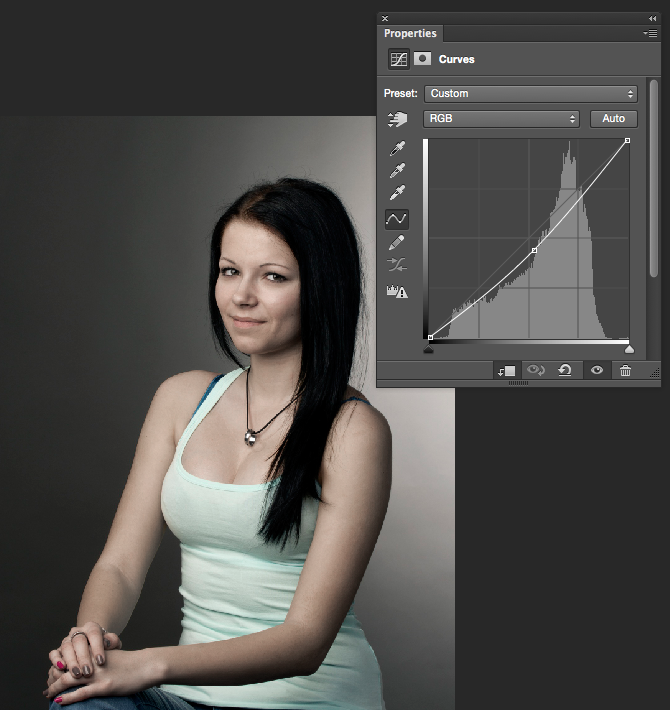
  1. Adjust the curves.

enter image description here

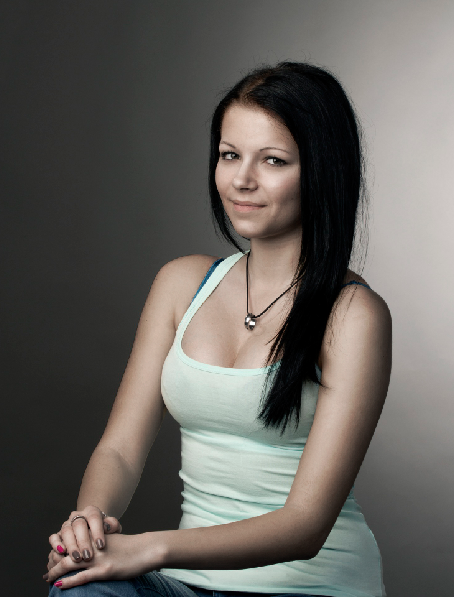
  1. Do the dodge and burn. Done!

enter image description here

\$\endgroup\$
1
  • \$\begingroup\$ Thanks for the effort. While it does not look exactly like my first image (doesn't quite have the "metallic gloss") - it's quite an easy technique that could probably be improved upon easy (probably by adding more contrast, saturating a little bit more etc.). Anyway, it's easy enough so i'm accepting this answer :) Thanks. \$\endgroup\$
    – Marius
    Commented Jun 22, 2015 at 9:21
5
\$\begingroup\$

This is very easily done in Post Processing, I'll do it using Photoshop.

I did it with 3 adjustment layers which I'll explain.

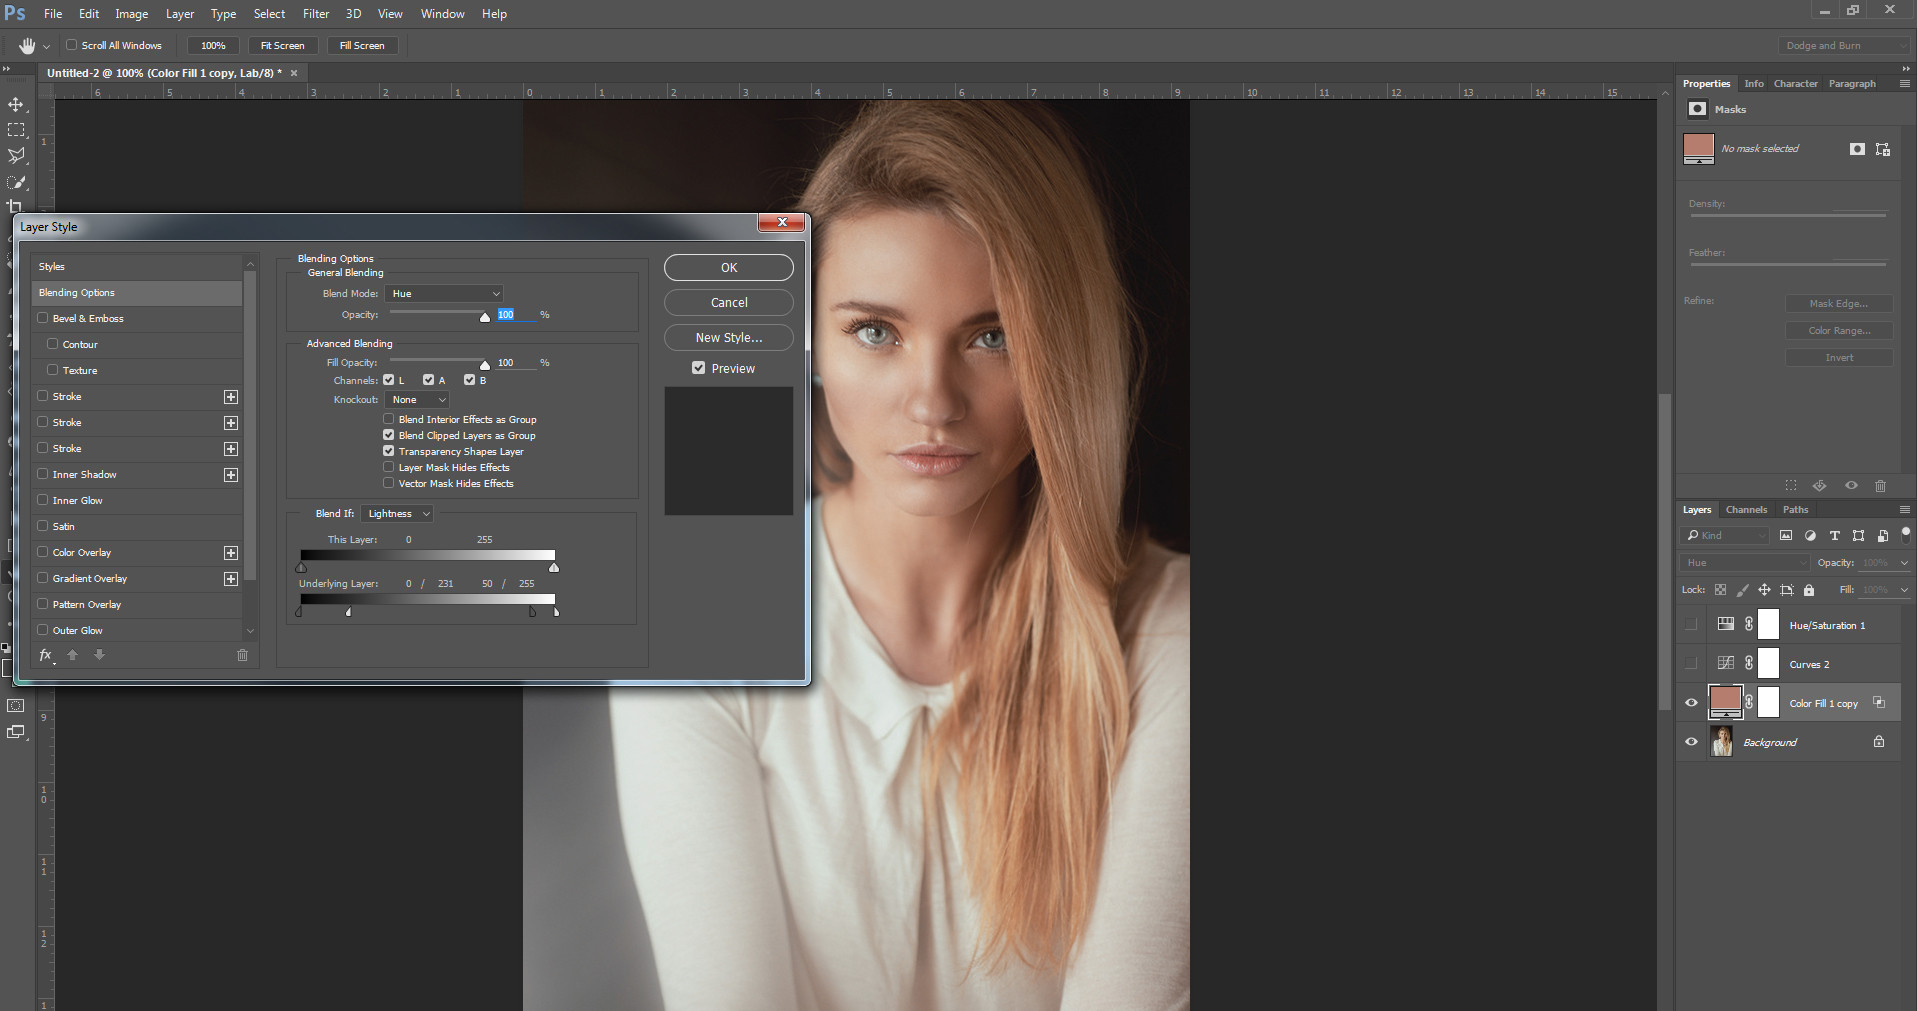
First I did a Color Fill with Blend Mode set to fill using a bronze color. I then adjusted the Blend-If Lightness, Underlying Layer to 0/231, 50/255

enter image description here

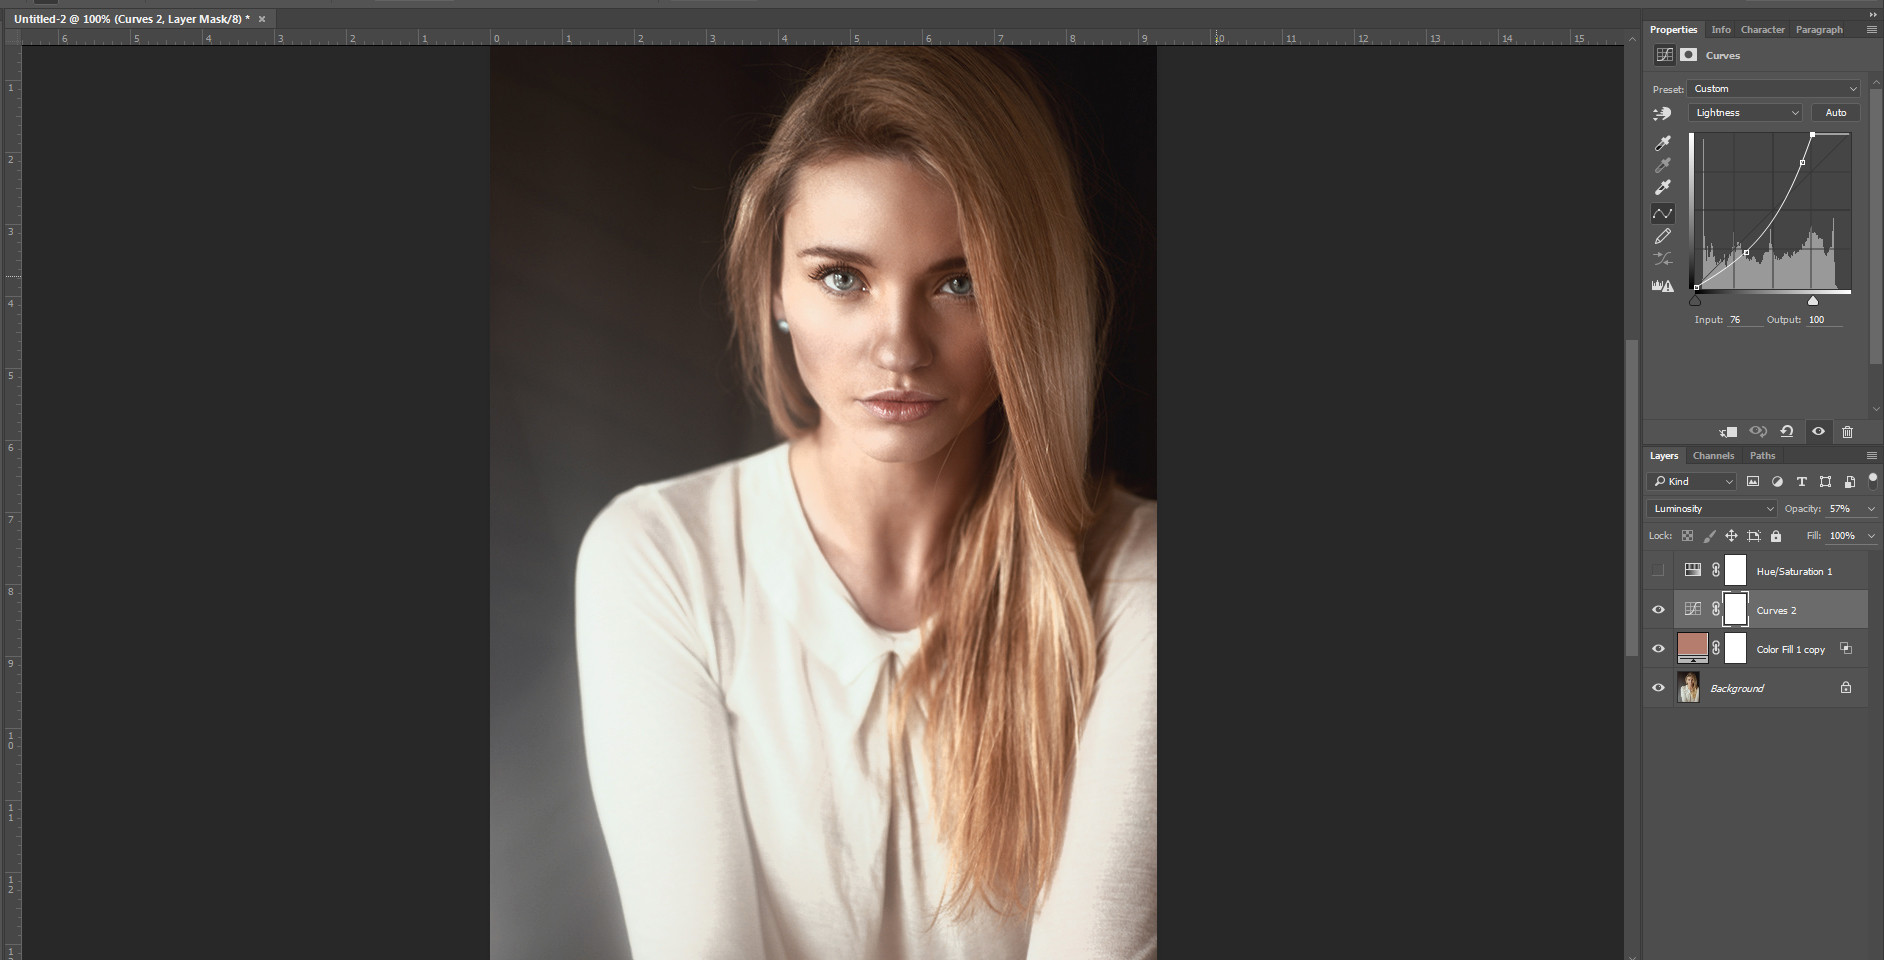
Then I did a Contrast Curve on the Lightness pulling the midtones down and flattening the shadows a bit. I also lowered the opacity of this layer.

enter image description here

Then I lowered the saturation just slightly for the final look

enter image description here

For the results:

enter image description here

Because we bumped contrast a bit I would probably then do some dodge and burn on the cheek, pores, forehead and nose. Maybe dial the entire look back by grouping the adjustments and lowering the opacity. I'd probably also mask the shirt and give it its own adjustment to bring it back to a more neutral white.

\$\endgroup\$
1
\$\begingroup\$

There are some components to that "look". In this case I think the make-up and lighting are the more important to get right from the start, particularly because they can't be corrected later.

  • Make-up makes the skin appear more uniform in texture as well as colour, and can give a gleam or a flat appearance. It can also go some way to getting the colour you want.

  • Lighting is very important. Ring flash (or just some flash near camera) was used for the first image, catching gleam in the skin more, while the second image has some softer more traditional (3-point lighting) setup.

  • De-saturating the image a little. Especially in the first photo, the saturation is cut a lot.

  • Playing with tone curves (eg in raw developing software, or adding curves layers later in photoshop). Play around until the skin tones have that nice sheen to them, it's essentially an S-curve, which boosts contrast, with the flattening at the top around where the skin tones are in terms of brightness.

You should be able to achieve all you want with just the above, but you can also add a colour cast, or add a gradient map (but with a blend mode or less than 100% opacity on top of the original).

\$\endgroup\$
0
\$\begingroup\$

If I understand correctly, the question is: how to constrain skin tones to only brown hues; getting rid of the naturally occurring red patches and bluish tints that some subjects have.

I've substituted skin tones using a combination of gradient maps and layer masks. For my answer to make sense, you'll need to be familiar with both techniques.

Create a gradient map that consists of the colors that you want in the skin tones, this would be from a very dark to a light brown for example. The gradient map adjustment layer will limit the image to only those brown tones you have specified.

In your example above, the dark skin value is around #2d2115 and the light is about #c0aea2. You can use more than two colors in the gradient if you want.

Now that the whole image is in tones of brown, the next step is to mask out the parts of the image that you don't want affected. Use either a (raster) layer mask that you paint on, or a vector mask that you draw on with the pen tool. (you could use both in combination if you are experienced with that)

Final tweaks would be to adjust the overall opacity of the adjustment layer, or setting it to "color" mode instead of normal in order to preserve some qualities of the original image.

\$\endgroup\$
5
  • \$\begingroup\$ Thanks for your answer! I actually know of this technique. I used to create gradient maps from lots of different colors based on the original image. Unfortunately, the result would in most cases be a "flat" image. Why? Because most images are different in contrast and tonal values. For instance, you can get the tones from image 1 and apply them to image 2 and you'll get a completely different look. What i'm looking for is this metallic contrast as wwll as the colors. I've seen people use lightroom only to turn image 2 into image 1 so i guess there should be some simpler technique for that. \$\endgroup\$
    – Marius
    Commented May 25, 2015 at 18:24
  • \$\begingroup\$ @Marius if you'll upload one of your own images (one you own copyright to) I will attempt the technique as a demonstration. \$\endgroup\$
    – Aaron
    Commented May 26, 2015 at 12:27
  • \$\begingroup\$ Thank you, but there's no need for a demonstration. I understand what you said in your post and it's a good tip. But for really good results this is quite time consuming, as it requires lots of sampled colors and contrast adjustments. I've already done this in the past myself, but didn't like how long it took. As i'm pretty sure this can be achieved easier with maybe just a camera raw filter's temperature / curves combinations or something similar. Still trying to find a simpler way myself. \$\endgroup\$
    – Marius
    Commented May 26, 2015 at 12:55
  • \$\begingroup\$ @Marius OK, then. By the way, contrast can be controlled by the gradient adjustment layer without an extra step. I've not found it to take a lot of time to get the effect. I have many pre-set gradient maps that I use for exactly this purpose. \$\endgroup\$
    – Aaron
    Commented May 26, 2015 at 15:42
  • \$\begingroup\$ You're right about that too. Maybe it's just a matter of preference or my color-blindness issue that this technique doesn't work all that well for me. Difficult to say. Thanks for your help! \$\endgroup\$
    – Marius
    Commented May 26, 2015 at 18:02

Your Answer

By clicking “Post Your Answer”, you agree to our terms of service and acknowledge you have read our privacy policy.

Not the answer you're looking for? Browse other questions tagged or ask your own question.