33
\$\begingroup\$

(Was: Help motivate me to go beyond being a point-and-shooter)

I'm aware of the existing 'getting started with photography' questions, but what I'm asking here is slightly different:

I've had SLR cameras for years, but I've taken far more photographs with my trusty point and shoot compact, and even when I use an SLR, 99.9% of the time I have everything on automatic. (I did use manual on the older SLRs where I had no choice, but that mostly consisted of twiddling aperture and exposure time till the green light came on).

What I would find interesting is a progressive list of "if you want to get this result, you'll need to use this function", to push me outside my comfort/lazy zone and get me using my SLR's manual mode.

EDIT: already lots of great answers, thanks! Just to clarify: my question is and was about using an SLR; when I said 'being a point-and-shooter', I meant that I am using my SLR exactly as I use my compact - all automatic: point, and shoot.

\$\endgroup\$
3
  • \$\begingroup\$ Love the question. +1. Trying to come up with some answers! \$\endgroup\$
    – AJ Finch
    Commented Dec 9, 2010 at 10:52
  • \$\begingroup\$ You should change the title of the question. It's not a question. Your last paragraph is where your question is so this should be titled "Is there a catalog of end result images and settings, functions, and techniques to achieve that end result?" \$\endgroup\$ Commented Dec 9, 2010 at 11:20
  • \$\begingroup\$ Great question and some a.c.e answers - I won't get pedantic about the title - rules are meant to be broken ;-) \$\endgroup\$
    – immutabl
    Commented Dec 9, 2010 at 15:47

10 Answers 10

30
\$\begingroup\$

Following the format you present of "if you want to get this result, you'll need to use this function", here are a couple ideas. I'll try to add to this list in the next day or so, if I think of more -- or perhaps I could be convinced to make this a community wiki answer. Anyway, thoughts:

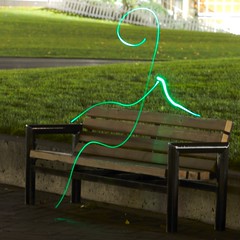
  • If you want to do some light-painting, you'll have to find and use your "bulb" mode, set your camera on a tripod (or other support), and do a nice long exposure, in a dark environment (indoors or out, as long as it's dark), and then "paint" with light using a flashlight, LEDs, or any other portable light source. You can either "paint" the light onto an object, or "paint" in the air, so that the lens sees the light source directly. Example:

    Resting, by Lindes

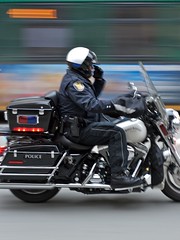
  • If you want to do a panning shot, you'll have to set your shutter speed at somewhere in the vicinity of 1/15", either in Manual mode or Shutter Priority (often called Tv -- which is short for "Time Value"), and then track motion of (say) a bicyclist (or runner, or car) riding by you, opening the shutter as they bath. Experiment also with other shutter speeds, especially for faster or slower objects. Experiment with your camera hand-held, and on a tripod (making sure the axis for panning is unlocked and loose). Example:

    Bus Patrol

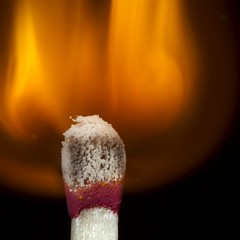
  • If you want to do ("true") macro photography, you'll have to turn off your auto-focus (manually setting the focus to the closest possible distance), and move the camera to adjust focus. (You may also need to do other things, especially if you don't have a macro lens -- there are a couple of answers to this question about macro on the cheap that could be useful (including in terms of helping you out of your lazy zone) if you don't have one.)

    Chemical Reaction

  • If you want to shoot high-key or low-key images, you'll have to either use exposure compensation settings, or (better yet, in my opinion) shoot in manual mode.

  • If you want to get yourself to think carefully about your images, you may want to set yourself a challenge to take, say, exactly one photo per day, for some amount of time (whether just one day, or a week, or a month, or a year or more). No more, no less. This can "force" you to think about it, because you'll (likely) want the one photo to "count", and be good.

  • If you want to get yourself thinking (even) more about your images, you could also set yourself the challenge of making sure that not a single thing in the frame is there without your explicit intention. So, for example, if you were to take a picture of your desk (random example based on a specific image a friend of mine once showed me), you'd make sure that every book, every piece of paper, every everything that's in the frame, you have specifically chosen to place there. Clear out the desk, and then add the things back that you want to be in the frame. Or at least think about each and every item, and have a reason for having it be there. (This concept of course can apply to any sort of image, the desk thing is just one possible example.)

Hopefully that gets you a start on a few things; I'll add more if/as I think of them, and I'm sure others will have other ideas posted in other questions.

More

I'm back, with a few more possibilities:

  • If you want to get challenged with new ideas on a regular basis, you might want to check out a website like DPChallenge, which offers new challenges each Tuesday (and occasionally at other times), which you have a week (usually) to complete. They give you a theme, and it's up to you to figure out how to complete the theme... so this won't require you to learn how to use your camera, but it may well inspire you to do so, especially if you go regularly, vote on others' entries, and view the winners. There are sometimes some pretty spectacular images there; to aspire to win could give motivation to learn your gear.

  • If you want to get pushed to just shoot on a regular basis, you might want to check out groups on flickr (and/or on other sites, or even other whole sites) which encourage/"require" you to shoot regularly. There are many of these; here are a few examples:

    I'm sure there are many others. Those are just a few I happened to know about and/or find quickly. Many of these groups encourage critical feedback, as well, so you may find them helpful for getting to know how you're doing with things.

  • If you want to really get to know your camera, you may want to read the manual, cover to cover, trying out every single setting (or a reasonable subset, based on what you want to learn) as you go along.

  • If you want to get to know how different exposure settings work really well, you may want to find some beginning photography exercises in a book or online, and challenge yourself to do them, even if you have nobody to "turn them in" to.

  • If you want to have help keeping at it and get feedback on your progress, you may benefit from joining a group, whether online or in person, that focuses on photo critiques. There are a bunch of these on flickr, I know, though I personally find the in-person ones to be more rewarding. I particularly like ones that meet regularly, with a small close-knit group, a la the "Monday Night Manifesto", or "New Work Review Groups", described by members of one photo club I happen to belong to, Group f/5.6. These can be tricky to find, but "camera clubs" can at times offer similar benefits, and there are surely myriad other groups out there, hopefully some of which are in your area. And if not, or if you just prefer it this way, there's always online: I used to really get a lot out of WEEKLY; I haven't checked in there lately, though, to know if it's still such a useful group.

  • If you want to keep finding ways to challenge yourself, you'll have to just do exactly that! Giving oneself assignments can be a great way to get things done. Chuck DeLaney's book Photography Your Way has some things to say about this (and other more-or-less related topics) that I found useful. The bottom line, though, is just to challenge yourself. And if you're taking any of the recommendations from any of the answers to this question of yours, you're already doing it. :)

Happy learning; happy shooting!

\$\endgroup\$
6
  • \$\begingroup\$ Exactly what I was looking for, with example. This will make an excellent resource. Thanks! \$\endgroup\$
    – Benjol
    Commented Dec 9, 2010 at 12:25
  • \$\begingroup\$ Glad to hear it. You're welcome! \$\endgroup\$
    – lindes
    Commented Dec 9, 2010 at 19:22
  • \$\begingroup\$ Just updated with another half dozen ideas. Hope you enjoy! \$\endgroup\$
    – lindes
    Commented Dec 11, 2010 at 0:10
  • 1
    \$\begingroup\$ This is an excellent answer, made better since. Green tick for you, sir! \$\endgroup\$
    – Benjol
    Commented Jan 19, 2011 at 7:40
  • \$\begingroup\$ Hehee, thank you @Benjol. Did it work? Were you motivated to go beyond being a "point-and-shooter", as you originally said it? I hope it at least helped. :) \$\endgroup\$
    – lindes
    Commented Jan 19, 2011 at 18:17
5
\$\begingroup\$

Not sure if that is what you are looking for, but if you want to use a compact camera for night scenes (or low light), look for a way to set long exposure times on it.

Many but not all compacts have a way to define longer shutter times, either by offering a "manual mode" (where you can also set the desired aperture), by an "speed priority" mode ("S" on most cameras, "Tv" on Canons) or even by offering "scene modes" where you can choose "night scenery" or "fireworks" and thus obtain a similar result.

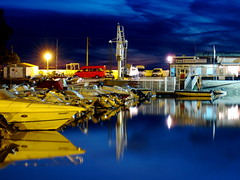
In this example I've used manual mode to set the exposure time for 15 seconds, which allowed me to capture a scene where there was quite little light:

Faro Boat Line 2 | Linha de barcos em Faro

Another use for longer exposures is to show continous movement as in the shot below, where the water flow exposed for 1/4 of a second (that would already be considered long exposure) makes it look like a veil over the rocks:

Water Flow 1 | Água em fluxo

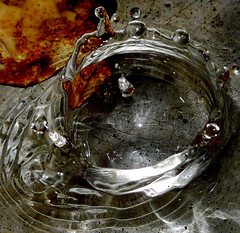
And finally, you could go in the opposite direction and use really short exposure times in order to capture moving things as if frozen in time. This example is a quite cliche shot of a water drop (on my kitchen sink) taken at 1/1300 of a second (note that when using such high speeds, you will need a lot more light in the scene, so in this case I've activated the camera flash):

Tabula Rasa 2

\$\endgroup\$
2
  • \$\begingroup\$ Apparently my question wasn't very well worded, but this is what I was looking for anyway :) \$\endgroup\$
    – Benjol
    Commented Dec 9, 2010 at 12:35
  • 1
    \$\begingroup\$ What do you call an unusual cliche shot? \$\endgroup\$ Commented Apr 4, 2012 at 1:40
4
\$\begingroup\$

Getting the Flash Off the Camera

The image below isn't one of my best ever, but I think it demonstrates the value of getting the flash off the camera to add texture and character to a portrait.

Controlling Aperture to put the background out of focus

The background is also pretty dark in this image, but by using a wide aperture (small f-number), I have also made it out of focus, to focus (pun intended) the viewer's attention on the subject.

alt text

\$\endgroup\$
2
  • 1
    \$\begingroup\$ Illustrated! +1 :) Remind me: wide aperture = small f-number, yes? \$\endgroup\$
    – Benjol
    Commented Dec 9, 2010 at 11:00
  • 4
    \$\begingroup\$ Yes, wide aperture = small f-number. The "f-number" is expressed in terms of a ratio - f/x, where x is the "f-number" and f is the focal length of the lens... so, f/4, for a 100mm lens (say, because the math is easy) has an actual physical opening of 25mm (100/4 = 25). f/8 gives 12.5mm for the same lens, though for a 50mm lens, f/4 is 12.5. The details of this math are rarely important when taking pictures, but perhaps knowing this will help you remember how the numbers go. \$\endgroup\$
    – lindes
    Commented Dec 9, 2010 at 11:34
4
\$\begingroup\$

A simple trick great for street photography: Rear Sync flash (some compacts have this)

-Set your flash sync settings to rear -use a slow shitter shutter speed (1/20, 1/30 should be fine)

alt text

(photo by alexanderbot)

Works really well the places with lots ot light and movement

More info here

Update: had to correct my typo, but shitter speed is way too funny to delete it :D

\$\endgroup\$
0
2
\$\begingroup\$

How about by trying the small next step: figure out how to take HDR photos. This requires bracketing your shot with multiple exposures.

Trying to figure out how to navigate the menus to enable bracket exposure. How to position the camera for best bracketed shot, etc. This will get you out of 'just press a button' mode and will show you what the camera can do in other modes.

Then, you can progress to other, more difficult, challenges.

\$\endgroup\$
2
  • \$\begingroup\$ This, however, can be done without manual mode. Simply setup auto bracketing on your camera, the bracket step and continuos shooting. \$\endgroup\$ Commented Sep 14, 2011 at 15:05
  • \$\begingroup\$ I believe that will then do auto-exposure compensation every time, so the pictures will not be fully 'compatible'. And you may get slightly different focus points with autofocus. \$\endgroup\$ Commented Sep 15, 2011 at 17:22
2
\$\begingroup\$

I'm answering the original question here:

The one thing you can never get out of a point and shoot is the ability to change lenses as per the demands of the situation. Need a long range shot? Use the telephoto (and I mean a real long range one, not the ones you take with the 5x 'zoom' ). Wanna capture the bigger picture? Use a wide angle. This and some of the techniques of speed and aperture control can help you get better, much better images.

\$\endgroup\$
1
\$\begingroup\$

I'm coming dangerously close to duplicating @AJ Finch, but:

Read Strobist

His blog is a really fun and interesting way to learn how to make great pictures. He deals primarily in off-camera flash and manual mode.

\$\endgroup\$
1
\$\begingroup\$

(Here's an answer I received by email from someone who hasn't signed up, yet...)

Whilst it is true that a lot of compacts can do the clever stuff if you can find it, you learn a lot more with the SLR, and for my money the single most compelling reason for an SLR is taking a serious shot where you want to know exactly what's in the frame. You need a viewfinder for this. And a serious shot is when you deliberately want to take a photograph for photography's sake. It may be only 10% of the time, and you use a compact (or even a phone, as I did today) for the rest.

There is far more risk of getting a bum shot with an SLR, because instead of applying the law of averages to produce averagely exposed shots, they tend to do what you tell them, and even in auto mode, can expose conservatively (eg dark exposures) to allow you to work on them afterwards and get the maximum amount of detail.

The most useful facility for me is to use the aperture/speed combination to choose depth of field. SLR allows you to play with this AND stop the lens down to see the effect. Or you can take a shot to find out.

\$\endgroup\$
1
\$\begingroup\$

The number one with a bullet absolutely best reason to use manual mode isn't any trick or gimmick, it's this: even exposure between shots while taking a series of pictures. Sometimes you don't need the best exposure for individual shots, sometimes you want to try and record the actual lighting conditions - things that are in shadows are darker, even when you shoot them up close. On overcast or cloudless days, the intensity of the sun doesn't change for hours on end, and that's when it's perfect.

\$\endgroup\$
1
\$\begingroup\$

If you are in any situation that requires the exposure to be the same across a number of shots, manual mode is great.

For example: shooting in a studio with strobes. Or shooting a series of shots for a panorama.

\$\endgroup\$

Your Answer

By clicking “Post Your Answer”, you agree to our terms of service and acknowledge you have read our privacy policy.

Not the answer you're looking for? Browse other questions tagged or ask your own question.