1
\$\begingroup\$

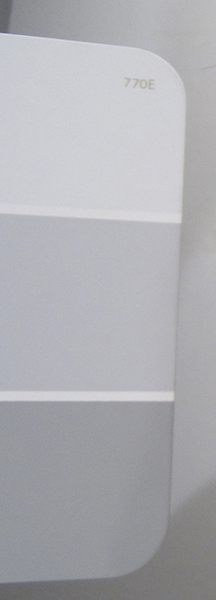
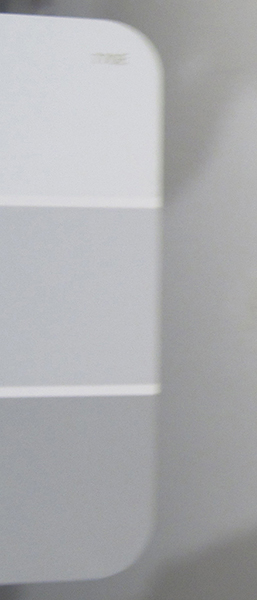
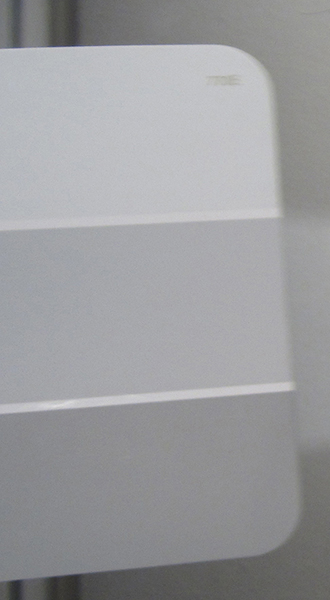
I have a set of 3 images and I would like for all of them to have the same color scheme (ie. I think it's via color correction)

Essentially I want the gray in each photo to look identical when I look at the 3 side by side via the Color Picker. Is there any way to do this with Photoshop CS6? Please disregard that the photos are blurry, thank you.

Image A

Image B

Image C

\$\endgroup\$
4
  • \$\begingroup\$ Are your actual photos color photos or are you literally asking about gray card shots? \$\endgroup\$
    – mattdm
    Commented Jan 28, 2014 at 11:33
  • \$\begingroup\$ They are color photos, not gray shots. I just cropped the photo to make my question more evident \$\endgroup\$
    – Kamilski81
    Commented Jan 29, 2014 at 13:51
  • \$\begingroup\$ I feel this is still ambiguous: are the colors on the card grey on a grey background or were they color samples, like shades of green, but converted to B+W in camera? \$\endgroup\$
    – tenmiles
    Commented Jan 30, 2014 at 2:04
  • \$\begingroup\$ How close must the match be? What do you mean by "match?" \$\endgroup\$
    – Stan
    Commented Aug 13, 2017 at 23:40

4 Answers 4

1
\$\begingroup\$

You'll need to keep the following consistent between each photo:

The lighting when the photo is taken

If the ambient light changes, even just darker/lighter, the sun moving a bit overhead, a cloud passing by, or a large object moving (so that reflections off it change) then the light reaching the object will change, and so will the light reflecting from the object to your sensor.

If the ambient light is not easily controlled, then an "easy" way to do this is by providing your own lighting that is much brighter than the ambient light. For example, using a bright flash with exposure settings that would otherwise produce a (nearly) black image.

Note that some ambient light is constantly varying, such as that of fluorescent tubes. They are flickering at around 50–60 Hz, and change colour slightly as they flicker, so the colour will change with each exposure.

Consistent lighting across the subject

Your ambient light or flash needs to be really diffuse. If some sections of the image are brighter or darker, they won't give you the same reading as each other. You often don't notice this, as the human brain tends to interpret shadows and makes you think the colour is consistent because you know it ought to be. But if the lighting changes even a little bit across the subject, then some sections will be darker (lower values) than the others. This can also cause a slight colour shift (not just intensity shift), depending on the light sources.

The exposure settings (ISO, Aperture, Shutter Speed)

You'll want to at least keep the same exposure level for the photo (e.g. if you went up one stop in shutter speed, you could perhaps go down one stop in ISO or aperture). Ideally you'd keep all settings constant though.

The whitebalance

Ideally shoot the photos in RAW so you can arbitrarily adjust the whitebalance after the fact. If shooting JPEG you'll need to set a custom whitebalance. Definitely not "Auto", and I'd be a bit wary of even the "Scene" whitebalances (e.g. cloudy or sunny, etc) as it's not immediately clear whether the camera manufacturer will use a fixed whitebalance/colour temperature or allow for some variation with the scene settings.

Cameras with custom whitebalance often have instructions for setting a custom whitebalance from a photo, so once your consistent lighting is set up you could do that manually following the camera's instructions (typically involves taking a picture of an 18% grey card, and using the menu to set the whitebalance from the card). Alternatively just choosing a particular colour temperature/tint from the whitebalance settings will at least ensure consistency.

If you're using a camera that doesn't let you set a fixed whitebalance (e.g. phone camera or cheap point & shoot) this won't be possible, as they will try to account for the lighting by looking at the colours in the image and adjusting slightly. Unless you can "tell" the camera that the light is not changing, then a change in subject will make it guess a different value for the appropriate whitebalance.

Limitations

If you can't achieve the above, you won't be able to achieve a consistent colour reading from different photos.
\$\endgroup\$
2
\$\begingroup\$

You are looking at color correction a bit incorrectly. The point of color correction isn't to make it so that colors that are the same in two images show up exactly the same in another image taken under different conditions. The point of color correction is to ensure that images consistently appear closer to the way the scene actually was.

If there are changes in the lighting between images, there may also be differences in the way each part of the physical object should look. For example, if the image is really dark on one side and really bright on the other and you give even light, there is a high contrast. If you put lots of light on the dark side and no light on the light side however, then the image should appear very low contrast since the sides actually appeared very close to the same color under those lighting conditions.

Assuming lighting conditions are similar, the curves tool is probably the most helpful tool for color correction. You can set your white point to the white side, your black point to a black side and your white balance can be set based on the grey card. This gives you a decent starting point, however the level of response in the scene to spread information out is still key.

If there are a few highlights that make all the shadows too dark, you can use curves to pull up the middle-left section in order to brighten up the shadows while still preserving deep blacks. Similarly, if the bright parts aren't dark enough, you can pull down the middle-right parts and increase the apparent detail in the brighter portions of the image.

It isn't an exact science though and it takes a lot of practice and tweaking to get it just right. It still won't let you correct for major changes in lighting, but it can help you achieve a similar look for images that may have had differences in exposure or minor differences in lighting intensity or color. It won't change the fact that the lighting was different and the actual RGB colors are different, but it can make them look (to the human eye) like the objects are the same color in real life.

\$\endgroup\$
2
\$\begingroup\$

I would start by using the Levels Adjustment for each photo. Use the eye-droppers to select the white and black points in each photo (or the middle eye-dropper to select they part of the photo that is grey.)

Once you have clicked on an eye-dropper it will be helpful to take advantage of the Sample Size drop down box in the tool options bar. It is set to 'single point' by default, but you will likely get a better response by letting it average 5 pixels x 5 pixels or larger, depending upon your image size.

\$\endgroup\$
1
\$\begingroup\$

Grey has no color, so if you want the three to match then what you want to do is match the exposure. Not sure how to do this in post, but if you take your camera and put it on spot metering and then meter the same thing each time it will come out the same each time, even if you brighten/darken the lighting.

What color correction would do, here, is basically you identify a thing in the frame that should not have color, but, because of the color of the light illuminating it, it does. By identifying that it should be a shade of grey (void of color) the software can determine how much color is coming from the light and apply the appropriate correction to the entire frame.

\$\endgroup\$
1
  • \$\begingroup\$ Grey can appear coloured if the lighting is at all coloured (and most lighting has some colour bias to it). The white balance is for adjusting the colour balances so that white is white (and grey is grey). Further, what appears grey will often be a little coloured anyway. The 'greys' in the image are all very slightly blue (in RGB space from the image). They may well be slightly off-grey in real life too. \$\endgroup\$ Commented Jan 29, 2014 at 23:56

Your Answer

By clicking “Post Your Answer”, you agree to our terms of service and acknowledge you have read our privacy policy.

Not the answer you're looking for? Browse other questions tagged or ask your own question.