2
\$\begingroup\$

For accurate color representation I use (or: accurate exposure and blacks/whites), I'm using a gray card that shows

  • middle gray
  • white
  • black

Example Image: Gray gradient Chart

While shootings products, I always take a reference photo from this card first. Then in post-production, I import the photos into Lightroom and:

  • take a white balance reading from the middle gray
  • slightly correct the exposure in case middle gray is not 50%, 50%, 50% (RGB, seen in Histogram)
  • adjust white and black slider, so the white on the card gets white and the black gets black

The settings for black and white are most commonly -50 and +50.

While I think the images should now be technically correct, the Luminance of the images is quite off and especially colors look way to harsh. The output from setting white/gray/black points in Photoshop Curves quite differs and looks way more realistic.

All images in RAW from a Sony A7II, converted to dng on import, profile corrections checked.

Q: How do you get accurate white/gray/black points based a gray gradient map for the most realistic product images possible?

Please also explain, why black and white sliders fail to get the result in Lightroom.

\$\endgroup\$
5
  • \$\begingroup\$ I've seen it that some cards come with a software that can be run as a plugin that analyses the image with the card and creates the adjustments automatically. \$\endgroup\$
    – null
    Commented Sep 10, 2016 at 8:09
  • \$\begingroup\$ @null I already considered this method with e.g. the xrite ColorChecker Chart. It creates camera profiles. However it should be also possible with a normal gray gradient chart. My Question is more about why Lightrooms White/Black sliders fail although they sound to be the technically correct solution. Also I don't think the Color Profile Method actually adjusts b/w points as Camera Calibration Profiles in Lightroom generally don't do this, afaik. \$\endgroup\$
    – ptmr.io
    Commented Sep 10, 2016 at 8:31
  • \$\begingroup\$ Adobe Camera Raw and Lightroom apply by default a tone curve to your images for better presentation and rendition ( docs.google.com/spreadsheets/d/…) This will get in the way of any precise and controlled adjustment you might want to perform as their effect will be highly non linear. This post should be of interest for what you are trying to achieve: triplegangers.com/index.php/blog/cat/technology/post/… \$\endgroup\$
    – Kel Solaar
    Commented Sep 10, 2016 at 8:54
  • \$\begingroup\$ @KelSolaar your comment is very helpful. It really seems that this default tone curve pushes the highlights way too far which then leads to this luminance effect. I will adjusting the tone cure with help of the post you mentioned. But this leads me to one more question: wouldn’t a color profile with a Color Checker Chart like mentioned above also lead to a similar effect? \$\endgroup\$
    – ptmr.io
    Commented Sep 10, 2016 at 9:47
  • \$\begingroup\$ @KelSolaar while this method somehow works, you would have to overexpose while shooting by 1 stop then add about 66 white and black. Looks similar to setting white/gray and blackpoint in photoshop curves. \$\endgroup\$
    – ptmr.io
    Commented Sep 10, 2016 at 10:33

2 Answers 2

1
\$\begingroup\$

The answers of Kel Solaar and RyanFromGDSE are pretty right. After hours of testing I found the correct workflow.

Here is how to get the most accurate colors from RAW-Files, afaik:

  1. Take a photo of a color checker (this case: x-rite color checker passport) and your products
  2. Get the RGB values (see: xritephoto.com)
  3. Download the Adobe DNG Profile Editor
  4. Import your pictures Into Lightroom
  5. Create a DNG Calibration Profile with the X-Rite Software (in Lightroom: Export > ColorChcker Passport)
  6. Open the DNG Profile Editor
  7. Click on Base Profile > Choose external Profile
  8. Choose the newly created profile under %appdata%/Adobe/CameraRaw/CameraProfiles (Windows)
  9. Go to Tone Curve
  10. Check Show Base Tone Curve
  11. Now Chose from Base Tone Curve select field the option Linear
  12. Click File > Export and give it a name you remember
  13. Restart Lightroom
  14. Under Camera Calibration apply the new flat profile (and Profile Corrections, if needed - you do not need to white balance the image perfectly)
  15. Open the images as layers in Photoshop and put the Colorchecker Image on top
  16. Click Edit > Convert to profile > sRGB
  17. Click Image > Mode > 8 Bits/Channel
  18. Create a Curves Adjustment Layer on top
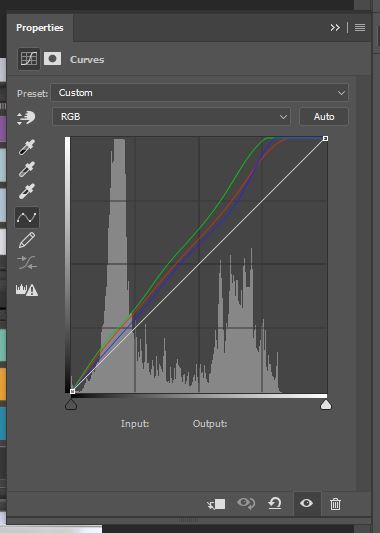
  19. Choose the "Hand-Tool" of the Adjustment Layer and click on every gray-tone to set a point for every Color Channel (RGB) separately (!)
  20. Now adjust the 18 points to match the RGB values of the value sheet (see: xritephoto.com)

Your curve should now look similar to this:

Adjusted flat curve

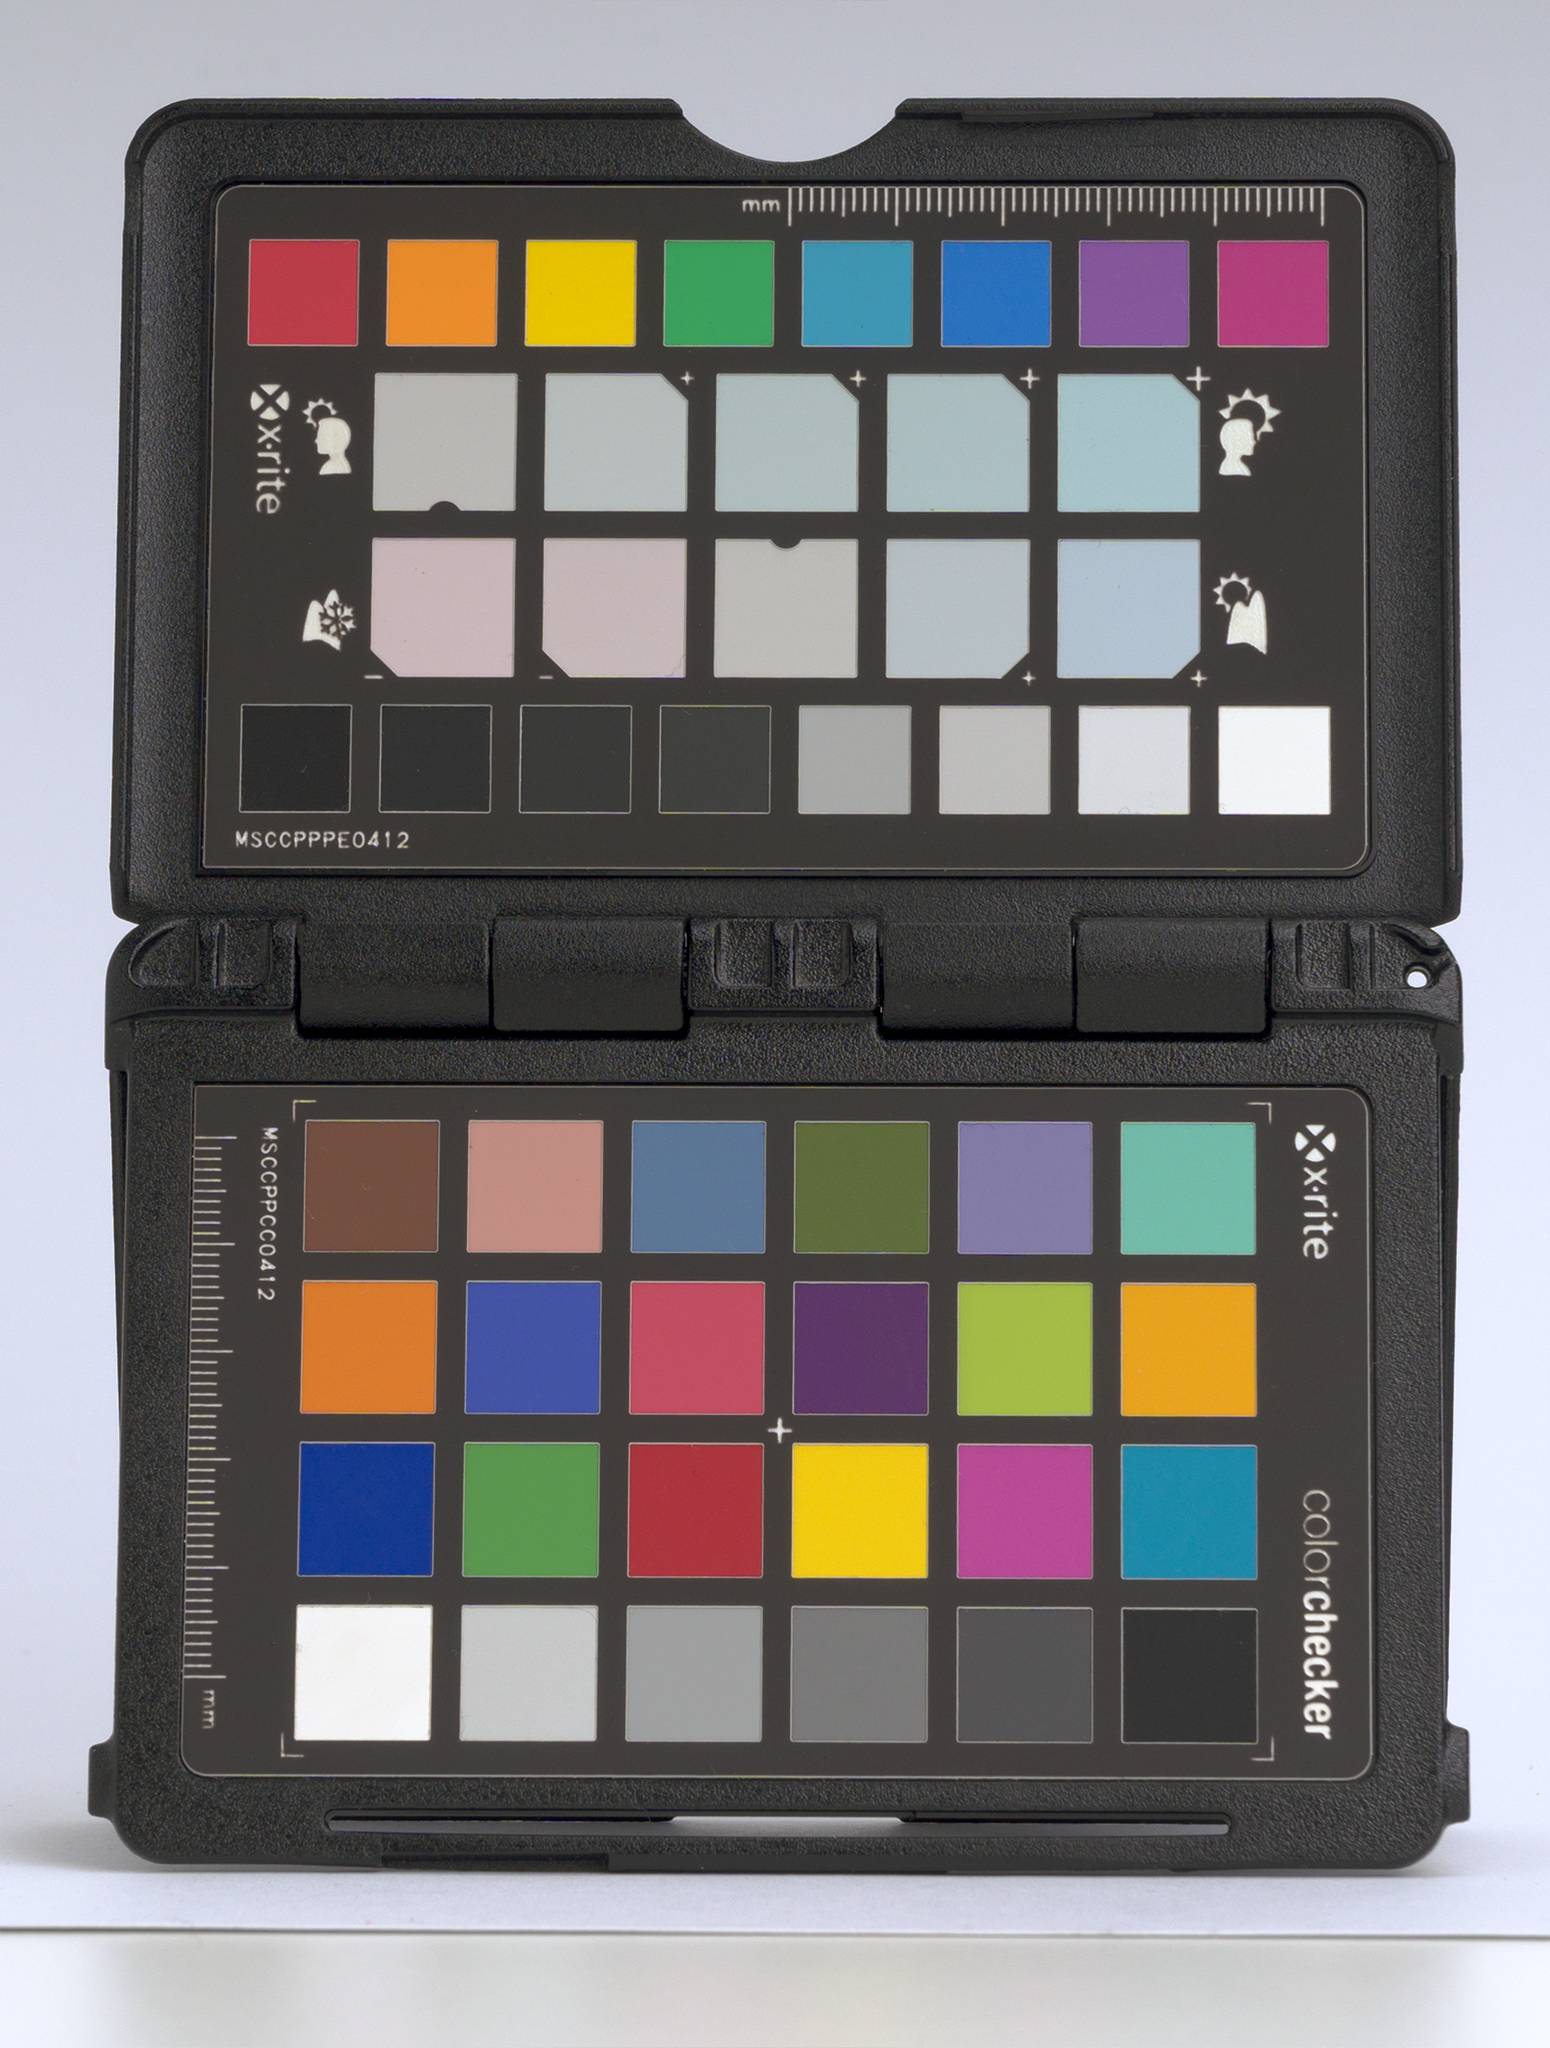
Each and every color should now only differ a little bit from the colorchecker RGB values. I guess that small difference is hardly to eliminate.

Final color checker with accurate colors

Simply apply the Curve Adjustment Layer to your other layers (actual product photos) and you will get the most accurate product photos, you possibly can get.

To answer the second question: This isn't possible in Lightroom, because of that non-flat RAW-Curve, Adobe automatically applies (I guess to make pictures more pleasing). Other RAW-Converters may be more appropriate, however I did not test it.

More details on flattening the curve: triplegangers.com

\$\endgroup\$
0
\$\begingroup\$

First off, you need to know what your particular Gray Card, White Point, and Black Point actually are. Then personally I would manually adjust for it within Photoshop if colors are critical for product. A White Card and Black Card doesn't usually go to pure white or pure black, so if you're adjusting to those that is probably one of the issues. A pure black is much too deep and would absorb color casts while and a pure white would always be blown out making both useless. Again, the first step is knowing what your particular gray card actually is. This is where a well calibrated and documented one like an X-Rite Color Checker Passport is so beneficial.

Beyond that each Raw Processor varies a bit. CaptureOne by PhaseOne has much better RAW default settings and colors which is why for professionals that value color accuracy it is preferred to Adobe Camera Raw or Lightroom for that portion of the workflow.

\$\endgroup\$

Your Answer

By clicking “Post Your Answer”, you agree to our terms of service and acknowledge you have read our privacy policy.

Not the answer you're looking for? Browse other questions tagged or ask your own question.