13
\$\begingroup\$

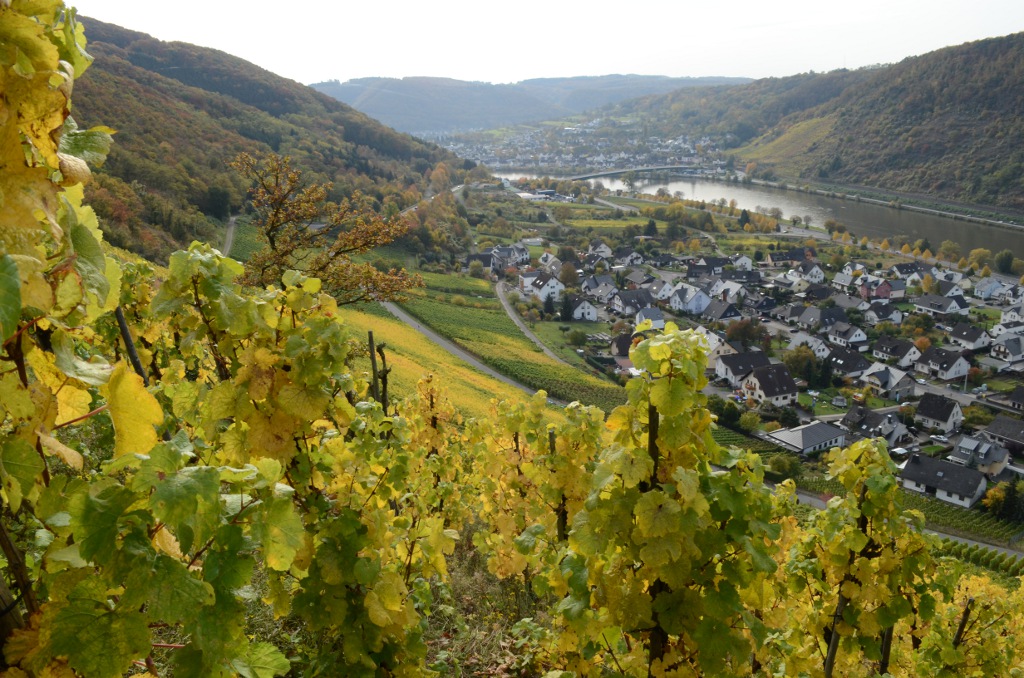
I'm currently trying to learn landscape photography. The biggest issue I'm currently facing is blown out skies.

I take most of my photos while hiking - so I can't always use the golden hours but have to take the photos right when I come across a good motive. So it is often around midday which results in the sky being blown out like in the following image:

blown out sky

What can I do to prevent the sky from being blown out when taking the photo (given the restrictions mentioned above)?

\$\endgroup\$
7
  • \$\begingroup\$ Hi Benedikt and welcome to the site. Your question is good and the example is very appreciated, but this is a topic alreay discussed in many questions. Have you already checked them out and found them not satisfying for some reason? Some examples: photo.stackexchange.com/questions/26303/… photo.stackexchange.com/questions/12324/… photo.stackexchange.com/questions/15204/… \$\endgroup\$
    – Francesco
    Commented Oct 22, 2012 at 8:33
  • 1
    \$\begingroup\$ In many of the questions I found using the search, the suggestion is "come back later" - but the way I shoot my photos that's something I can't do. Hence the seperate question. \$\endgroup\$
    – Benedikt
    Commented Oct 22, 2012 at 10:08
  • \$\begingroup\$ I think "come back later" is an important point for a general answer, but those other questions do all have answers covering what to do when you can't. \$\endgroup\$
    – mattdm
    Commented Oct 22, 2012 at 11:06
  • \$\begingroup\$ Besides "come back later" there's also in those that I checked the suggestion to use filters, or to use multiple exposures: those are two approaches possibly suitable for your case, too. \$\endgroup\$
    – Francesco
    Commented Oct 22, 2012 at 11:38
  • 1
    \$\begingroup\$ @Benedikt: those other questions could stand better answers. A bounty might be in order. \$\endgroup\$
    – mattdm
    Commented Oct 22, 2012 at 17:25

7 Answers 7

14
\$\begingroup\$

Here's a few methods I'm aware of:

Circular Polariser filter

A lot of the light from the sky is polarised during the day, so a simple CP filter can drastically cut down the amount of light you get, so that it doesn't blow out. You also get a lot of polarised reflections from vegetation and water, so this can cut glare and improve contrast throughout the image.

It doesn't always work, for example different areas of the sky will have different polarisations, so a really wide lens + CP filter will cause some dark/light patches across the sky (rather than consistent lighting) as the polarisation changes. My experience is that pointing closer to the sun, the CP filter does less, but if shooting away from the sun it can make a huge difference (some times too much, if you rotate it to get the darkest sky!).

Also this is pretty much useless if its overcast, as the reflections from clouds isn't polarised (though can make clouds really 'pop' if there's a mix of blue sky and clouds).

This works better on some lenses than others; if your front element rotates while zooming and/or focusing, it's going to be a bit of a pain to adjust the filter after any slight adjustments to either...

Graduated ND filter

Another filter is the Graduated ND (neutral density) filter. Basically its got a dark half and a light (transparent) half. You rotate it to get the dark half on the sky, and it can stop the sky saturating. I've not got a lot of experience with these, but they'll obviously work best if there's a clean horizon line somewhere towards the centre of your image. Even if it just stops the sky saturating to white, you can of course make some adjustments after if it makes parts of the sky a bit too dark/light.

Shooting Raw Images

The basic idea is that raw image files have more bits than the JPEG your camera makes (say 10-14 bits instead of 8). So it has more information in the highlights, and you can use your post-processing software to reduce those highlights down to a more realistic level, so it looks blue rather than white. This sometimes helps, especially if you underexpose a bit (so you have to lighten up the shadows too).

On really bright days its not going to be enough, as the dynamic range of your camera's sensor just doesn't cut it.

HDR / Tone Mapping

This is usually my last resort (since it requires a fair bit of time/effort in post processing), but basically you take a few shots at different exposures (it helps to have exposure bracketing, with varied ISO or shutter-speed between each) so that you have each part of the frame correctly exposed in one of your images (at least 2, but often 3 or 5, sometimes more if shooting at the sun, which can be bad for your eye/sensor!).

There's a lot of HDR software around, and new ones appearing all the time, so I won't recommend anything too specific, but the basic process is to combine the exposures into a single image with more than the basic 8-bits (or 10-14-bits depending on your DSLR's raw photos) of information per colour/pixel, which lets you bring down the highlights and bring up the shadows to compress the dynamic range into something more aesthetically pleasing.

There's a lot of HDR out there that looks really weird and surrealistic, but you can also create fairly natural looking HDR images too (though some of the cheap/free software is really geared towards the surrealism!).
\$\endgroup\$
6
  • 1
    \$\begingroup\$ Aaargh, raw isn't an acronym so it doesn't need capitalisation! \$\endgroup\$ Commented Oct 22, 2012 at 8:17
  • 5
    \$\begingroup\$ @ElendilTheTall — like it or not, it's the accepted usage, and the accepted usage rules all. \$\endgroup\$
    – user2719
    Commented Oct 22, 2012 at 9:03
  • 3
    \$\begingroup\$ Where is that written? It's not accepted by me that's for sure. \$\endgroup\$ Commented Oct 22, 2012 at 9:24
  • 6
    \$\begingroup\$ Both Canon and Nikon use an all-caps "RAW" in their product descriptions. \$\endgroup\$
    – Phil
    Commented Oct 22, 2012 at 15:32
  • \$\begingroup\$ All good points. Will fix this up as "RAW" seems specific to some manufacturers/marketing groups. \$\endgroup\$ Commented Oct 23, 2012 at 3:09
5
\$\begingroup\$

Try a 3-shot HDR if your camera supports Auto Exposure Bracketing... It's easiest if you are able to carry a tripod, but otherwise if you can learn to hold your camera steady you can still get usable shots. I have succeeded in a 7-shot HDR handheld. (Software that combines them like Photomatix have an option to auto-align). A common misconception with HDR is that you need to make it all crazy looking with over saturated colours and definition etc. This is not true, and merely an option. Shooting HDR will also let you produce very natural looking photos too, very much more along the lines of what you saw when you took it.

Of course, if you don't go that route then the aforementioned Graduated ND filters would probably be the best way to go... And ALWAYS shoot in RAW - this will allow you to recover as much as possible from the sky. Alternatively, expose for the highlights and then lighten the land details in the foreground.

\$\endgroup\$
4
\$\begingroup\$

This problem is caused by the shot having too much dynamic range; too much difference between the darkest and lightest parts of the image.

If you want to get the shot right in-camera, then you need a set of graduated neutral density filters. These limit the amount of light coming from a selected part of the image, so you essentially have two exposures in one shot. The accepted answer here explains them in more detail.

You can also try the black card technique, but this is more useful for seascapes.

Nowadays, however, it is much more common to fix this issue in post-production. Again, you have a couple of options depending on what software you have available.

Better raw processors like Lightroom and Adobe Camera Raw have software versions of graduated ND filters - gradient masks that allow you adjust the exposure of the sky independently from the rest of the image.

However, these can still result in the very brightest parts of the sky blowing out, so if you want to achieve absolutely perfect results you need to look at exposure blending and perhaps even HDR. Basic exposure blending involves taking two shots: one exposed for the sky and the other for the foreground. You can then composite the two shots together in a program like Photoshop or GIMP. The full process is detailed in this Photo SE blog post.

You can also look at going full HDR (High Dynamic Range), where you take multiple shots with slightly different exposures (say, 3 stops either side of a 'middle ground' exposure) so that every detail is captured, then blending them in dedicated software like Photomatix. This is obviously a more complex process, and it is often extremely overdone, but when done well it can produce stunning results.

\$\endgroup\$
0
\$\begingroup\$

While Shooting: Graduated ND-filters, these filter out light from one half of the picture, working against the over exposure.

Post Production: Try playing with the recovery slider in lightroom. If you shoot in RAW-format you might get some details back.

\$\endgroup\$
0
\$\begingroup\$

You basically have 4 choices:

  1. Shoot a darker picture so the sky isn't blown out - this will have the unfortunate side effect of also making you foreground darker.

  2. Deal with it in post - Shoot raw, set the camera to the brightest exposure where there are no blown highlights (same picture as option 1) and then brighten the foreground back in post - it may be possible to do with the sliders in lightroom or you may have to use something like Photoshop to process (mostly set curves) the foreground and background separately.

  3. Use HDR (there's a reason HDR is so popular with landscape photographers)

  4. Use a graduated ND filter, this will work well when the horizon is mostly flat.

\$\endgroup\$
0
\$\begingroup\$

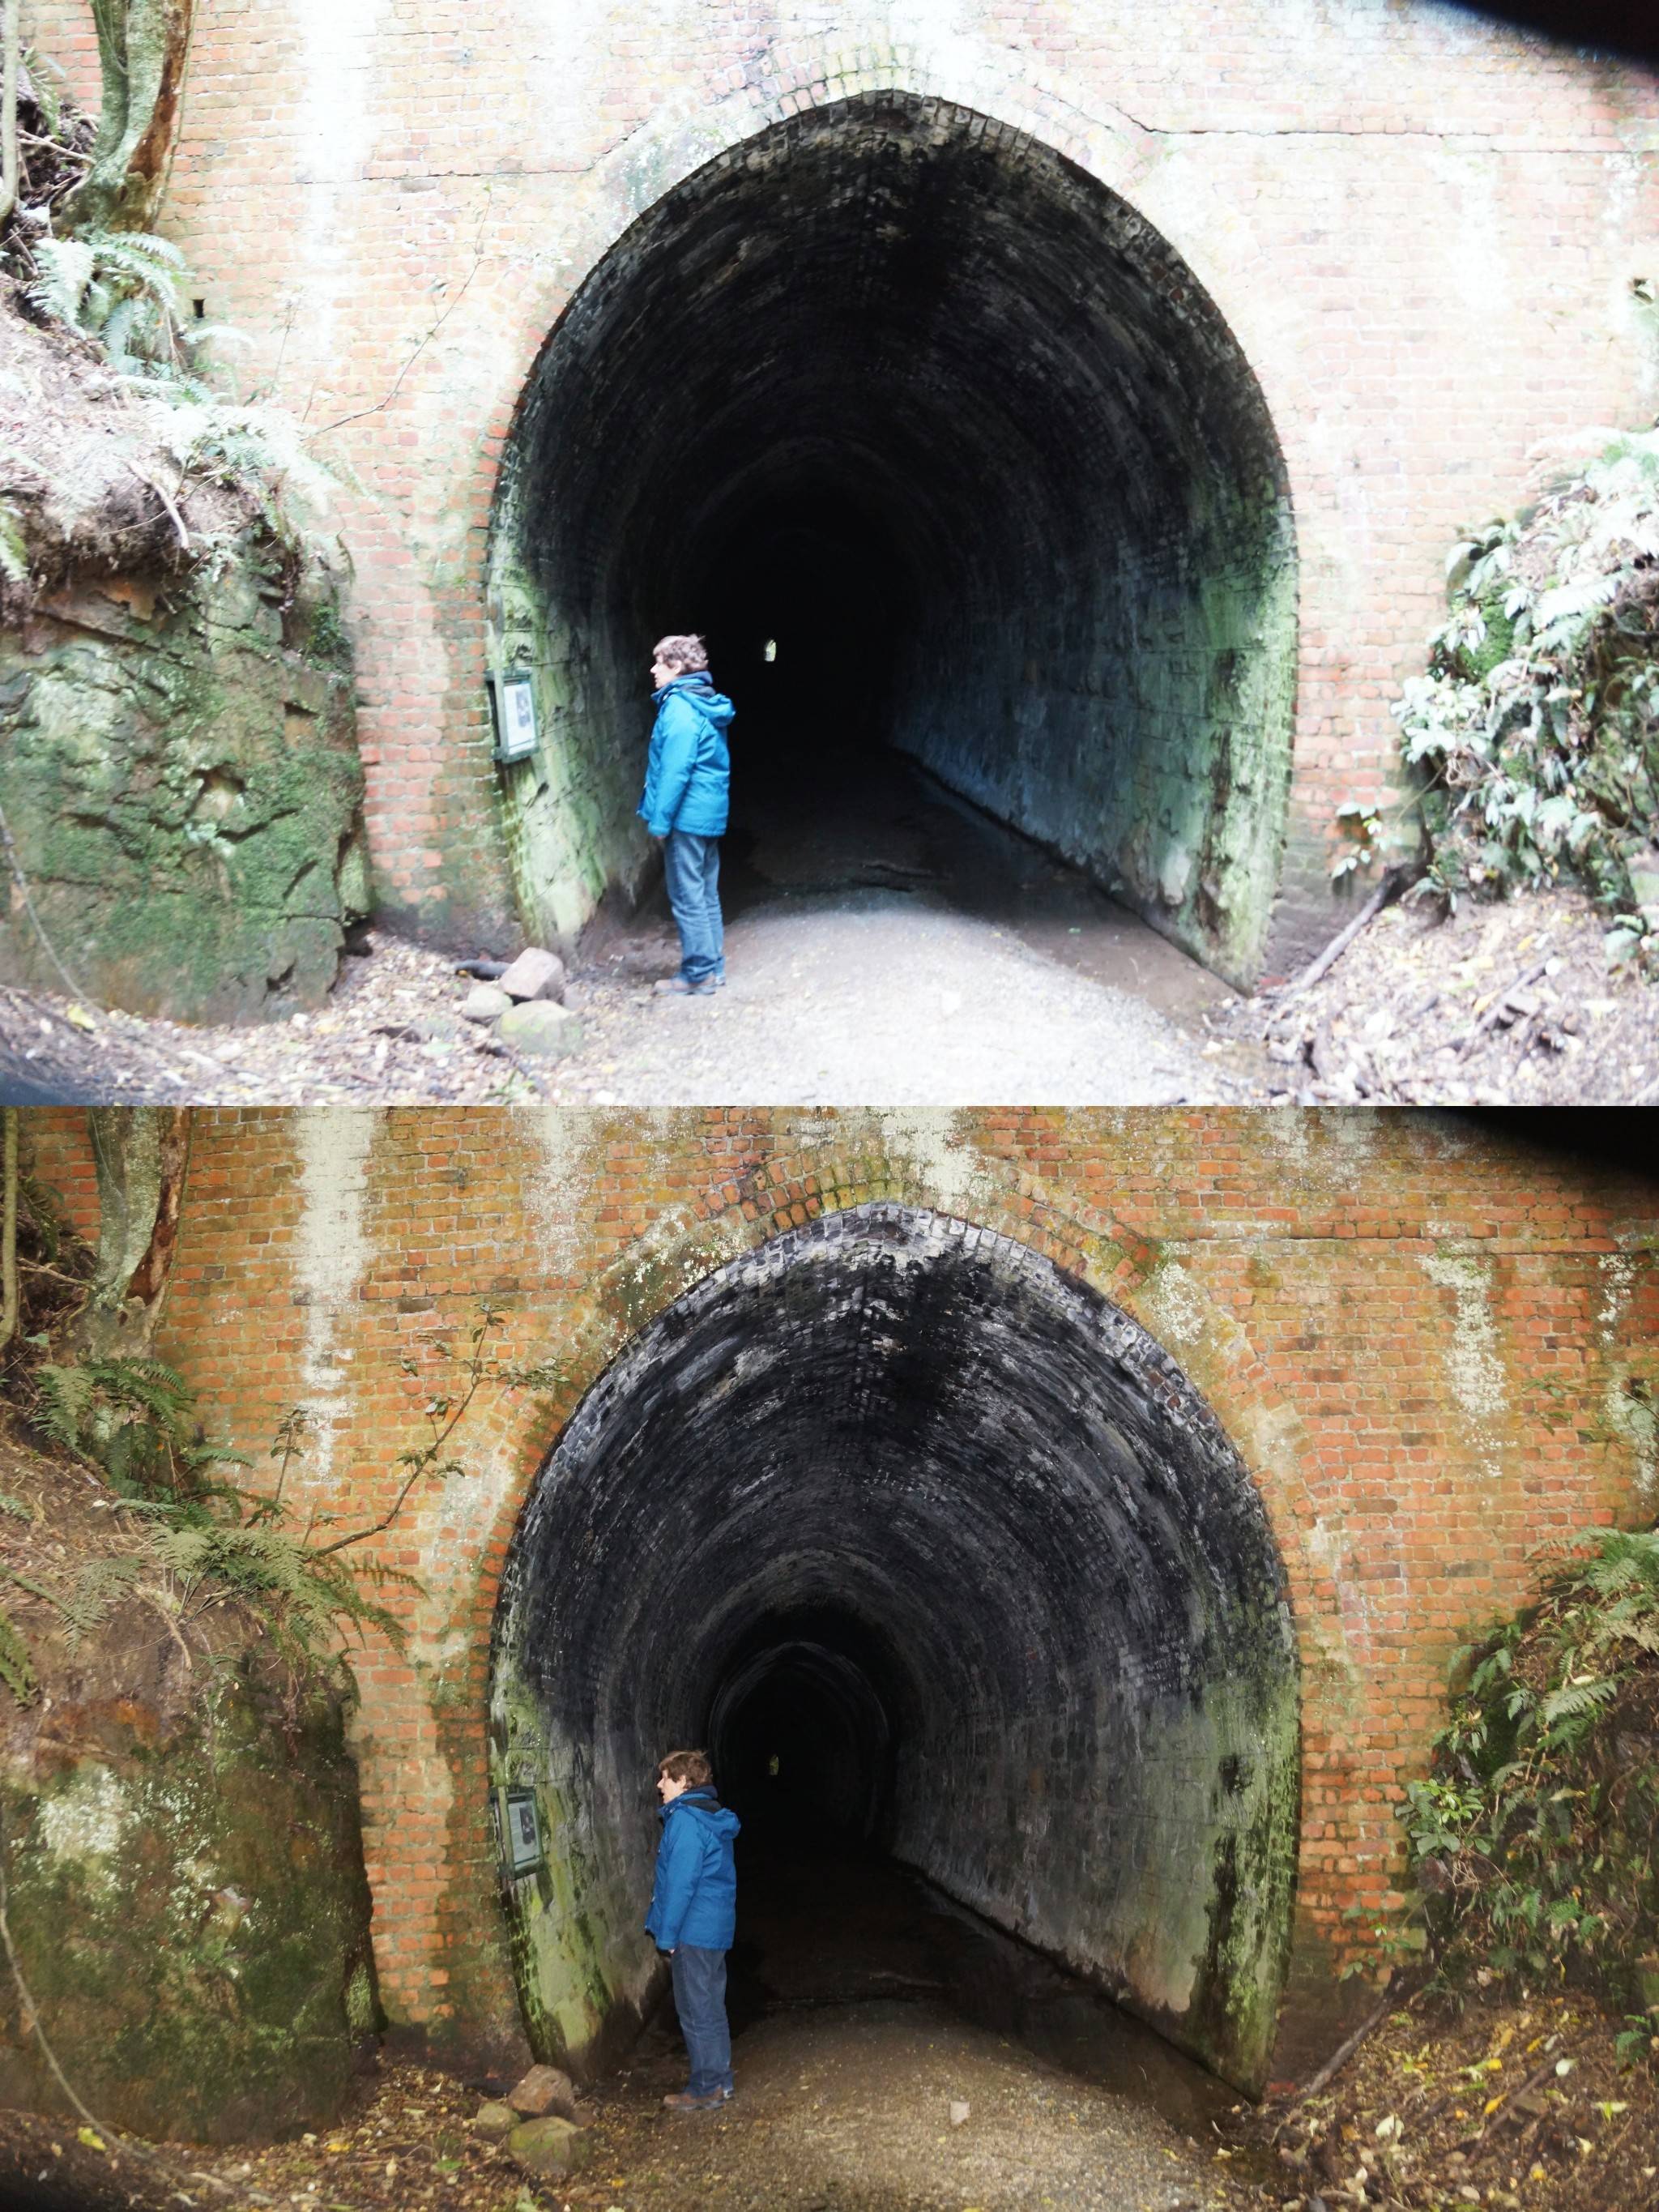
Similar dynamic ranges - Sky:Landcsape / Landscape:tunnel

HDR has been mentioned by several people for landscape use.

No sky, but ... - The photos below have, very clearly, no sky in them BUT but provide an excellent example of much greater than usual dynamic range in a scene and of how HDR improves the ability to handle wide dynamic range.

Standard disclaimer applies :-) - no photographic merit claimed for shots etc*.
These were taken on a recent holiday - an old 260 metre rail tunnel used by a logging railway is accessible for public inspection (and deemed 'public safe' some 100 years or so on).

Single exposure / overexposed to try to improve low light areas:
The top photo is a conventional image. It has been over exposed drastically to try and bring the tunnel light levels up, without great success.

HDR with notional +/- 6EV range improvement:
The lower photo is an in-camera processed 3 image HDR with 6ev change in exposure level between each photo - thereby adding a notional 12 bits of dynamic range to the 13 or so provided by the camera sensor (Sony A77) for a notional total of 25 bits of dynamic range. Even if it adds only another 6 or 8 bits it's well beyond what the very best sensors available this side of orbit can achieve.


.....Top Photo: massively overexposed - still no dark detail:
Bottom Photo: 3 exposure HDR:

enter image description here


*The vignetting at top right and bottom left is caused by a cracked lens hood which had rotated slightly, unnoticed. (How to crack a lens hood the hard way is another story ...).

\$\endgroup\$
0
\$\begingroup\$

I do something different than what has been mentioned above. I have no technical knowledge about cameras (exposure, filters, etc.) but I use image softwares a lot.

Taking your photo as an example, I would take the same photo (with the horizon on top and little sky visible), then another one shifting the camera upwards (horizon in the middle), then a third again shifting upwards (horizon on the bottom). Then you would have three different photos 1. with overblown sky 2. normal sky 3. sky fully detailed. Then I would use a photo stitching program to blend them all together. You then get a composite with all the details of the sky as well as the scenery. Then cropping to your desired frame, and tone mapping for better effect. I usually take more than three photos.

It does take more time in post processing, but less while taking the photos. And for breathtaking landscapes it's really worth it, brings out the wow effect.

\$\endgroup\$
1
  • \$\begingroup\$ Please note: This answer will only work with auto-exposures and is a variant of combined bracketing and stacking. \$\endgroup\$
    – flolilo
    Commented Nov 28, 2017 at 23:47

Your Answer

By clicking “Post Your Answer”, you agree to our terms of service and acknowledge you have read our privacy policy.

Not the answer you're looking for? Browse other questions tagged or ask your own question.