When your camera adjusts your settings (aperture, shutter speed, and/or ISO) to get a certain exposure value it is basing those decisions on the tone of the image (different from color).
It could be any color, but the tone should average out to be 18% grey (thus the use of grey cards that are 18% grey). So if you had a bright white vs a dark white you would experience the same issues as you would bright green vs dark green.
If you have an image that is supposed to be predominately bright then the camera will darken it to reach 18% grey so you need to adjust your exposure to be brighter to compensate. Conversely, if your image is predominately dark the camera will brighten your image to get to 18% grey and so you need to lower your target exposure to fool the camera into getting the correct exposure.
This is why people use manual. If you are shooting a light skinned person with blonde hair and a white shirt against a dark background and that person takes up most of the frame the camera will darken the image and you can set your target exposure (Av and Tv modes) to get the correct brightness. However, if you move forward, backwards, or side to side and change how much of the frame your model takes up in the picture then it can change how your camera calculates the exposure. Using manual this won't happen (the meter will bounce around as it predicts changes, but the meter in manual mode is just a guide and doesn't actually do anything).
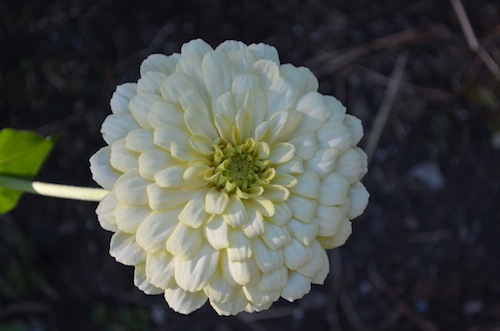
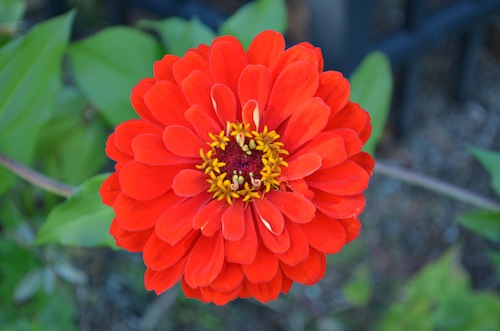
In your case the white flower is bright so the camera darkens the whole frame to reach 18% grey, thus the darker than normal background. In the case of the red flower, the flower was darker so it made the whole frame brighter which raises the background to be overexposed as well.


non white plants. The portrait mode over exposed the flower color (well the color was lighter than what it should have been for a lightly violet flower), I fixed that in manual mode but then the surrounding was a little darker than it actually was. \$\endgroup\$