M1
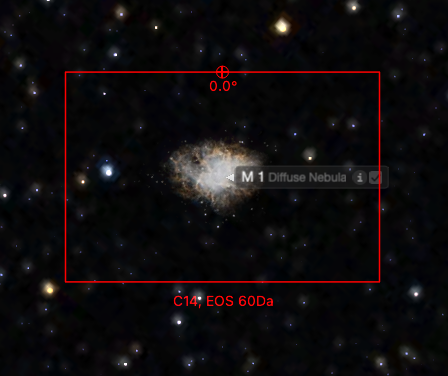
Before delving too deep ... consider the size of M1. It is 6 arc-minutes edge-to-edge. Here is a simulated view of it that I generated using Starry Night Pro Plus:

The above field of view simulates what you could capture using a camera that has an APS-C size sensor (e.g. my Canon 60Da) if attached to a Celestron C14 Schmidt-Cassegrain Telescope. This is a 14" aperture f/11 telescope with a 3910mm focal length.
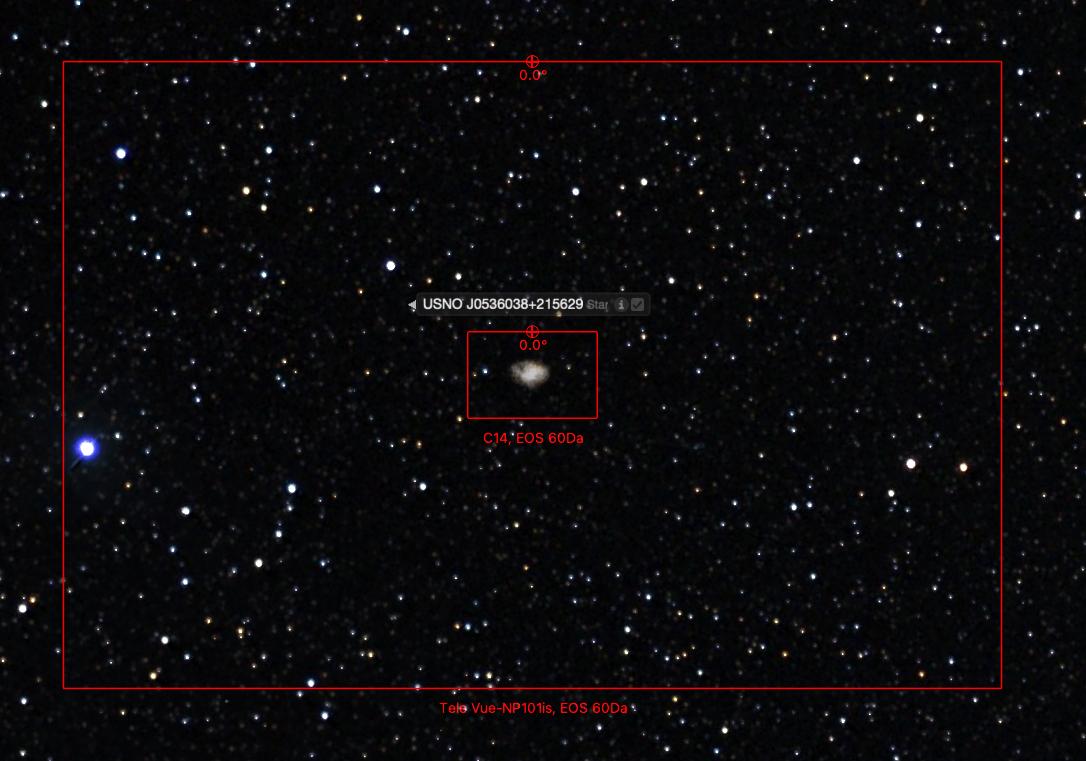
Here is another field-of-view generated for a 540mm refractor:

While the above image used a telescope, you could achieve similar focal length with a camera lens. But ... you can see at those focal lengths M1 is just a smudge in the center of the frame. You wouldn't expect to see detail.
When using shorter focal lengths I tend to look for wider-field subjects (or sometimes several nearby subjects).
Focus
Canon uses "exposure simulation" when using live-view. I use live-view only to focus the camera, then use software to control a series of long-exposures for imaging.
Everything in space is focused at infinity. You can achieve focus by picking anything in space (it doesn't need to be near the object you plan to image), then move to your subject (without changing focus) and begin shooting.
To focus a Canon camera, put the camera in Manual exposure mode, set the ISO to max ISO, set the aperture to wide-open (if using a lens ... can't adjust this when using a telescope), and set the exposure duration to 30 seconds. This maximizes the brightness of the live-view display to make it easier to see stars (you'll only see the brighter stars ... so pick a bright one.)
If using a lens, switch to manual focus mode and adjust the focus so it is near the "infinity" focus for that lens (if you don't do this then blurred stars wont up at all and you'll be looking at a blank live-view screen).
Adjust focus to get try to get the star down to pin-point size. Use the live-view "zoom" feature to magnify to 10x and adjust focus again.
Be patient doing this step... I am guilty of getting it the point where it looked pretty good to me ... and started shooting. Only to get home later and realize that everything was just a little soft. I recommend setting the ISO and exposure settings back to sane values and take a few test shots ... then inspect and MAGNIFY them to verify you really are happy with the focus before you continue.
To get really precise, pick up (or make) a Bahtinov focusing mask (https://en.wikipedia.org/wiki/Bahtinov_mask). The mask causes bright points of light to form diffraction spikes along three different axes. When you achieve perfect focus, the spikes will all converge at a common center point.
The downside of a typical Bhatinov mask is that it is solid with slits cut into it ... and this means it is blocking a little over half of the light. So what few bright stars you can find at all... get even dimmer. LonelySpeck (I am not affiliated in any way ... although I do own one of their filters) makes a clear slide-in filter that is etched much in the same way that a Bhatinov mask is made ... and it does the same thing (produces diffraction spikes that help focus). But since it is a clear filter with etched lines it allows all the light to pass ... so stars don't get dimmer when you try to use it. The downside is that it is a square "slide-in" type filter and this requires a filter bracket and adapter ring to attach to your lens -- these aren't common equipment. Most photographers don't own them and many local camera stores don't even carry them (the major camera stores do).
Tracking
Faint-fuzzies need long exposures. But since the Earth is spinning, it will drift in the field of view unless it is on a tracking mount.
Earth rotates at just over 15 arc-seconds per second. Since M1 is roughly 6 arc-minutes across, each 4 seconds would shift it by a full arc-minute. In 24 seconds it would have moved it's own width.
Exposures for deep-space faint-fuzzies are usually many minutes long ... 5, 10, even 15 minutes.
Tracking during long exposures is complicated by both the precision of the tracking mount and the precision of it's polar alignment. Generally an auto-guider system is necessary (I typically do not use an auto-guider at low-ish focal lengths -- e.g. around 500mm, but do use them at high focal lengths -- e.g. around 2000mm) The guider uses a separate camera and you select a star near the object you want to image. It takes a new exposure ever few seconds (e.g. maybe every 3-5 seconds) and compares the location of the tracked star to a master frame to determine if it is has moved in the frame. If it has, a correcting movement is sent to the mount.
If you are just beginning to learn astrophotography, then starting with larger wide-field subjects is easier because they can be captured with camera lenses or short focal-length telescopes and usually don't need the complication of adding auto-guiding.
Without needing to invest in a solid equatorial telescope mount, you can use a tracking head that attaches to a regular photo tripod. Sky Watcher and iOptron both make tracking mounts that are popular. For telescope mounts, things get expensive. The telescope mount quality is easily the single most important piece of equipment (more than the telescope and more than the camera).
You can search AstroBin.com as a resource for learning. Most astrophotographers who post their work to AstroBin include, telescope, camera, exposure info, and if and what filters may have been used. This can give you a pretty good idea of what you might need to achieve similar results.


