0
\$\begingroup\$

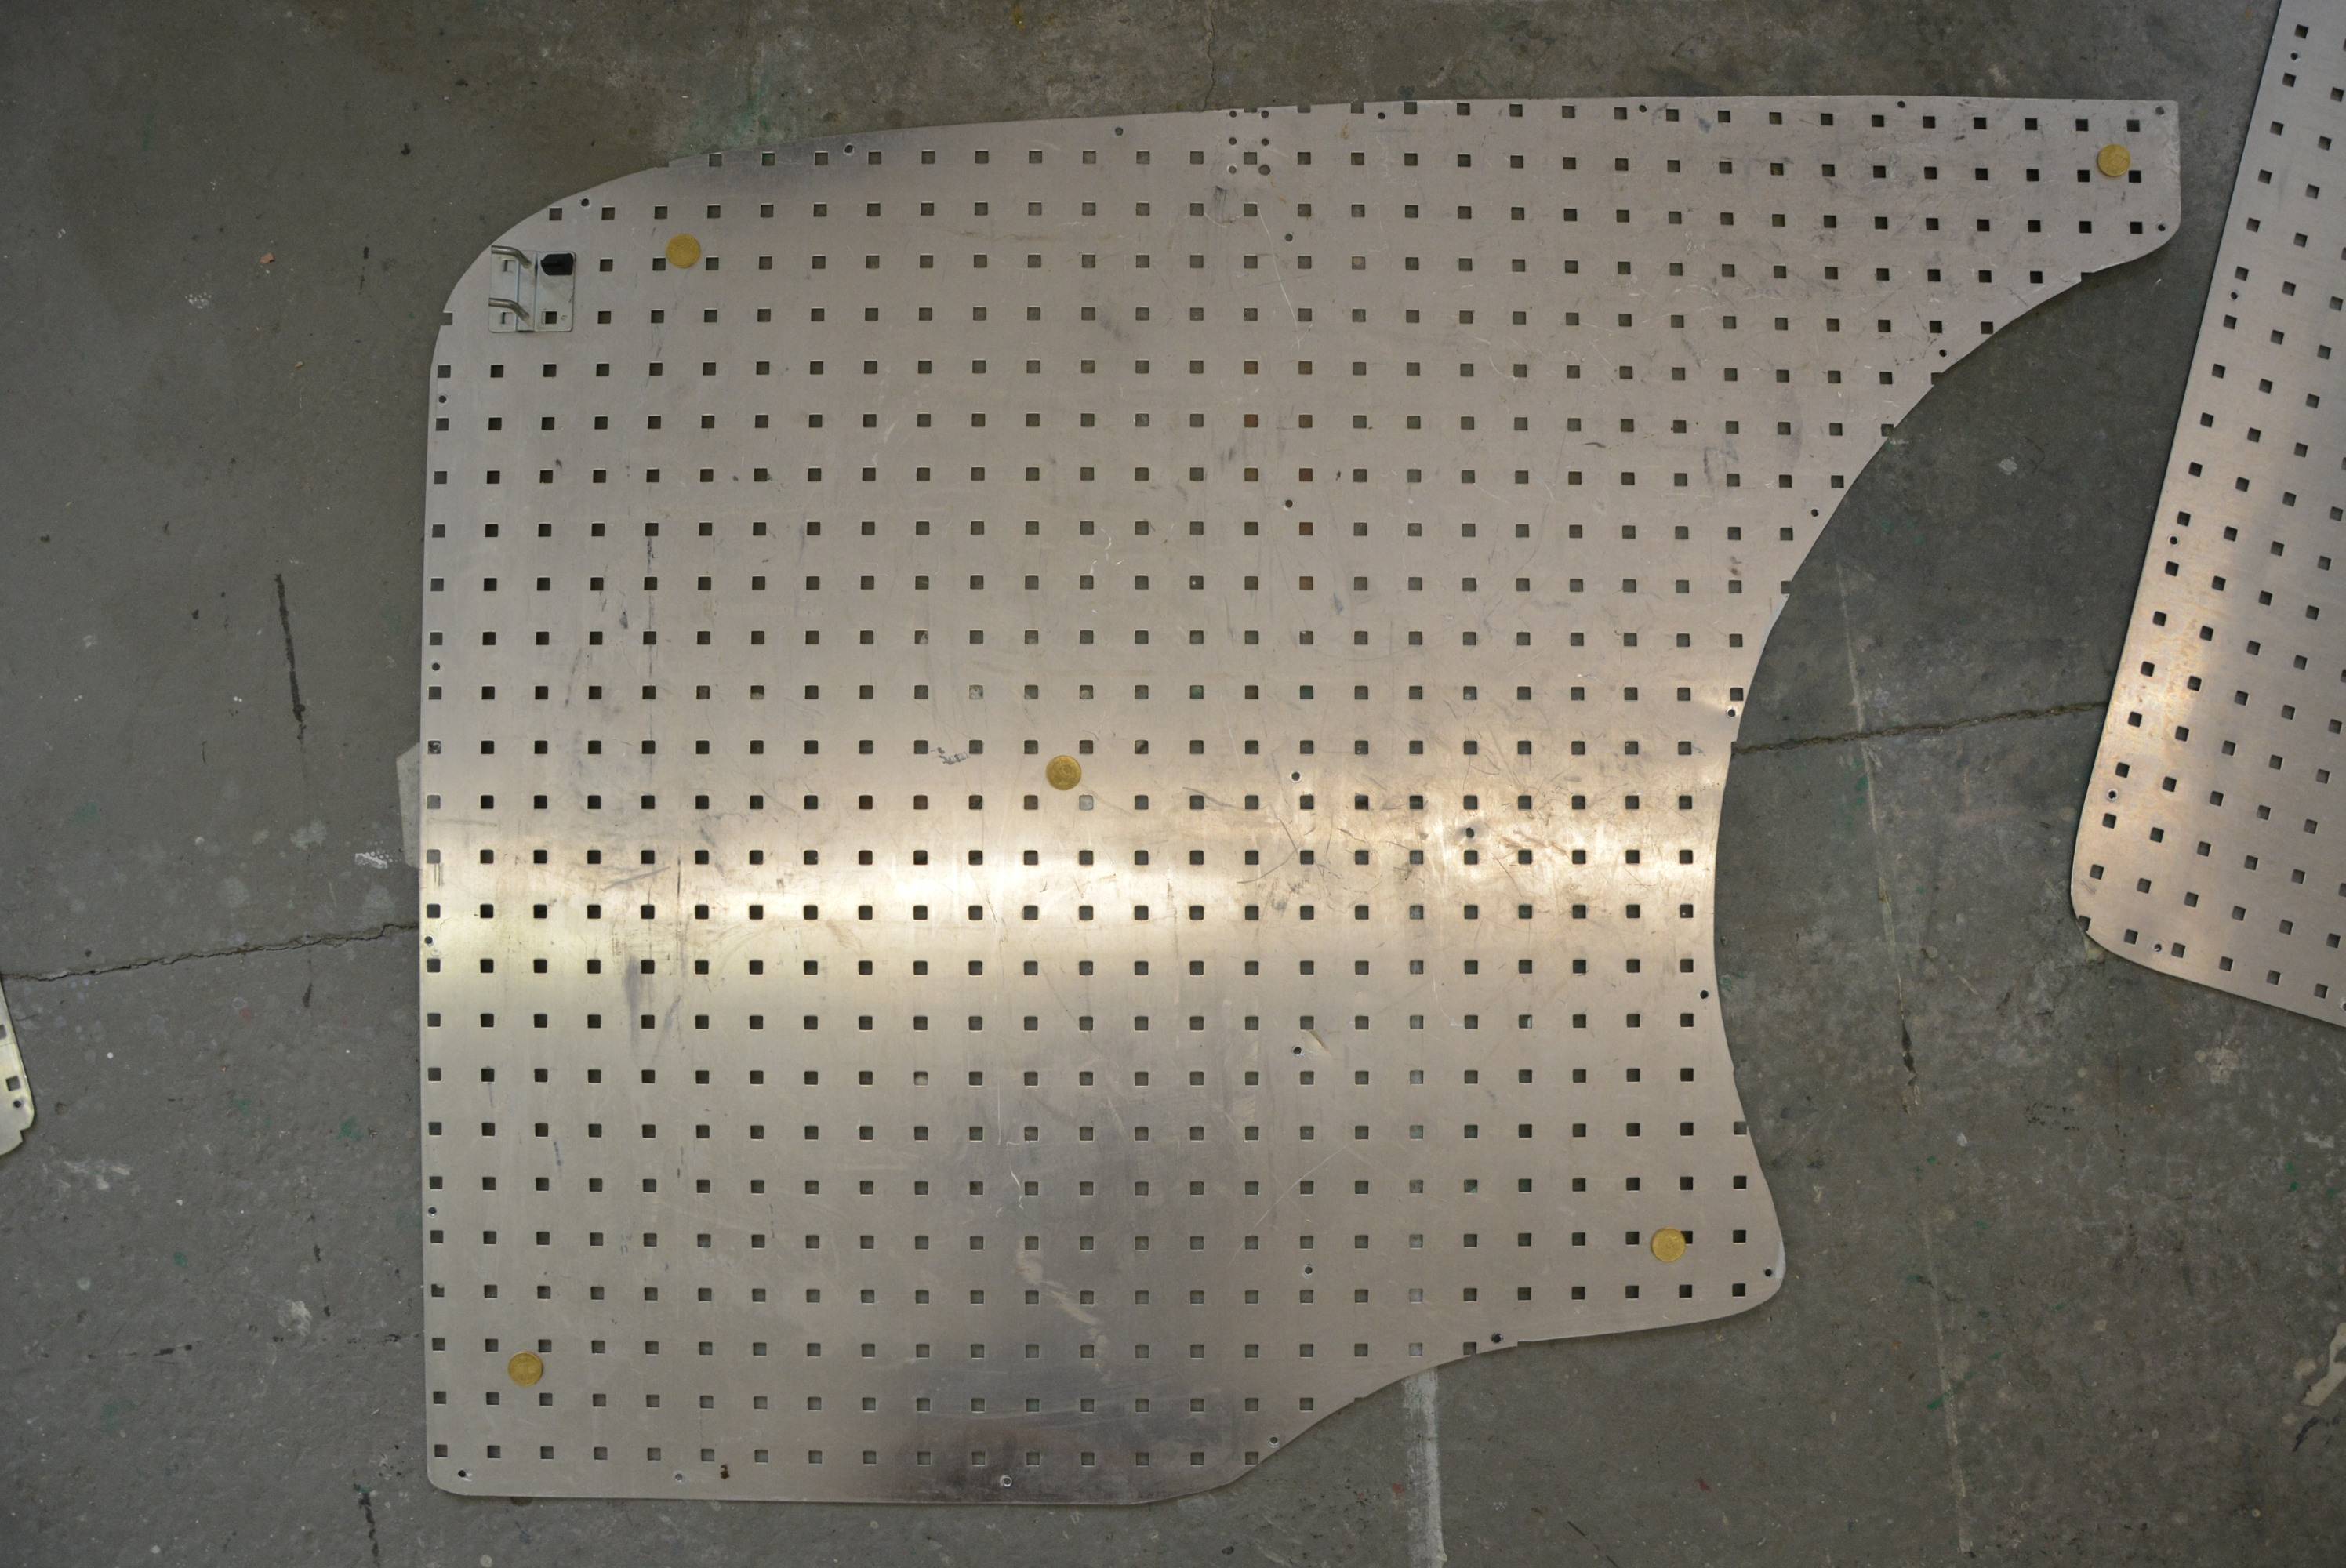
I made some pictures of my inner panels of my van (VW T5) because I would like to convert them to a vector graphic. My intention is to use the data in order to produce my own CNC cut spare parts.

I placed 50 cent coins at the center and the edges and as expected the images are quite distorted. It is possible to correct for lens distortion by calibrating the camera (e.g. using OpenCV). Unfortunately, I did not adjusted the position of the camera while I took the pictures.

Is it possible to correct the distortion due to the unknown distance and angle of view using the coins after I corrected for lens distortion ?

If I calibrate the lens distortion using OpenCV, what is the best setup ? I guess the camera should be orthogonal to the chess board ?

enter image description here

\$\endgroup\$
4
  • \$\begingroup\$ Is the camera facing straight down? \$\endgroup\$
    – null
    Commented Apr 9, 2016 at 20:53
  • \$\begingroup\$ I do not have a ready solution for this, but I'd say something about this specific image: you'd better place it on a black background to make holes drawn better, and, instead of using coins, you may use the holes as guides as they look aligned. In other cases, you may paint the part slightly and project laser net onto them and use it as guides for straightening (parts should be planar for that of course) \$\endgroup\$ Commented Apr 10, 2016 at 9:27
  • \$\begingroup\$ If accuracy is important, why not draw it in a vector image app like Illustrator, Inkscape or a CAD program? You would just need to measure the lines and curve radii and reproduce them in the software. That way you'll get exactly what you want without the fiddling around. I suspect if you start with a photo, any vector image you convert it to will never be quite right. \$\endgroup\$
    – HamishKL
    Commented Apr 12, 2016 at 9:21
  • \$\begingroup\$ Yeah, thought about it. I am more confident with computer stuff than with geometric algebra. I will try both approaches and update this question with the results. \$\endgroup\$
    – Moritz
    Commented Apr 13, 2016 at 9:21

2 Answers 2

1
\$\begingroup\$

I won't answer the original question about correcting the image, because in my opinion a coin is not good enough.

Instead my workflow would be

1) Use a sheet of paper with a printed grid. Like a flip chart paper used in presentations.

This is because you need aditional information like a 90 degree angle.

2) You can put some marks with a marker, for example each feet. As I read, you need a lot of exactitude, so you can even print your own grid.

3) It is better to go further away than close. I would say at least 3 mts (6 would be great) If you can put them vertically on a wall with the paper behind it (use some tape).

You can have an asistant to hold it. One finger or two on the photo won't be a problem.

Imagine the plane of the pice and move yourself so you are "perfectly" perpendicular to it. Get on your knees or lay down on the floor if necessary.

If you absolute need to have them in the floor, at least use a chair... But I prefer the wall method. I would only use a chair for small pices.

4) Use the longer focal length you have. It is ok if you do not fill the frame entirely. The distance is more important.

It is better to have a small non distorted image than a big distorted one.

5) Now you have enough data to copy and paste the image on a vector program like Corel, Ilustrator or Inkscape. Size, angle, alignment.

\$\endgroup\$
1
  • \$\begingroup\$ Basically I did that in the end. Similar you explained. I used the grid of the metal itself to check if everything is aligned. Seems to be so. Plotting in 1:1 will tell me the deviation. I used a ruler instead of a sheet of paper. \$\endgroup\$
    – Moritz
    Commented Jun 21, 2016 at 18:24
-1
\$\begingroup\$

Photoshop has great tools to correct lens distortion and has developed a lot of profiles to adjust lens distortion. Also Lightroom has an adjusting tool. If you shot your pics with a smartphone or any mpu-enabled camera, you should find angle and focus distance in the EXIF data, then you should be able with some math to achieve true dimensions.

\$\endgroup\$
2
  • \$\begingroup\$ I used a plugin for gimp. Worked well. But I have to test how exact I can reproduce the shapes. \$\endgroup\$
    – Moritz
    Commented Jun 21, 2016 at 9:48
  • \$\begingroup\$ That's fine for lens correction, but how does this answer most of the question about perspective correction? \$\endgroup\$
    – scottbb
    Commented Jun 21, 2016 at 20:46

Your Answer

By clicking “Post Your Answer”, you agree to our terms of service and acknowledge you have read our privacy policy.

Not the answer you're looking for? Browse other questions tagged or ask your own question.