27
\$\begingroup\$

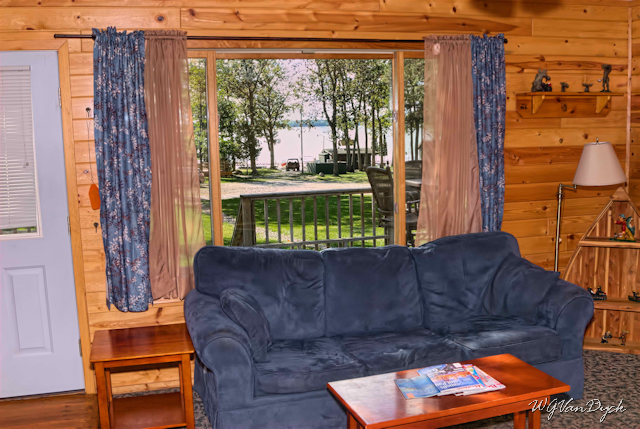
I sometimes find I want to photograph a room showing the view outside the window. This is tricky — either you adjust the shutter speed so that the the window is so bright you can see no detail, or the room looks very dark and gloomy.

Are there any techniques I can use to get the best photo showing as much as possible of both room and view?

My camera is a Sony Nex3, and for this sort of thing I usually use it with an elderly Pentax-M 1:2.8 / 28mm manual focus lens with an adaptor, although I would be prepared to buy another (cheap manual!) lens.

\$\endgroup\$
4
  • \$\begingroup\$ related: photo.stackexchange.com/q/27232/8756 \$\endgroup\$
    – Meysam
    Commented Apr 3, 2013 at 10:29
  • \$\begingroup\$ Yeah, I think this isn't a duplicate, because the other one really wants a photo of the (curtained) window itself, which is a rather specific and narrow situation rather than this general one. \$\endgroup\$
    – mattdm
    Commented Apr 3, 2013 at 13:08
  • \$\begingroup\$ Fill flash pictures added. \$\endgroup\$ Commented Apr 7, 2013 at 11:26
  • \$\begingroup\$ Although I have not been able to try it myself, I'd imagine Russel's solution #5 probably yields the most natural-looking results. It is very tempting. Otherwise, blending multiple shots does enable you to have the indoor images with the natural light. Anyway, when we see things indoor during the day we can see what's outside simultaneously. I never cease to admire the human eye's ability. \$\endgroup\$
    – user19249
    Commented Apr 9, 2013 at 8:02

5 Answers 5

28
\$\begingroup\$

Any camera is going to struggle with the dynamic range of that sort of situation. Very hard to get the room and the outside both exposed reasonably at the same time. With enough flash power you can do it by flooding the room with light I suppose.

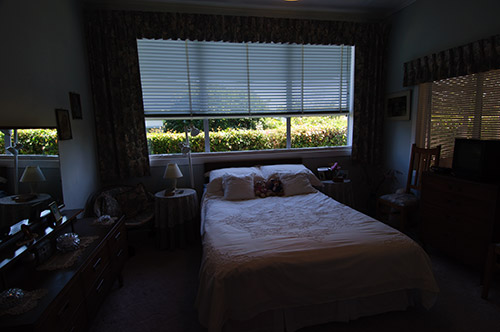
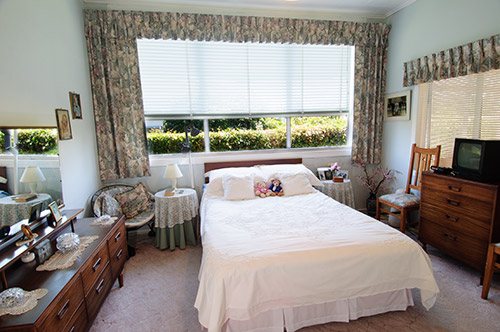
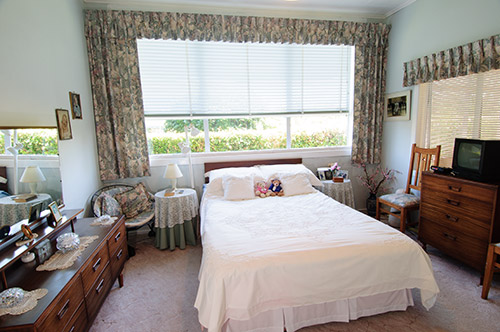
But the easier way is to use a tripod and take two exposures, one for the inside and one for out, and blend them together in your editing tool. I think it's best if you leave the outside exposure pretty bright, otherwise it looks fake.

You can use HDR, but if you have a few windows that are easy to mask, I'd just blend two exposures manually.

Simple example:

Light exposure for the room

enter image description here

Dark exposure for the outside

enter image description here

Blended exposure

enter image description here

\$\endgroup\$
3
  • \$\begingroup\$ Brilliant, am slapping my forehead that I didn't think of that! Will try it. \$\endgroup\$
    – user19102
    Commented Apr 2, 2013 at 12:17
  • \$\begingroup\$ Interesting that you chose the window on the right and the blinds in the main window from the bright exposure but the reflection of the main window in the mirror on the left from the dark exposure. Perhaps a medium third exposure for the blinds in both windows would look even more natural? \$\endgroup\$
    – Michael C
    Commented Apr 2, 2013 at 22:30
  • 3
    \$\begingroup\$ I did a much more careful selection when I originally shot these last year. The above are quick re-edits from the original files, so not much thought went into details like that. I also popped flash into the corners and blended that in when I originally did it. The blinds would probably be good with something like a 50% opacity blend from both exposures. \$\endgroup\$
    – MikeW
    Commented Apr 2, 2013 at 22:38
16
\$\begingroup\$
  1. HDR

  2. Flash fill such that flash deals with inside view and ambient deals with exterior.
    Juggle to suit. See photo example below.

  3. Long exposure with a manually moved mask between light and dark to balance exposures. There is a whole art-form based around doing this.

  4. Multiple exposures and manual combining. Can be reasonably easy with tripod due to sharply defined exterior / interior spaces in many cases.

  5. Stan Rogers old time solution - stick ND material over windows on outside !!!!!!!!! [Wow!].

  6. Handy pocket Mr Fusion halogen lamp. Hard to come by. So far.
    One or more 100 Watt CFL tube (about 400 W - 500 W tungsten equivalent output) makes a fair not too dear reasonably compact stand in. (They sold these here (in NZ) for some years but have stopped doing so.

  7. Long exposure with multiple manual flash washing. Takes some experience but you can differentially illuminate target area. I have never done this "in anger" with a flash but using an LED or other lamp to "wash" an area at night with long exposure can be great fun and even useful.


Photo: With and without fill flash. I had minimal time to 'play', so no effort made to optimise, and it uses on-camera flash. Given time I'd reduce flash level somewhat and better balance ambient and flash so some shadowing remains from eg phone on bed or grand old lady [tm]. [Note full flash reflection in window of room opposite - whoops.]

enter image description here

\$\endgroup\$
3
  • 3
    \$\begingroup\$ Thanks for saving me the time to post. (And it would probably be ND + CTO, since incandescent indoors was almost a given.) It's things like that that made it a lot easier to charge $5K for a shot in the '80s :) \$\endgroup\$
    – user2719
    Commented Apr 2, 2013 at 20:29
  • 1
    \$\begingroup\$ I had to give a +1 for item 5! \$\endgroup\$
    – Joanne C
    Commented Apr 3, 2013 at 1:57
  • \$\begingroup\$ @mattdm - Thanks - failed to notice numbering change. Strange system./ Putting nos in brackets works. \$\endgroup\$ Commented Apr 7, 2013 at 13:49
5
\$\begingroup\$

You've basically got three choices in such a situation:

  • Use artificial light to bring the interior brightness up enough that the entire scene is within your camera's dynamic range. Anything from on-camera flash to multiple strobes.
  • Take multiple images and combine them using one of several methods for compressing dynamic range. This could range from HDR with or without heavy tone mapping, to Exposure Fusion, to combining elements of multiple exposures by hand in Photoshop.
  • Use a combination of both.

There has been some debate about which approach yields the best results. Which you choose will depend on what you want your final image to look like.

This video, this article, and this Flickr discussion examine in detail what the different methods will wind up looking like.

\$\endgroup\$
1
\$\begingroup\$

A very easy one: Wait until dusk or dawn to take the photo.

\$\endgroup\$
2
  • 1
    \$\begingroup\$ Could add a bit more details, perhaps add some examples? AFAIK rooms go darker too in dusk, so the ratio will still be the same. With artificial lighting switched on, the white balance of light inside and outside will mismatch. \$\endgroup\$
    – Imre
    Commented Apr 3, 2013 at 20:53
  • \$\begingroup\$ @Imre The idea is to match artificial lightning inside with natural light outside. Of course you are right about the color temperature difference. If the effect is too ugly, you would have to correct it and use layers to correct the colors separately, much like the technique MikeW describes. In that case you could as well take two photographs and don't have to wait until dusk or dawn... \$\endgroup\$ Commented Apr 4, 2013 at 18:03
0
\$\begingroup\$

Set camera to it's MANUAL MODE and walk over and set the exposure (shutter, aperture, and ISO) to the scene outside the window (just what you see out the window and no interior).

Set your flash to AUTO or FILL. Move to a position where the flash will not reflect (from a window, mirror, hanging photo, or any other reflective surface) directly back at the camera. Take the shot.

Evaluate the photo on your camera's LCD screen. If the interior is a little darker than you want, increase the flash output.

I have used this method on both DSLRs and Point & Shoots (with MANUAL MODE ability). While I have gotten very good results using JPEG files out of the camera, the best ways to deal with this type of photo is to shoot it in RAW where you have much greater post editing ability.

From a resort shoot that I did using a Nikon D200 and an Olympus XZ-2 a couple of years ago. Both cameras worked very well using this method.

\$\endgroup\$
1
  • \$\begingroup\$ Ok. This works, but using the camera flash is the worst lighting you can produce, so it is not a pretty image U_U \$\endgroup\$
    – Rafael
    Commented Sep 8, 2017 at 20:38

Your Answer

By clicking “Post Your Answer”, you agree to our terms of service and acknowledge you have read our privacy policy.

Not the answer you're looking for? Browse other questions tagged or ask your own question.