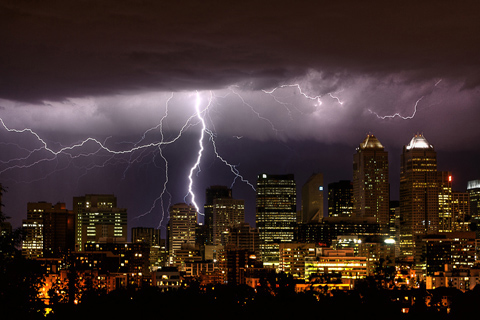
There are several ways to approach capturing lightning. What other elements you choose to include in the frame and how comfortable you are combining images in post processing will determine some of your decisions regarding exposure times, aperture, etc.
You need to mount the camera on a tripod and use a cable release if available. One with a timer is even better. Mirror lockup isn't really needed unless you are using an extremely long lens, and it makes it more difficult to use a wired remote for continuous shooting. Make sure your battery has plenty of charge, as you will be taking many exposures. Set up under a roof if at all possible by shooting out of an open window or from a patio or balcony with a roof. Leave yourself an easy path to a safe refuge if the lightning moves close to your location.
If there are moving objects in the field of view then wider apertures and faster shutter speeds will be the way to go. If the objects in your field of view are stationary you can use narrower apertures and longer shutter speeds which increase the chance of capturing a bolt of lightning in any particular frame. The narrower aperture will also increase the depth of field so that you have a better chance of the lightning being in sharp focus. I prefer to select an aperture near my camera's Diffraction Limited Aperture (f/10.2 on my Canon 5DII), calculate the hyper-focal distance for the focal length and aperture (or refer to a chart), and manually focus using Live View x10 on an object at that approximate distance. Alternately, you can focus on an object (like a large building) near where the lighting is occurring and then switch the lens to manual focus to keep it there.
Most storms that produce lightning also have high winds that move the clouds at a rapid pace. If the clouds are at a distance and moving across your field of view this will not be as much of an issue, but if they are closer and moving towards you it may limit your maximum exposure time. Be sure you are saving your files in RAW format. Set your camera to Manual exposure. Select a low ISO. Set the aperture and shutter speed you desire and take a test shot. Adjust the exposure by increasing or decreasing the shutter speed until your histogram places your highlights around 0 to +1. If you are shooting at night, don't be concerned if the histogram is heavy on the left side, you don't want the darkness to appear as a medium gray. Once you have found the proper exposure begin taking a series of photos one right after the other. This is where the timer can help. You can also set the camera to continuous shooting mode if your cable release allows the button to be locked down. Continue taking photos until the storm has passed or until it gets too close. Safety first! No photo is worth being struck by lightning! If the lighting moves within a couple of miles (3 kilometers) it is time to go inside.
Once you have all the shots and have imported them into your editing program you can select the ones that captured lightning. Most of your shots will not. Batch process the shots you like so they have a consistent white balance, contrast, saturation, etc. You can combine several exposures if you want using a variety of programs.


