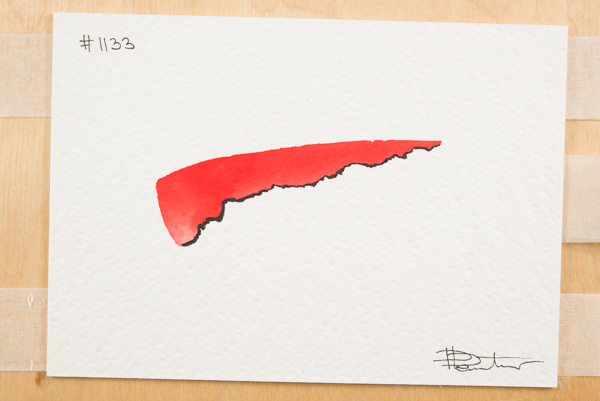
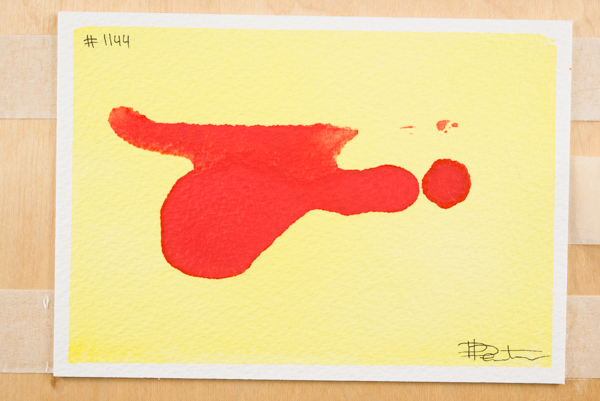
I am trying to shoot my art, and colors seem off, more specifically pale. I am aware I can adjust settings manually since I shoot in RAW, but I feel like if I get exposure and white balance and profiling, I should have to edit manually colors - I need objectivity throughout all my art.
So here is my setup:
Nikon D750
Macro Lens 60mm
Xrite ColorChecker Passport 2
2x ESDDI 800W and 5500K Soft Lights, Continuous Lighting LINK
Del Monitor, calibrated with i1Display Studio
Shooting Setup and Process:
Setup: I put the lights on both sides at 30 degrees from the plane I am shooting.
Camera Settings:
- Iso: 100 (i need high quality no grain)
- f-stop: 8 the focus depth is about right for art
- shutter: 1/15
Exposure: To get the right exposure, keeping those settings, I put up the 18% gray on the ColorChecker passport, focus on it manually with Point Metering, and make sure the exposure meter is at 0.
White Balance: I swap now to the White Balance Card on the color checker passport, focus on it, and set WB on the nikon to a d-1 preset that is based on this picture of the white balance card.
Color profile: I shoot now the color profile page of the x-rite ColorChecker. This would be used later for creating color profile through their plugin.
Shoot: I take out the color checker since I have already set everything and i put up my art for shooting. I shoot. NOTE: One thing I notice - exposure meter is off to the +++. Maybe that is natural since a relatively white and light art is brighter than the 18% gray. Correct?
Post Process:
I import everything in Lightroom classic. And here is what I get by default is terribly pale. Colors have no depth at all. Also, the paper has a slight yellow tint, which seems lost on the shot:
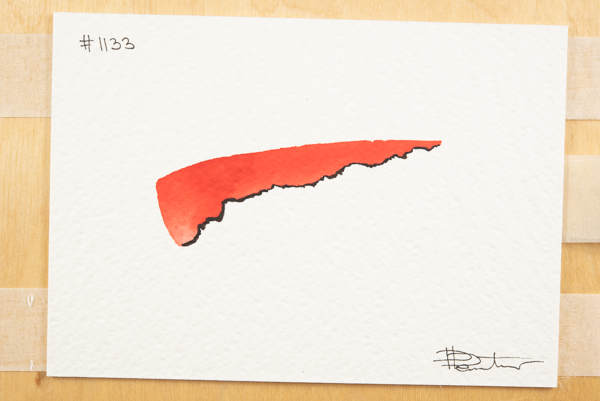

Next, I find the photo of the color checker colors. In lightroom I click "File>Export with Preset>ColorChecker Camera Calibration". This creates a profile, I restart LR as instructed.
However, this is still way off. Reds are not nearly as deep as the original. Paper is absolutely white instead of having slight yellow tint. And the yellow on the second picture is much paler that reality.
I was expecting that by this time both exposure and color should be right. Instead I am way off. I can't manually edit each, since I have hundreds of art pieces.
- After manually playing around tons of time, I get about the right results which should look like that:
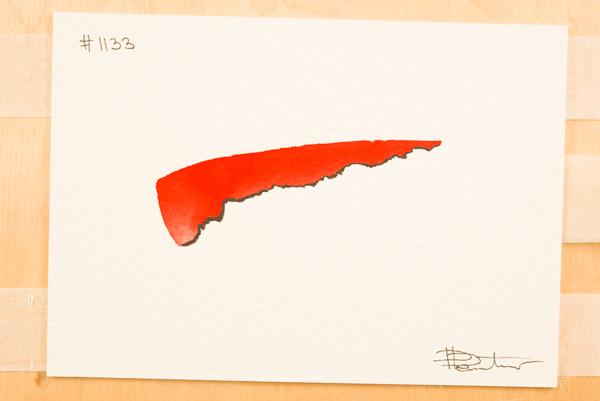
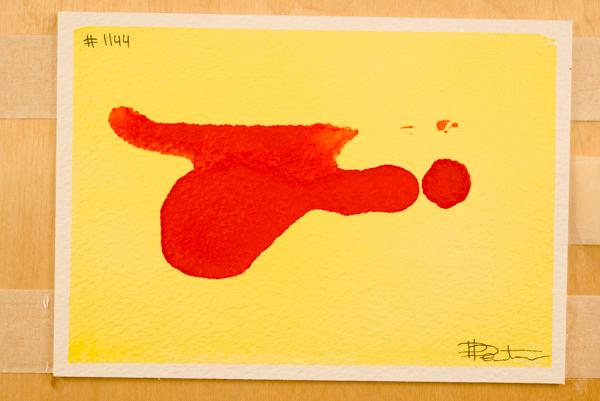
You can see how deep the red is, and this yellow background is totally coming up. But even with reducing the exposure I couldn't get the paper to look more "sepia".
In any case, manually adjusting for each is not an option, so I am searching for a wise person's advice on how to the get colors right without manual adjusting.
I would really appreciate if someone could jump in and pinpoint if I am missing a step! Thanks!

