Sunlight doesn't "drown out" colors, in fact it generally brings out truer color rendition than other light.
Unclouded sunlight can produce stark shadows, which is just another way of saying that the scene has high contrast or high dynamic range. Assuming a reasonable sensor, this is a issue for post-processing. For full sunlit scenes you generally have to bring up the logarithmic mapping to a higher level, and maybe increase the near-black value even more beyond whatever logarithmic mapping you do. Note that I'm not saying to bring up the black level. The darkest parts of the image should still map to black. The issue is what to do with the levels just above that.
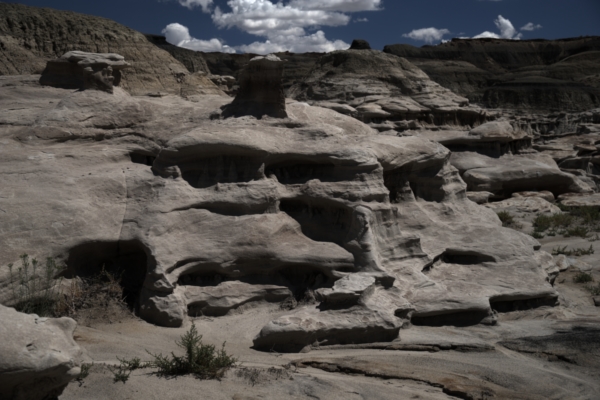
For example, here are some rock formations in full unclouded sunlight:

This picture is just the raw data linearly mapped to the output image, with the darkest area declared black, the lightest white, but keeping within the known color correction for sunlight for that sensor.
Taking the large dynamic range captured by the sensor and linearly mapping it to the much smaller range you can see on a print or on a screen is rarely the right answer. Humans perceive brightness logarithmically, so a logarithmic mapping to squash the dynamic range will look more natural to a human.
However, there is no absolute fixed way to map the wide dynamic range down to a smaller one logarithmically. That is because true black would be negative inifinity in log space. Usually you pick the darkest part of the picture to be full black on the output medium even though there was some light eminating from it. This "cheat" means you have to pick one parameter to decide how the linear image will be logarithmically mapped to the output. There are various ways to present this single degree of freedom. One way is to specify the ratio of how much more a small change in brightness at the black end of the range is amplified compared to the same small change in brightness at the white end of the range. I express this factor in powers of 2, like F-stops.
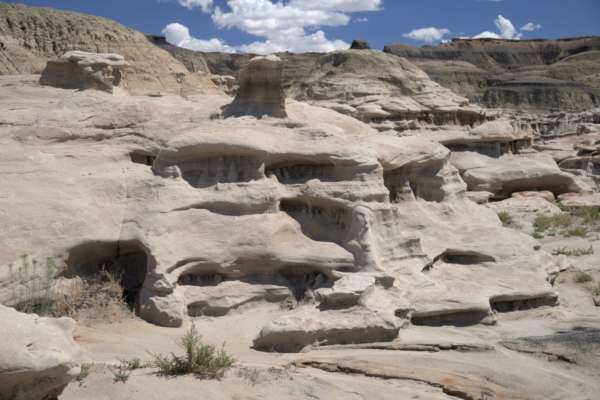
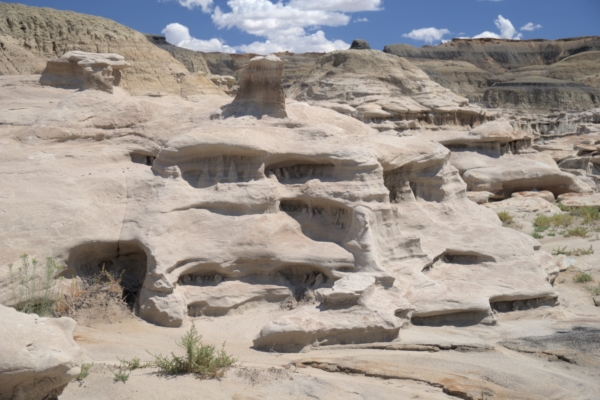
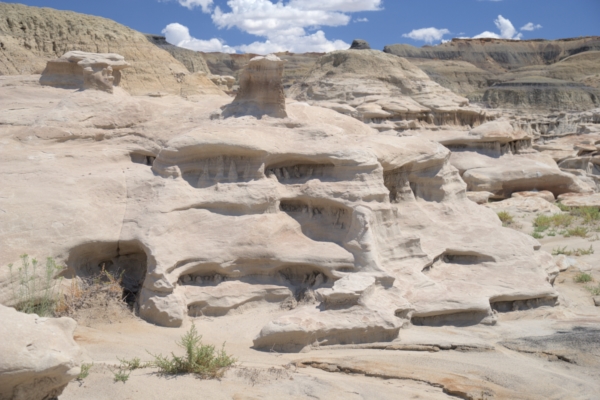
The following pictures had this logarithmic scaling applied with this parameter set to 4, 5, and 6. In other words the first picture has the darkest areas expanded by 16x compared to the lightest, and in the last picture that factor was 64x.


Other non-linear mappings can be combined with these. I often use another one that brights up the dark areas more while not effecting the light areas much at all. That one is a bit harder to describe mathematically.
However, the point is that high contrast or high dynamic range need not be a problem, as long as the sensor can capture the wide dynamic range in the first place. Which of the three pictures above is "right" depends on what you are trying to show, the overall look of the picture you are trying to convey, etc. You might prefer the first or second on if you are just trying to make a interesting picture, but the third might be better if it is for more scientific purposes where you want to show details, for example.
In any case, none of this is "drowning out" colors.


