4
\$\begingroup\$

I am totally new in the photography field and I need an expert help. I need to take very close-up pictures at school lab (counting the hairs on ant's head, I know its strange) for insect and ants classification. I do not have any experience and the more I read the less I know.

I have a Nikon D3200 camera with AF-S NIKKOR 18-105mm 1:3.5-5.6 G ED lens. I was told I could reverse the lens I could get decent close-up pictures, however when I tried (just holding the lens reversed manually without connecting it) I had to keep the aperture open with my finger which does not feel right. So, is there actually a way this could be solved? Also, I am very lost in all the rings and part I need to connect all the puzzle together. Could someone please please give me a "list" of things I would need to get to make this work?

Also, a friend told me about getting El-Nikkor 50mm 2.8N and put it in reverse, which seems like a good solution, but again, how can I connect it to the camera? Or would it be better / easier to use both these lenses at the same time and connect them somehow?

\$\endgroup\$
8

3 Answers 3

2
\$\begingroup\$

Due to the extremely small depth of field and high magnification, you will need:

  • A lens reversal ring (make sure you choose the right thread size) to mount the lens onto your camera backwards
  • A tripod to keep the camera stable

Even better if you can also get:

  • A Nikon BR-6 adapter
  • A Nikon AR-3 shutter cable
  • A lens whose physical and focal length don't change when you focus.
  • A wireless shutter remote

The BR-6 adapter goes on the back of your lens, and enables you to lock the aperture wide open. With the AR-3 shutter release cable, which screws into the BR-6 adapter, you can adjust the aperture yourself with a button you press down. You can set it to stay wherever you leave it; i.e. an any aperture. Unfortunately there's no aperture scale, though such a scale wouldn't be much use anyway since the f number is different when you mount a lens in reverse. These tools aren't required for an AF lens with an aperture ring that lets you adjust the aperture manually. But they are very handy for lenses without an aperture ring.

Another important consideration is that if you use a lens that changes physical length when you focus, then this can result in having to physically shift the tripod/camera every time you want to change focus.


Photos of Setup

Here's what the lens looks like with the reversal ring screwed in where a filter would normally go, and the BR-6 adapter attached:

enter image description here

At this point, you can lock the aperture either wide open or fully stopped down, but nothing in between. Unfortunately, the BR-6 doesn't provide this capability. Unless....

enter image description here

...you add an AR-3 shutter cable to it. Now you can push down the button to the desired aperture, and it will stay in place. The cable has the added bonus of not disturbing your camera as much when you want to adjust the aperture. The camera is very sensitive to slight movement when shooting macro.

Here's what the camera looks like with the adapted lens mounted:
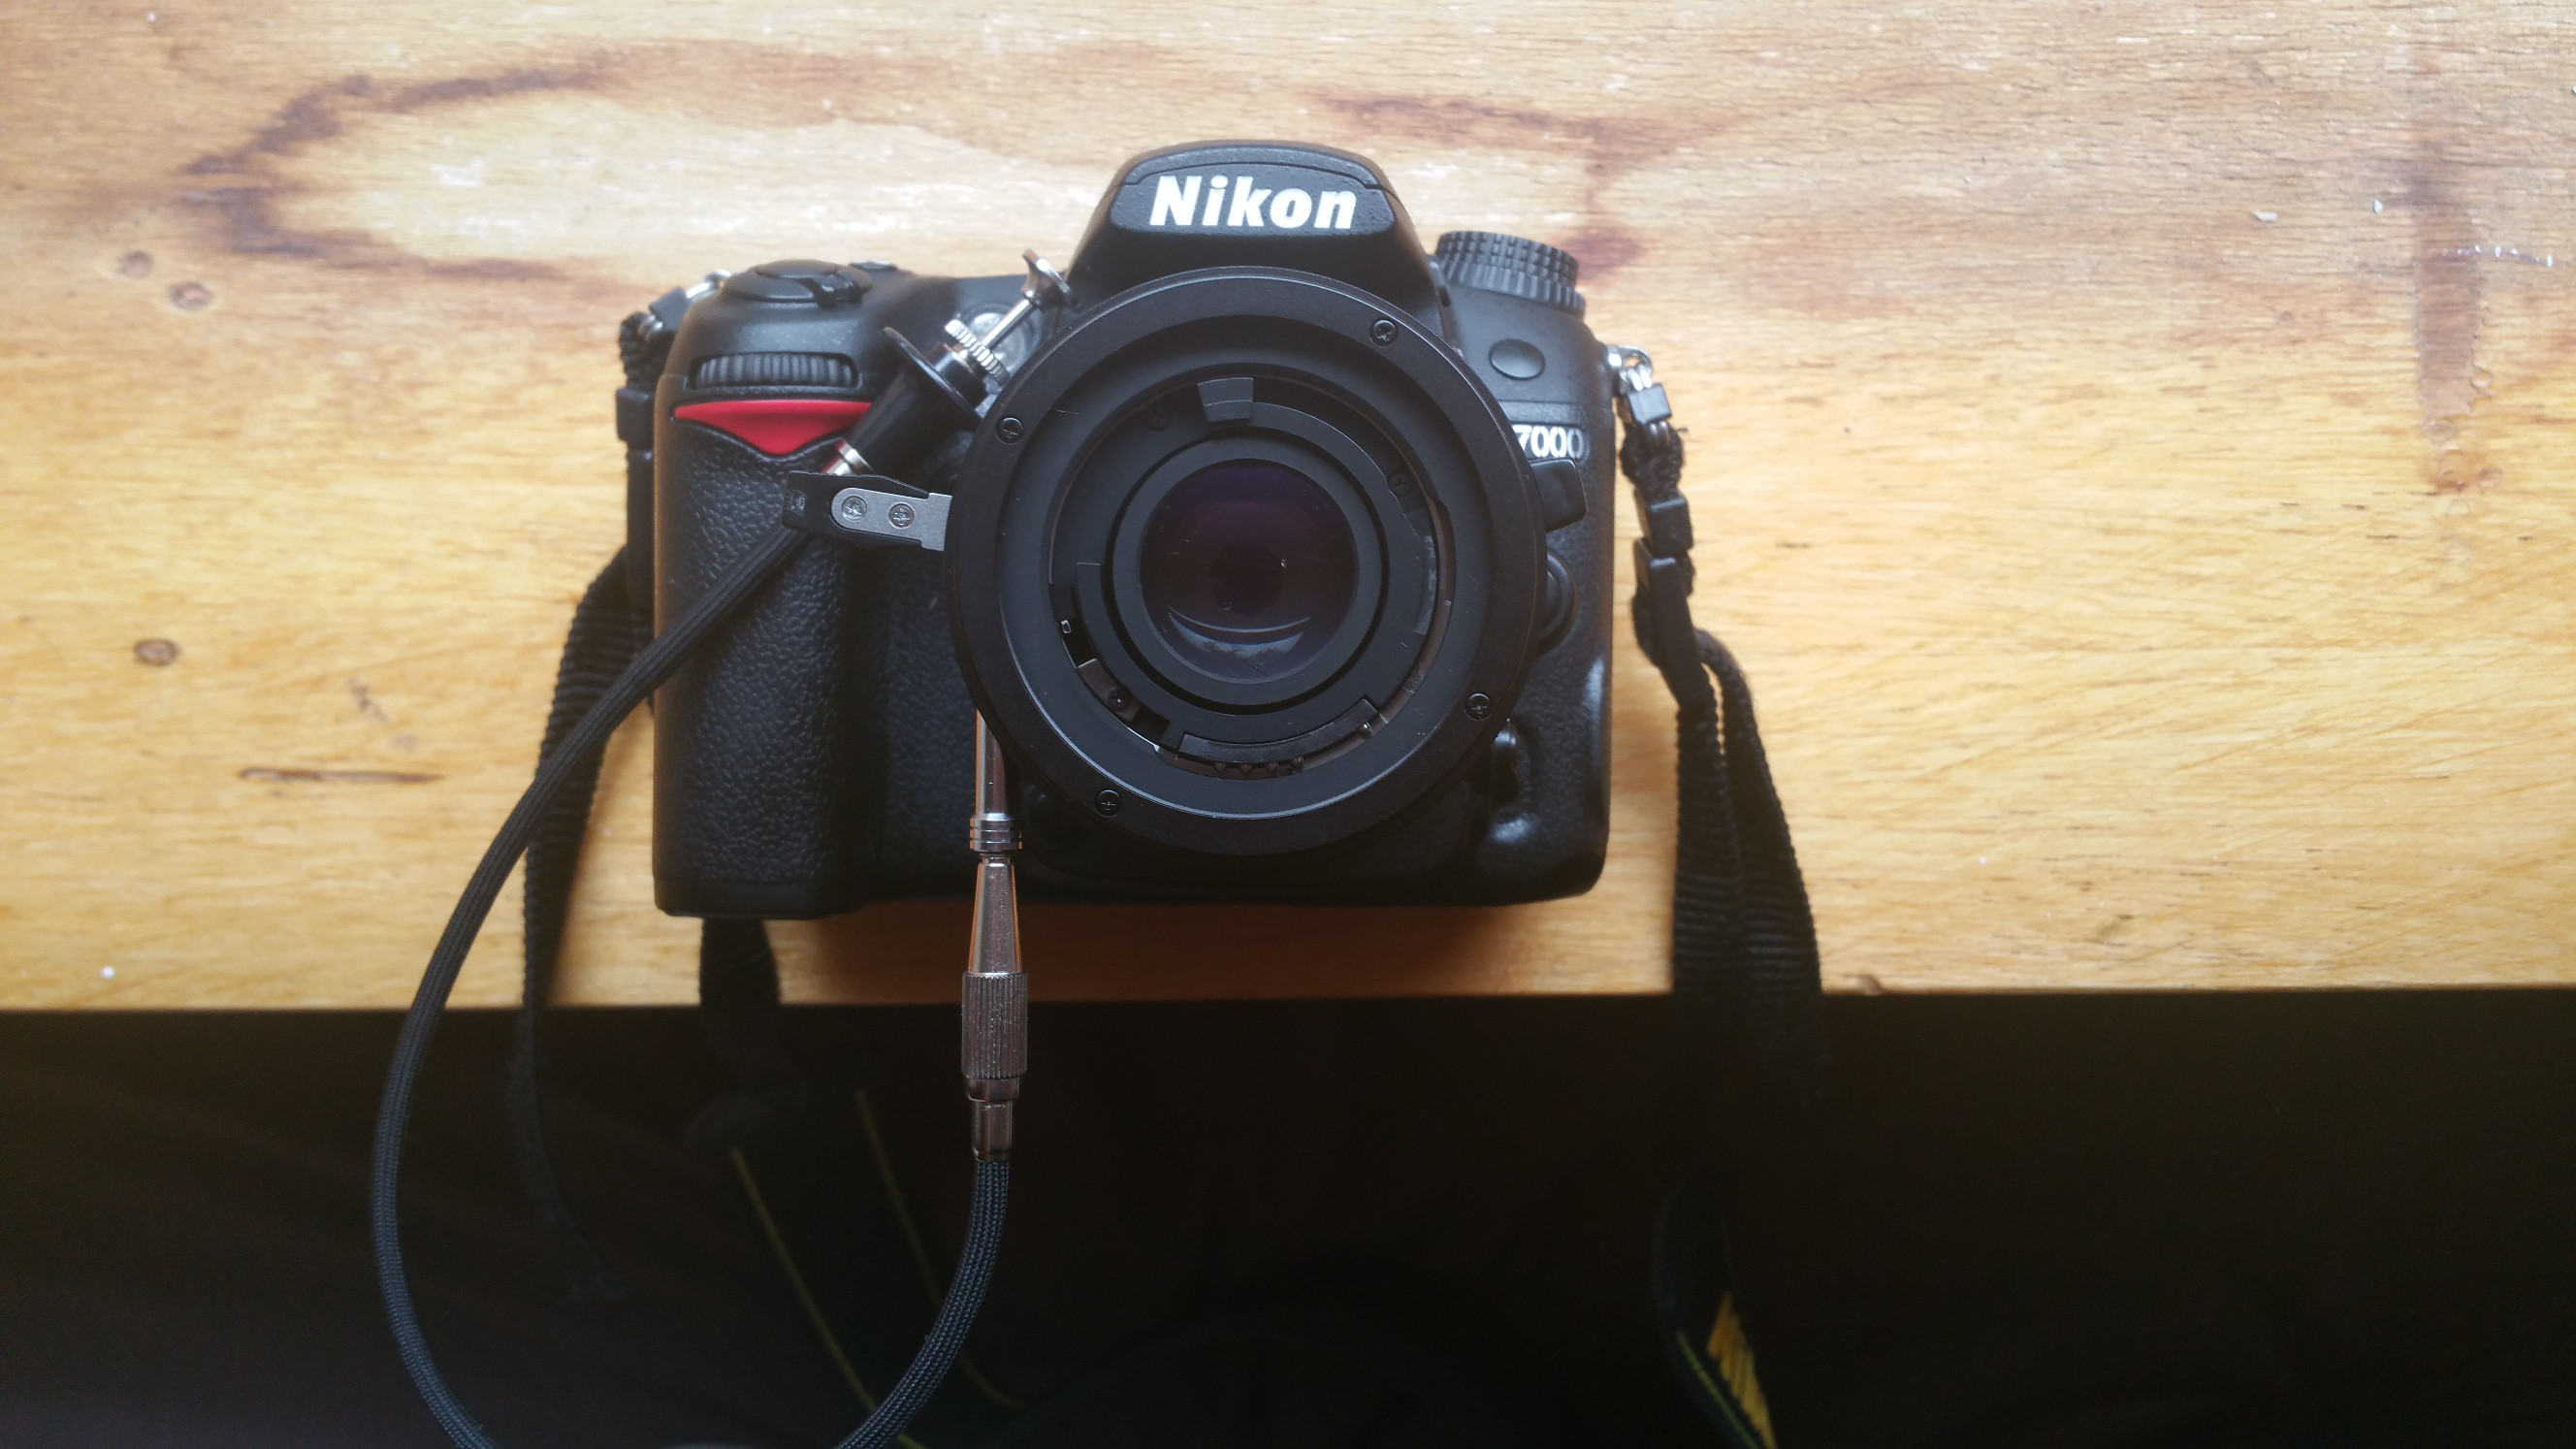
enter image description here

And here is an example (focus-stacked) image taken with this setup:
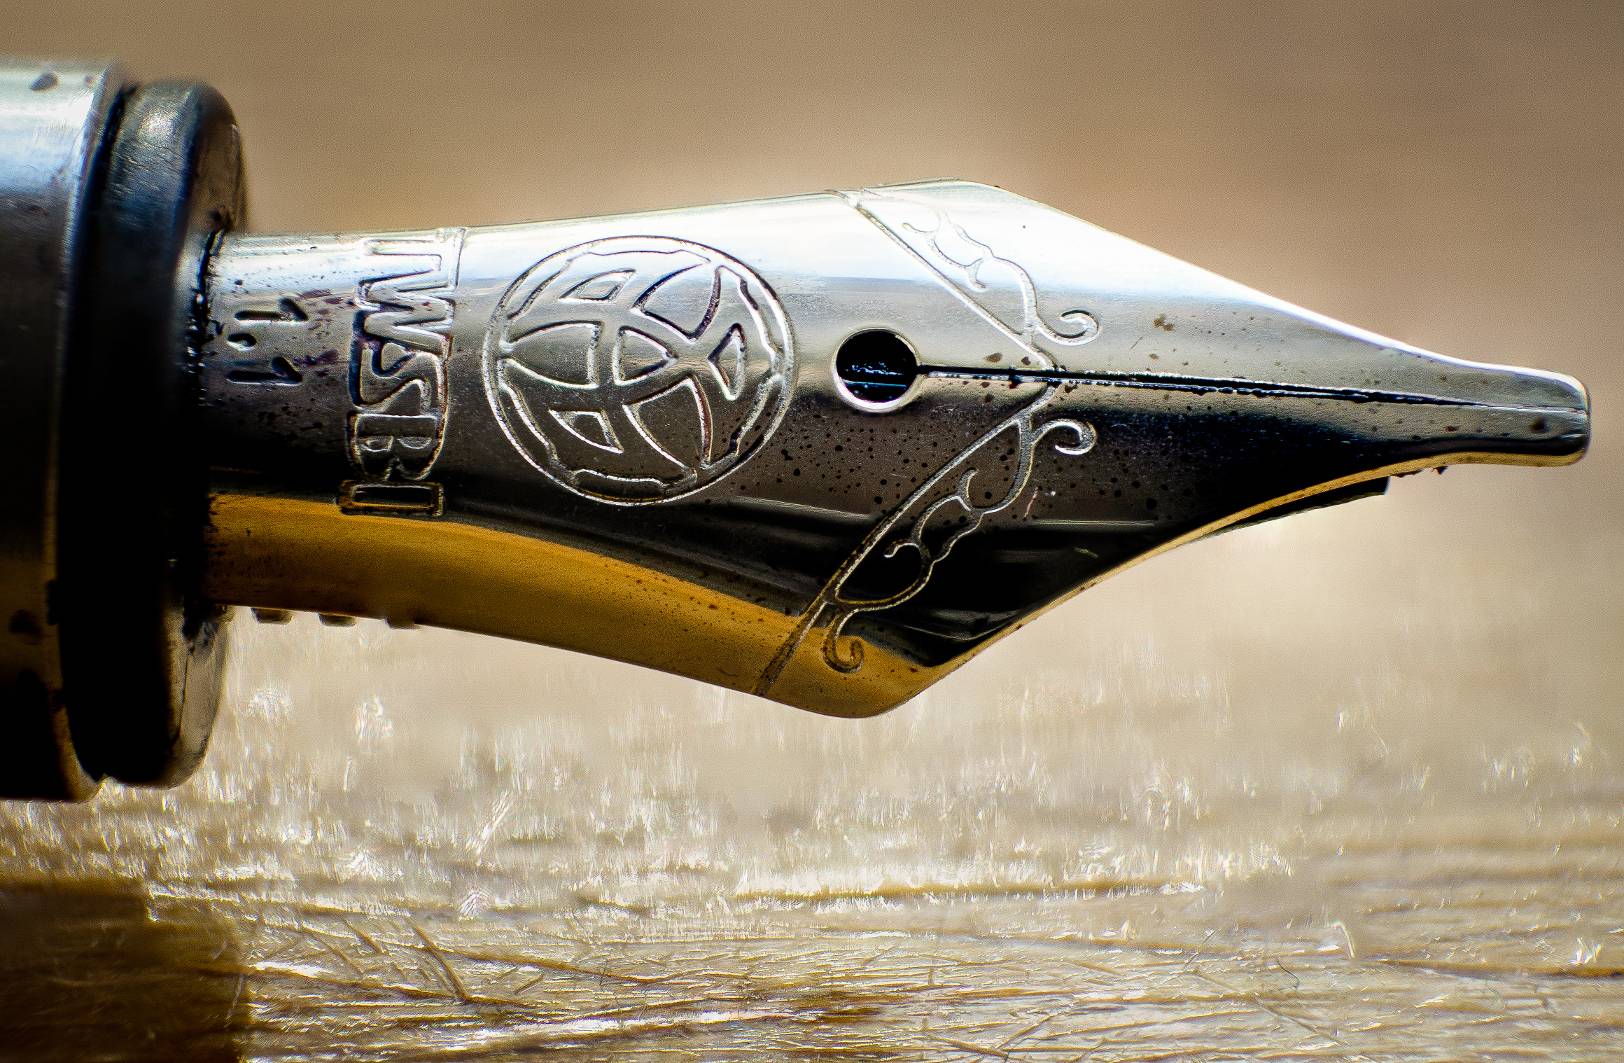
enter image description here


Additional Advice

Freelensing

Your technique of holding the lens by hand is sometimes known as freelensing. While this can produce tilt-shift effects that look interesting in some situtations, it will probably make macro focussing nigh impossible. If you don't align the optical axis of the lens exactly perpendicular to the camera's sensor, and intersecting the center, then the focal plane will be tilted and shifted.

i.e. here's an example photo I took while freelensing for selective focus on a subject's eyes (although I didn't do a great job):

enter image description here

I have not added blur to this photo after the fact. This is how it was taken. That's caused by a tilted focal plane, something which will only compound on the difficulty of precise focus when taking macro photographs.

Focus Stacking

When taking macro photographs, the depth of field is extremely small because of the high magnification. So small, in fact, that you may be tempted to use the smallest aperture available and end up with diffraction limited photos as in my case here. There are a couple of solutions:

  1. Take long exposures on higher f numbers (being wary of diffraction), and make sure your camera and subject are perfectly still. This is where a shutter remote comes in as well.

  2. Take a series of photos, identically composed, at different focus settings. Use software after the fact to merge these photos (i.e. Photoshop's Auto-Blending of Layers does a good job).

\$\endgroup\$
1
\$\begingroup\$

Wide angle legacy lenses are typically used when reverse mounted on a camera body. Your best bet is to use a "legacy" adapter that allows mounting old, non auto focus lenses to your digital camera body. These may be found for cheap on Amazon. As for Nikon wide angle lenses, these are practically given away on Ebay and Amazon.

However, the depth of field using this technique is measured in microns and tends to be a torus versus a line. Despite the ability to count hairs on the head of an ant, you will need stability, specialized lighting, and likely- photostacking software.

If these terms are entirely unfamiliar to you, stick with manually counting hairs on a dead ant under a decent macroscope because kluging together legacy gear on digital cameras for non-standard photography is a science unto itself and you could lose valuable time just finding the hardware and learning to use it effectively.

\$\endgroup\$
-2
\$\begingroup\$

Your Nikon D3200 has a close focus mode. You need to read your camera manual and familiarize yourself with this feature. Likely the camera and lens combination you own will perform this task without the need for you to purchase another lens or a lens reversing system. That being said let’s explore this subject further.

The lens you have is called a “kit” lens. This is industry jargon for the lens that is normally packaged with a camera body. The lens is a general purpose lens suitable for a novice. If your goal is take a lot of close-up pictures, then you need to purchase a “micro” lens. A micro lens is optimized to take close-up pictures.

Now about lens reversal: When you focus your camera, note that the lens barrel moves forward and backward in relationship to the camera body. When you focus on nearby objects, the lens moves forward to achieve sharp focus. For technical reasons, the forward motion of the lens may be restricted, and this will prevent you from making super close-ups. A workaround is to buy a set of close focusing rings, often called tubes. These are tubular spacers. The lens you own is removed and a spacer ring is mounted to the camera body. Now the lens you own is mounted onto this spacer ring. The result is: the revised, more forward position of the lens, allows super close-up work. Rings (tubes) are relatively inexpensive as they contain no lenses. The disadvantage of tubes / rings is they disconnect the lens from the camera. Now you are on your own as to setting the aperture and making exposure settings. Rings / tubes are an inexpensive way to accomplish your goal, but the learning curve is daunting. You can also purchase advanced tubes / rings that will maintain the lens to body connection. This would be your second best bet. First choice remains purchasing a macro lens.

When we use rings /tubes to do super close-up work, you are using the lens you already own. Again this is a general purpose lens that is likely challenged when tasked to work close-in. One workaround is to remove the lens and with the aid of a reversing ring, remount the lens, backwards. This will likely grant the lens improved performance for the close-up task. This is because the rear lens array is designed to project an image on the flat surface of the camera’s imaging chip. Since close-up subjects are generally flat or nearly flat objects, reversing the lens provides some improvement. Additionally, reversing the lens also adds some magnification -- thus the reversed lens magnifies a little more. The reversing ring completely cuts off the automation; you are on your own to set the aperture and exposure.

Again your best bet is to procure a micro lens for your camera body.

\$\endgroup\$
1
  • \$\begingroup\$ Although Nikon has a habit of naming their macro lens "Micro" the correct term is "Macro" lens which is optimized to around 1:1 reproduction on the sensor. True micro lenses are for extreme closeups such as with a microscope. \$\endgroup\$
    – Eric S
    Commented Feb 14, 2017 at 16:10

Your Answer

By clicking “Post Your Answer”, you agree to our terms of service and acknowledge you have read our privacy policy.

Not the answer you're looking for? Browse other questions tagged or ask your own question.