5
\$\begingroup\$

red photo

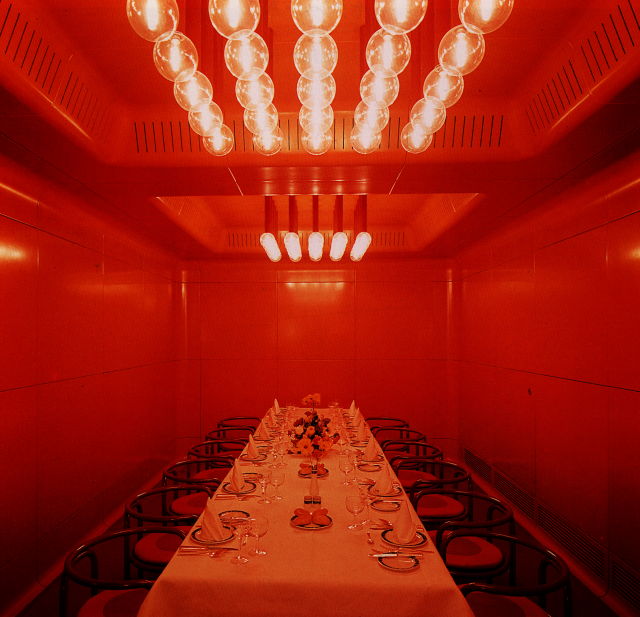
In the above image, there is a very strong red light cast over the room. How can I produce a similar image? My images either look terrible and washed out, like I took them on a cell phone camera (with 4000k color temperature setting) or they just look like normal white - no red overcast- if the white balance is set "correctly" (like 1500K). Do I just need to find the white balance sweet spot or is my method entirely wrong?

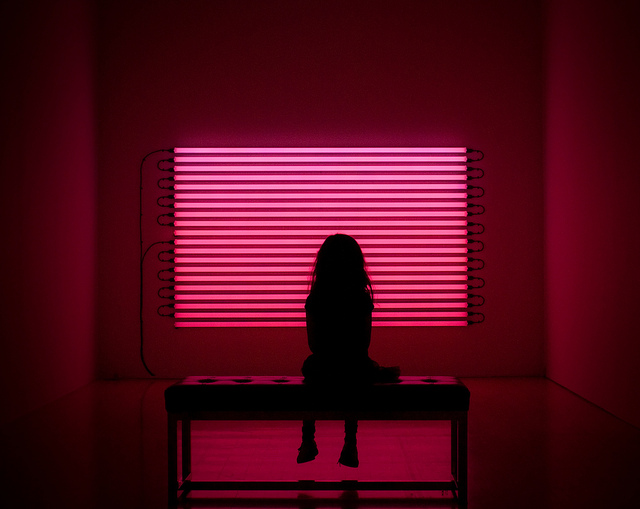
p.s. Here is another example photo:

"Modern Art", by Chris Esler
Modern Art, Copyright 2010 by Chris Esler, All Rights Reserved

\$\endgroup\$
7
  • \$\begingroup\$ Can you turn it off? You are not trying to achieve "white" balance. Or, do it in post with software. \$\endgroup\$
    – Stan
    Commented Jan 21, 2017 at 1:27
  • \$\begingroup\$ @stan don't know how to reply directly (I'm on mobile) but how can you just turn white balance off? I don't understand what you mean. and do what, exactly, in post? \$\endgroup\$ Commented Jan 21, 2017 at 1:38
  • \$\begingroup\$ You really cannot get a correct white balance. The illumination spectrum is extremely biased and the amounts of green and blue are insufficient to render colors correctly. White "balance" depends on having something close to a black body illumination spectrum that includes all wavelengths. \$\endgroup\$ Commented Jan 21, 2017 at 2:35
  • 2
    \$\begingroup\$ @JimGarrison Please post that as an answer \$\endgroup\$
    – mattdm
    Commented Jan 21, 2017 at 2:37
  • 1
    \$\begingroup\$ Shoot raw and adjust to taste in post. That will give you the best chance to achieve what you want. \$\endgroup\$ Commented Jan 21, 2017 at 3:11

4 Answers 4

2
\$\begingroup\$

To create an image with a strong color cast you need at least two things:

  • Light that includes the color you desire as a component of the portion of the visible spectrum included in the light illuminating your scene. The more the light illuminating the scene is the color you want, the easier it makes it.
  • The ability to eliminate light that is not the color you desire the image to be. Again, the less the light illuminating the scene includes portions of the visible spectrum you don't want in the color of your image, the easier it makes it.

The easiest way to do it is to light the scene so that it looks to your eye like you want the image to look, shoot raw, and then adjust color temperature and tint in post processing.

Another way to do it is to set the camera's color temperature to around 5200K (daylight), place a red filter in front of the lens, and shoot the picture. Again, saving the raw data will give you much more flexibility in editing to fine tune the color to exactly what you want. You can also shoot the scene and then add the color filter in post if you are using an application with the capability to add color filters.

If you only light a scene with a very narrow spectrum lighting that does not include the color you want it will be near impossible to produce the result you want. Your only option at that point is to edit the image in monochrome and then apply a colored filter to the whole thing in post processing.

\$\endgroup\$
3
  • \$\begingroup\$ In addition to what Michael Clark said, you should think in terms of light intensity and contrast in your scene to avoid the washed out look you are referring to. Shooting for a single color is identical to shooting B+W (monochrome). If you see a green object, a blue object, and a red object of similar lightness with your eyes, then shoot your image modified to nearly all red. This will make that original color differentiation nearly impossible (washed out). Notice shared image 2, there is an extremely high contrast from light to dark areas. \$\endgroup\$
    – cliffclof
    Commented Jan 21, 2017 at 6:15
  • \$\begingroup\$ @cliffclof That sounds more like an answer than a comment. perhaps you should put it in an answer of your own? \$\endgroup\$
    – Michael C
    Commented Jan 21, 2017 at 11:45
  • \$\begingroup\$ I guess I could, maybe I was being lazy. I didn't think your answer was wrong that's why. \$\endgroup\$
    – cliffclof
    Commented Jan 21, 2017 at 18:42
2
\$\begingroup\$

Using available light (red or other to the eye)

If you think in terms of your desired result, a monochromatic red image, it will make sense to think in terms of B+W photography regardless of method used to achieve the red image. Light intensity and contrast in your scene become the primary factors to avoid the washed out look you are referring to. If you see a green object, a blue object, and a red object of similar lightness with your eyes, then shoot your image modified to nearly all red. This will make that original color differentiation nearly impossible (washed out). Notice shared image 2, there is an extremely high contrast from light to dark areas.

I also noticed that you mention setting the color temperature to 1500K and call it "correctly". Assuming this gives you a white balanced image you could move your color temperature into the 5000 to 6000 or even 7000 K range and see if it gives you a better result. I have a feeling it will look too orange or yellow for what you explained you want. To fix this, look for something similar to the Canon EOS cameras called a white balance shift. It allows a photographer to bias the colors in images in either blue, amber, magenta or green directions in camera. If you choose the amber and magenta directions you can alter the colors to become more rich in red and magenta.
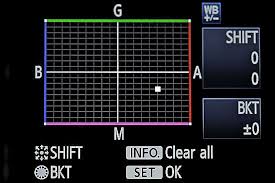
White Balance Shift

Also, try lowering the exposure by 1 stop or 2 stops. This could more evenly distribute the saturation over the entire range of the histogram vs all in the highlights. Although, It's tough to say this accurately without seeing an example image.

Using a red filter

Using a red filter over the lens like Michael suggested is also a great option if your light source is not already a deep red. Still think in terms of B+W photography when lighting.

Doing it in post

Other good options outside the camera are to tint the image after shot, especially if you shoot in RAW. Use Photoshop or a number of other editing tools available.
\$\endgroup\$
1
  • \$\begingroup\$ Note that with the Canon WB correction referenced in your answer each unit of adjustment is equal to a 5 mirad color compensation filter. The setting illustrated in the diagram would be equivalent, in terms of the effect on color, to placing a 25 mirad amber filter and a 15 mirad magenta filter in front of the lens. \$\endgroup\$
    – Michael C
    Commented Jan 22, 2017 at 9:44
0
\$\begingroup\$

If you can set a custom (White Balance )WB on your camera/phone, point it at a piece of Cyan paper..... sky blue or equivalent. Take a photo and use that to set your WB. Cyan is the opposite of Red so it will throw a virtual Red filter on in order to correct it back to white when you shoot a normal scene using your custom White Balance.

This should be done in the place where you intend to take the photo as the lighting elsewhere could throw off the reading of the sample.

This is the equivalent of using a grey card to set a white balance but instead you are setting a red balance using a cyan card.

\$\endgroup\$
0
\$\begingroup\$
  1. Color temperature changes the color balance between orange and blue. It is not the best tool for adding strong well defined red cast.
  2. Even if your camera has more precise control over color balance than just the orange - blue axis associated with color temperature, I would still leave this kind of manipulations on the photo editor. If you do it in camera, you can easily push some of the color values beyond limits and lose detail, introduce banding or cause some other kind of irreversible damage to the image.
  3. Image editor will give you much more precise control over the color tone and overall quality of the result. It will allow you, for example, converting the image to black and white first. In this step you can fine tune tonality of individual details. While bluntly cranking up the red would make everything green look black and everything yellow look orange, converting to B&W first and adjusting the tonality, you can get rid of unwanted local casts and large black areas without detail. These are just examples to start your creativity... The point is, don't do it in the camera, do it in an editor.
\$\endgroup\$

Your Answer

By clicking “Post Your Answer”, you agree to our terms of service and acknowledge you have read our privacy policy.

Not the answer you're looking for? Browse other questions tagged or ask your own question.