5
\$\begingroup\$

First of all, I would like to apologize for anything stupid or naive I would write because I am new to RAW post-processing and photography.

During my vacations, I took the following picture (in RAW) :
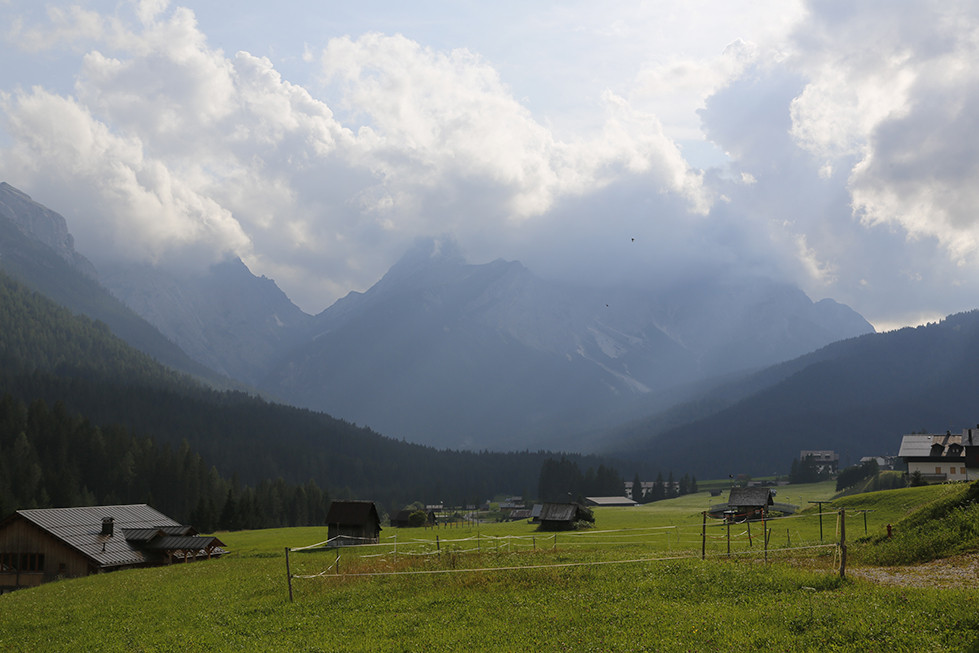
Original image

The sky and background mountain in the middle seemed a little blown out to me so I tried to use Camera Raw to recover some details in the background, the blown out colors and the sky. Here is the result :
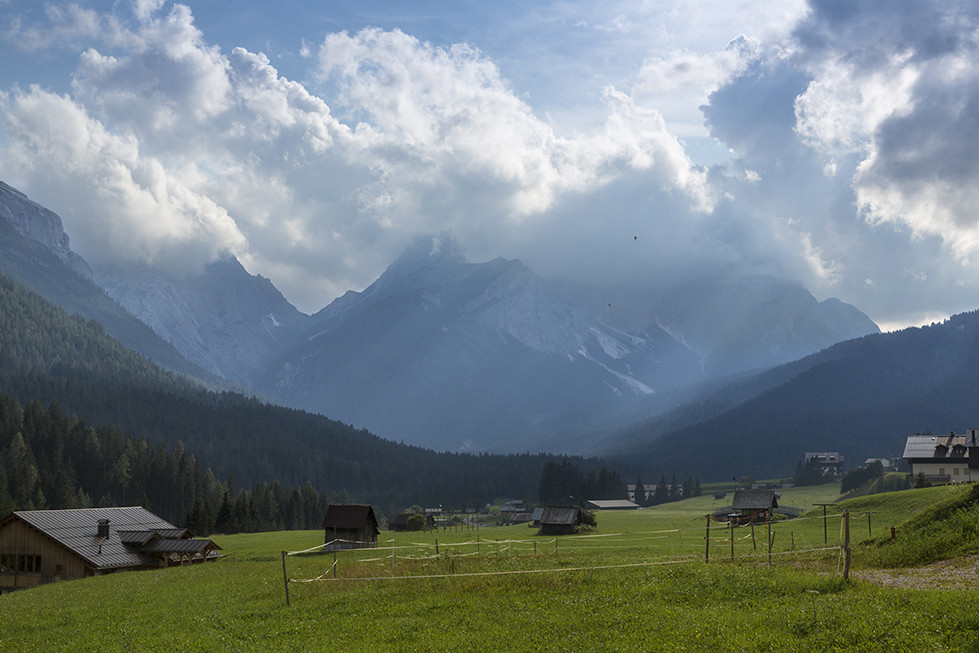
enter image description here

In this "improved" version, I would like to make the sun beams more visible, more defined. How could I do this ? I looked it up on Internet but all I could find was tutorials to add fake sun beams to a picture.

\$\endgroup\$
1

2 Answers 2

6
\$\begingroup\$

There are a few different ways to emphasize crepuscular rays in post production.

1) One of the ways those crepuscular rays can be enhanced is with any tool that can provide volumetric lighting effects. The one I use is a tool called Rays from Digital Film Tools. As you mentioned, this type of tool may be the type to add fake rays to a photo. However, I don't like using it for that, I just use it to enhance only what's already there. That is, I recommend a 'less is more' approach.

2) Another way, using Photoshop, is to add a shaped/mask, gradient layer above the photo layer and set the layer to screen. You'll have to shape the mask to just the light beams by hand. Then feather the edges of the shape, and either blur the shapes or use a gradient layer.

3) Another Photoshop option is to apply selective contrast / micro-contrast to different parts of the image. Like in the prior technique, you'd apply changes to a masked area.

4) If you have Lightroom you can use it's masking capabilities to selectively darken parts and lighten other parts of the image.

I'm sure there are other ways, but those are four post-production techniques I can think of at the moment.

\$\endgroup\$
1
  • \$\begingroup\$ @mattdm - I had to look it up ... I knew they were called something, I just couldn't remember what it was. \$\endgroup\$
    – B Shaw
    Commented Aug 23, 2014 at 3:27
1
\$\begingroup\$

I would do it in Photoshop. Use the lasso tool to highlight an area around the sun-beam, basically a cylinder on the angle of the sun-beam (or collection thereof). create a new layer called "mask" and fill it with a color.

next i'd create an adjustment layer and i'd set that with higher contrast and a touch more saturation; also play w/ levels a bit. your sun-beam should look nice at this point, but the rest of the piece may not be what you want. create a layer mask on your adjustment layer, and now control click on the layer you made called "mask". this should highlight the layer's contents, so you should now feather out that selection at least 32px depending on your photo resolution and paste that into the adjustment layer mask. this will give your adjustments a smooth transition so your photograph doesn't look wonky or too colorful.

to summarize, you're basically playing w/ the color contrast, brightness contrast, and photo saturation to bring out the sun-beams. you're also making sure you localize this effect so the rest of the photo does not also have such aggressive highlighting. that's the basic approach you will use despite any of decisions you make like whether or not to sharpen.

EDIT: for this particular photo, you should specifically focus on where the sun-beams are hitting on the ground. this will demonstrate a clear meaning for the viewer that the sun-beams are in fact sun-beams lighting the ground in a special way. this should match the intention you have and the overall meaning a sun-beam has for most viewers.

\$\endgroup\$

Your Answer

By clicking “Post Your Answer”, you agree to our terms of service and acknowledge you have read our privacy policy.

Not the answer you're looking for? Browse other questions tagged or ask your own question.