48
\$\begingroup\$

I know that this effect occurs when there's a shallow depth of field.

My question is, what are the various ways I can increase this effect in my photos when I'm taking them?

Note that I'm not asking how to use an editing program to achieve this effect after in post production or after the image is captured.

\$\endgroup\$
6
  • \$\begingroup\$ Are you asking for how you can simulate this effect by digital editing, or how you can setup the camera to do this in the first place, or both? \$\endgroup\$
    – kevin42
    Commented Jul 15, 2010 at 19:24
  • 2
    \$\begingroup\$ The simple answer to this is lower f stop.. but since you are asking this questions, chances are that you don't know how to manipulate ISO/aperture/shutter speed to get the effect you want. I'd strongly suggest that you read a small intro article/book to understand how they interact first. \$\endgroup\$ Commented Jul 15, 2010 at 19:37
  • 1
    \$\begingroup\$ See also photo.stackexchange.com/questions/9624/… \$\endgroup\$
    – mattdm
    Commented Mar 28, 2011 at 1:33
  • \$\begingroup\$ Be aware, that the larger the sensor, the more subject isolation the camera is able to produce. So if you are using a point-and-shoot, which normally have small sensors, you will not be able to get a lot of bokeh. \$\endgroup\$
    – Pete
    Commented Jun 8, 2012 at 18:11
  • \$\begingroup\$ If you have some ominous dark trees in your background that will enhance your photo you might want just a slight blur, so the trees won't completely disapear in the background so you have to adjust your blur accordingly. \$\endgroup\$
    – Frank
    Commented Jun 3, 2013 at 5:06

20 Answers 20

53
\$\begingroup\$

Here's the list of things that influence depth of field the most (in this particular order):

  1. Subject distance, the closer the subject is, the shallower the DOF (think of macro)
  2. Focal length, the more millimeters, the shallower the DOF
  3. Aperture, the smaller the f-number, the shallower the DOF
\$\endgroup\$
7
  • 33
    \$\begingroup\$ This answer is correct, but I want to point something out that tends to get lost in conversations like this one: Notice that the above answer says that as you get closer your DOF gets shallower, meaning that when you get further away your DOF gets deeper (less background blur). This effect cancels out the effect of using a longer lens -I've studied DOF tables to confirm this and it does. If you don't change your framing or your aperture, than using a longer lens won't help give you a more shallow DOF because you'll have to stand back further from your subject to take the shot. \$\endgroup\$ Commented Jul 18, 2010 at 16:11
  • 3
    \$\begingroup\$ Thank you, @erica-marshall, for making this point. I was looking for an answer to upvote that made it, since there are so many answers already. I think @Karel is making it implicitly by being specific about the order, and you've made it especially clear. \$\endgroup\$
    – lindes
    Commented Feb 8, 2011 at 19:08
  • 4
    \$\begingroup\$ The f-number is a ratio to the focal length, which means that f/2.8 on a 100mm lens is actually double the aperture diameter of f/2.8 on a 50mm lens. Increasing focal length gives you the square of the effect, since you get more background blur both from everything being magnified as well as the fact you're widening the aperture to maintain the same f-number. So while it may be true that focal length can "cancel out" equivalent change in subject distance for DOF - a longer lens still wins in background blur even taking into account maintaining framing. Happy to be proven wrong though \$\endgroup\$ Commented Feb 9, 2011 at 14:10
  • 3
    \$\begingroup\$ @Erica: Insightful comment. So, given a fixed framing, focal length is a function of subject distance. If you change one, the other has to change. Checking out dofmaster.com/dofjs.html confirms your comment as correct. The actual DOF doesn't change significantly if at all. However as others may be quick to point out the apparent DOF does change because the image appears "compressed". It just depends on what DOF effect is desired. \$\endgroup\$ Commented Feb 9, 2011 at 23:16
  • 4
    \$\begingroup\$ You've left out the distance of the background ... Objects farther away from your subject will be more blurry. So if you're in front of trees or a wall ... Move your subject farther away from it. \$\endgroup\$
    – rrauenza
    Commented May 20, 2016 at 3:35
27
\$\begingroup\$

While using shallow depth of field is the most common technique to get blurred background, there are some other ways:

  • using plain background so it would not need any blurring
    • set up your own background - you'll have full control over color and pattern a half-empty glass
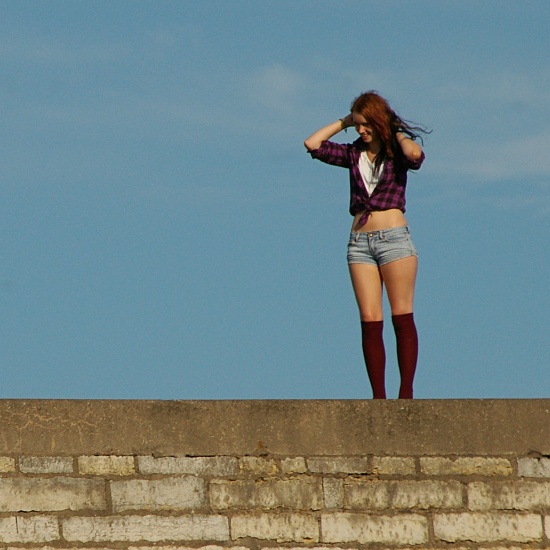
    • shoot against sky or some other plain surface (longer lens will help you by having smaller segment of background in frame) catching a breeze
  • shooting with decreased visibility
    • shoot under water
    • shoot during strong rain or snowstorm
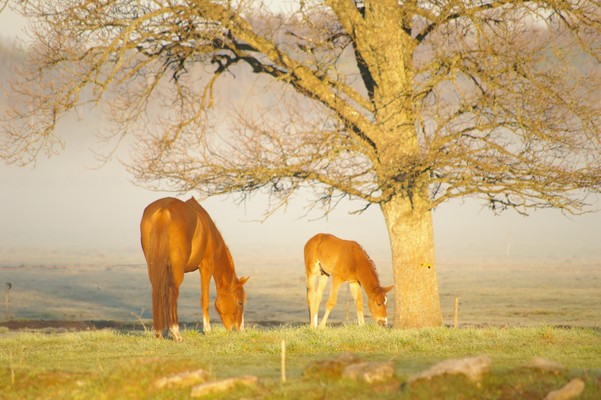
    • misty weather (you'll have best chances and light in mornings near sunrise) breakfast for two
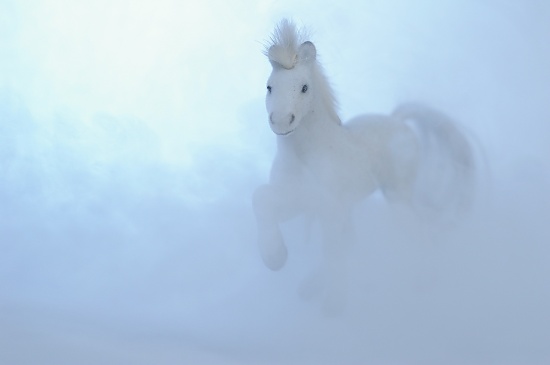
    • create smoke or fog behind subject (e.g. fog machine or an upwind bonfire) frozen horse
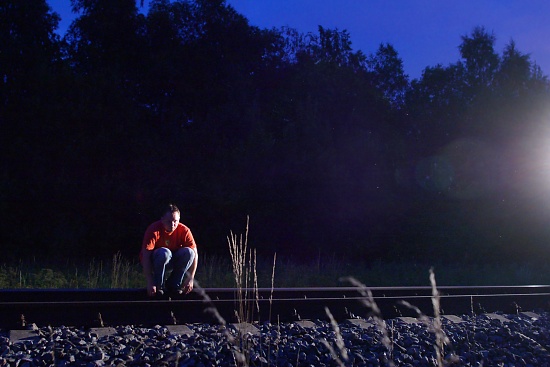
    • set up lighting and camera settings so that while subject is correctly exposed, background is underexposed - detail in dark areas is less discernible for a human eye owling
  • using motion blur

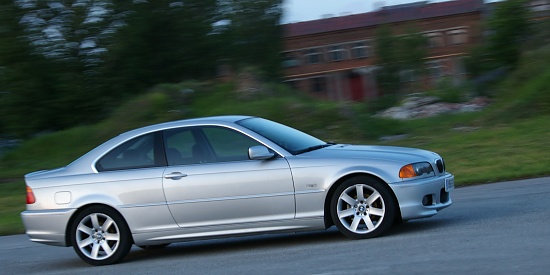
    • use flash to light up your subject (avoid spilling light on background), deliberately move camera during rest of exposure (this will not work well with dark subjects)
    • shoot with longer exposure against a moving background (a vehicle, moving water, birds flying past etc)
    • with a moving subject, use longer exposure and pan with the subject mowing the seaweed

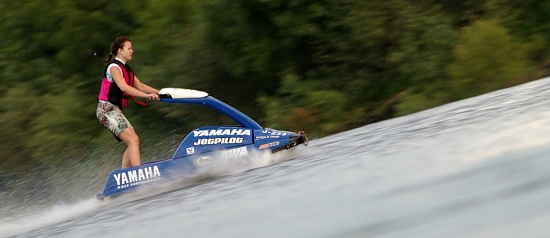
    • or switch roles - move the camera, keeping it aimed at a steady subject street beauty

  • using specialized optics
    • a Soft Spot filter
    • a lens with Defocus Control
    • a Lensbaby Suzuki Super Carry extra long
\$\endgroup\$
20
\$\begingroup\$

Ultimately, you want a shallow depth of field, which means a low fstop number (f/2.8 for example). The lower the fstop number, the more light that gets in, so in order to expose correctly, you need to increase your shutter speed (1/1000 is better than 1/25), lower your iso (100 is better than 400), and if all this is not enough, add a neutral density filter to reduce ambient light, so that you can further open up your aperture.

\$\endgroup\$
4
  • 12
    \$\begingroup\$ Also note that longer lenses create better DOF. \$\endgroup\$
    – NickAldwin
    Commented Jul 16, 2010 at 13:47
  • 4
    \$\begingroup\$ +1/-1: +1 for describing the various ways to allow you the widest aperture; -1 for not mentioning the camera:subject:background ratios (the single thing you change for the most difference, ultimately), or focal length (which really only matters if you're willing to change your framing, because the distance factor matters more, but sometimes that's ok, so it's worth noting). So, not voting. :) \$\endgroup\$
    – lindes
    Commented Feb 8, 2011 at 19:17
  • 2
    \$\begingroup\$ @NickAldwin - Actually, it isn't really the focal length but distance to you subject or "the size of your subject in the picture" that is important. If you make a portrait where the head is filling the picture frame with a 90mm lens and a 35mm lens, both at F2.8, you'll get the same DOF. The difference is there will be more distance between you and your subject when using the 90mm. \$\endgroup\$ Commented Feb 9, 2011 at 7:10
  • \$\begingroup\$ Another thing to consider if you are taking portraits is that getting in close with a wider angle lens can result in a image that some people feel is unattractive -- as it can make the face look wider and the nose larger. Backing off and using a longer lens results in an image that is often found more pleasing. \$\endgroup\$ Commented Feb 9, 2011 at 22:04
13
\$\begingroup\$

It's more complicated than just depth of field. You can have two photos with identical depth of field, but one can have more background blur than the other. In addition to background blur, there is also "bokeh", which describes what kind of blur there is. Check out this article which describes it in detail, and gives you a tool for calculating the various parameters.

\$\endgroup\$
11
\$\begingroup\$

Obviously, smaller f-stop means shorter depth-of-field, so I'm not going there.

There are a couple of things you can do: 1) Remove the subject from the background as much as possible. How much will depend on the lens and aperture you can use. 2) Use a longer lens. Longer lenses have more narrow DoF.

Hope that helps.

\$\endgroup\$
2
  • 3
    \$\begingroup\$ +1 for longer lens, which is what makes the whole difference. At 300mm it's easy to get extremely blurry backgrounds. \$\endgroup\$
    – Guffa
    Commented Jul 16, 2010 at 0:45
  • 4
    \$\begingroup\$ Technically this answer isn't quite correct. You can have a longer lens with the exact same DoF as a shorter lens, and the same f-stop, and yet the longer lens can have more background blur. See the link in my answer for details. \$\endgroup\$
    – davr
    Commented Jul 16, 2010 at 19:15
7
\$\begingroup\$

Use a large aperture (small F number) when you take a photo. The larger the aperture the narrower the depth of field will be (compensate with with a shorter shutter speed). In addition you can try to vary the distance between the camera and the subject. The shorter the distance, the smaller the DOF will be.

\$\endgroup\$
7
\$\begingroup\$

First of all, start by ignoring all the answers here that talk about depth of field. You are after background blur which, although somewhat related, is really not the same thing as depth of field. Be aware that most people mix this two notions.

The two main factors affecting background blur are:

1 – Framing

The tighter you frame (the bigger the subject in the viewfinder), the more background blur you have. If you frame twice as tight you get double the original background blur.

2 – Diameter of the entrance pupil

You get this by dividing the focal length by the F-number. For example, a 85 mm f/1.4 (when used at 1.4) has a 61 mm entrance pupil (which is plenty). The larger the entrance pupil, the more background blur. Double the diameter and you get, again, twice the original background blur.

The distance to the background does not really matter as soon as it is significantly larger than the distance to the subject. If this condition is not met, then start worrying about depth of field. Other factors such as focal length, subject distance, crop factor, etc... have no effect as long as you compare pictures taken with the same framing and same entrance pupil diameter.

\$\endgroup\$
6
\$\begingroup\$

To increase the effect of "bokeh blur" with thin depth of field, there are a number of things you can do in-camera.

  • Obviously, opening up your aperture wider will decrease depth of field, but moving from the typical fast prime widths of f/1.4-f/2 into the rarer f/0.95-f/1.2 will have a notable effect, if you can afford the glass, simply because not many people shoot with glass that fast. Be prepared for a big heavy lens, softness, vignetting, and catseye bokeh, though.

  • Get closer to your subject. The shorter the focus distance, the thinner the DoF becomes. This is why P&S cameras can still achieve background blur when shooting macros.

  • Increase the distance between your subject and the background. This increases the amount the background blurs.

  • Use a longer focal length. Longer lenses actually do produce a thinner depth of field, although the effect may not be particularly pronounced, especially compared to shooting from closer distances.

  • Use a bigger format. Shooting with a larger format of sensor/film has the effect of either causing you to shoot at closer distances or to use a longer lens to compose similar to how you would with a smaller format. Both of these can create thinner depth of field. This is one of the reasons medium format is so prized for portrait work.

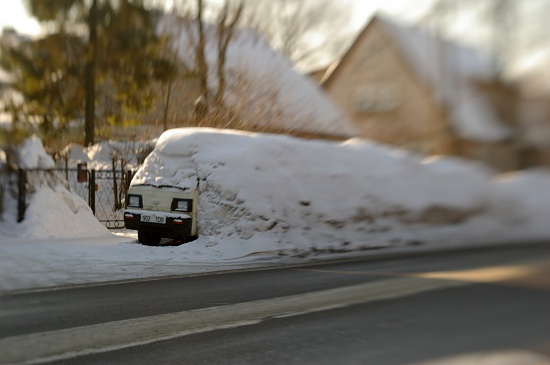
  • Use the Scheimpflug principle with a tilt-shift lens. Changing the shape of your DoF, so that it's no longer perpendicular to your lens by tilting the lens (or image plane) up can also create a fake thin DoF effect. Tilt-shift lens and view camera users often use this to create a "toy/model" effect and shoot landscape shots from above and make them look as if they were small models.

  • Shoot with a fast lens, a flash, and high-speed sync or ND filters This can still let you get a thin depth of field while shooting outdoors in daylight, but can "pop" your subject even more from the background by allowing for two different lighting levels: one for your subject and one for the background (see this Jason Lee photo on Flickr).

With post-processing, you can also do the following techniques:

\$\endgroup\$
4
\$\begingroup\$

If you want to increase this effect when making photos, then shoot on the longest focus end and with smallest possible aperture value (F number).

If you are talking about the post production, then in Photoshop you can use layer with gradient mask, copy the main layer, apply any blur filter to it, then use gradient for the mask. Here is the lesson for this technique. If you have a landscape shoot from the high point, then you can apply 2 gradients on top and on the bottom leaving the center of the image focused and sharp so that it looks like toy model.

\$\endgroup\$
4
\$\begingroup\$

Here's how to make the background as blurry as possible while keeping the subject sharp.

It’s the contrast between a sharp subject and a very blurry background that makes this effect stand out. Simply setting a wide aperture and getting a shallow depth of field is not how you get this effect, because then the subject may not be fully in focus. Background blur depends not just on the aperture setting, but also on the positioning of the camera, subject, and background, and on the the focal length of the lens.

First, decide how large the subject should appears within the frame. That's the magnification (relative to the frame size, ignoring differences between formats). The magnification is an important aspect of the composition that will probably override all other considerations for sharpness and blurriness, so this procedure assumes the relative magnification will be decided first and held constant.

Next, find the largest aperture (smallest f-number) that keeps the subject entirely in sharp focus. That means the focus field must be just deep enough to include the subject front-to-back, with nothing in front of or behind the subject in sharp focus. Focus must also be set accurately to include the entire subject. Note that the subject appearing sharp on a screen (or in a print) depends on how it is viewed. If you are viewing the image on a screen at reduced resolution or from a far distance, more of the image will appear sharp (that is, the focus field will be deeper). So try to emulate the final viewing conditions as best you can. If you want the image to appear sharp according to the limit of your camera's resolution, use your camera's focus magnification feature to zoom in all the way as you are adjusting the aperture and focus. For a given magnification and format, the focus field's depth depends largely on the f-number, and is largely independent of the distance between the camera and the subject, and the focal length. So with the aperture now set, it shouldn't require much adjustment from this point on. (Though with the subject very close to the camera and with a very wide lens, the focus field is deeper for a given f-number and format.)

With the magnification and the f-number now set and held constant, background blur is maximized by maximizing the camera-to-subject distance and the subject-to-background distance. Longer focal length lenses let you move the camera further from the subject and increase the background blur while maintaining the desired magnification.

Shooting indoors, where the camera-to-background distance is constrained, background blur is maximized by placing the camera as far as possible from the background, and placing the subject halfway in between. If your longest lens doesn't give you enough magnification, move the subject closer until you get the magnification you want.

Shooting outdoors where the distance to the background is large, use your longest lens and back the camera far enough away from the subject to achieve the desired magnification. A more distant background will appear blurrier, but the effect increases more slowly as the distance approaches infinity, so don't worry about trying to make the subject-to-background distance really large.

Note that moving the camera back also changes the perspective, making background objects appear larger relative to the subject.

A note about formats and lenses: If you are shooting with high magnification, the focus field will be shallow even at moderate f-numbers, and so having a fast lens is not important. In fact you might not be able to get the entire subject in focus even at the lens’s smallest aperture setting. Smaller format cameras have lenses with smaller apertures, which can overcome this problem. If you are shooting with low magnification (the subject is far away or the angle of view is wide), the focus field can be deeper than you want even with a fast lens. Larger format cameras can overcome this problem by having lenses with larger apertures.


\$\endgroup\$
1
  • \$\begingroup\$ +1 "It’s the contrast between a sharp subject and a very blurry background..." \$\endgroup\$
    – xiota
    Commented Feb 9, 2019 at 4:31
4
\$\begingroup\$

Depth of Field (DOF), background blur, and bokeh are related, but different concepts. There is also subject-background isolation/separation.

  • Depth of field is based on focal length, aperture, distance, and a predefined acceptable sharpness level. It is concerned with what parts of the image are expected to be sharp, not what parts of the image will be blurry, or how blurry unsharp portions of the image will be.

  • Background blur – How blurry is the background? I think of it as something that can be quantified. How big are bokeh balls a given distance from the lens? Different lenses with the same focal lengths, apertures, and distances can create different, though similar, amounts of blur because of different amounts of distortion, aberration, and field curvature. (There's also foreground blur, but people tend to be less interested.)

  • Bokeh is a qualitative description of the blur that is produced. Are the bokeh balls round? Do they vary in shape throughout the frame? Are they smooth? Do they have edge highlights? Are they smeared? Some people refer to how lenses "render" images.

  • Subject-background isolation refers to (subjectively) how well the subject stands out from the background. This can be achieved with depth of field and background blur, as well as appropriate lighting (such as rim lighting and creative use of "glow"). The common formula is to try to use narrow depth of field with high background blur. However, some types of bokeh can achieve good subject isolation with high depth of field and low background blur. For instance, Sonnar lenses create bokeh balls with an edge highlight toward the center of the frame, but a smear toward the edge of the frame. This tends to emphasize the sharpness of the subject toward the center, while also emphasizing the blurriness of the background toward the periphery.

Depth of Field and Background Blur tend to be inversely related. To minimize DOF and maximize background blur:

  • Use a longer focal length.
  • Use a larger aperture.
  • Use a smaller camera-subject distance (or larger subject-background distance).
\$\endgroup\$
2
\$\begingroup\$

You can also apply the 'Brenizer Method'. It is a hybrid solution that can produce outstanding shallow DOF images. See tutorial at ryanbrenizer.com. You still need post-processing though (and Photoshop works really well for this) to achieve final result.

\$\endgroup\$
1
  • \$\begingroup\$ Thank you for the comment and welcome to photo stack exchange! \$\endgroup\$
    – dpollitt
    Commented Oct 27, 2011 at 23:01
1
\$\begingroup\$

The wider your aperture, the smaller your focal depth will be. So if you can shoot with a fast lens and use aperture priority to use the most open aperture setting possible you will increase this effect.

Assuming you have already taken the photo and everything is in focus, you can use software such as photoshop to select everything in the image you want to be blurry and apply a blurring filter. You can take it a step further and create an alpha layer to vary the amount of blur with the depth of the image. This will take longer but result in a very nice effect.

\$\endgroup\$
1
\$\begingroup\$

Apart from aperture and focal length, depth of field also decreases with camera-subject distance. So get you subject as close to the camera as possible.

\$\endgroup\$
1
\$\begingroup\$

There are also special lenses that don't actually have huge aperture, but that have bokeh that looks like they had. These are specifically engineered to blur the background.

The one of them I know is Sony 135mm f/2.8 [T/4.5] STF: http://www.photozone.de/sony-alpha-aps-c-lens-tests/390-sony_135_28

When fully open, the amount of light getting in equals to f/4.5 lens, but bokeh is like it was f/2.8.

\$\endgroup\$
1
  • 3
    \$\begingroup\$ The lens does have f/2.8 aperture, but its APD elements cause light loss, therefore your exposure will be similar to f/4.5. APD elements enhance smoothness of bokeh, but won't let you get away with using a smaller aperture. \$\endgroup\$
    – Imre
    Commented Aug 23, 2011 at 14:40
1
\$\begingroup\$

You can find a little tool at http://howmuchblur.com which can give you some additional feeling for the subject. With this tool you can compare different lenses, cameras, and subject sizes and see a visual comparison between their ability to blur the background.

\$\endgroup\$
1
\$\begingroup\$
  • Using long focal length
  • Using very wide aperture
  • Keeping large distance between object in focus and the background
  • Using large(r) format sensor
  • Using Brenzier technique

To a lesser extent:

  • Using lenses that were designed to have rapid falloff of sharpness (e.g. Zeiss 35mm lenses currently in production)
  • Using lenses designed to have smooth background blur e.g. lenses with under corrected spherical aberration (like Zeiss Sonnar 50/1.5, most Leica lenses designed by Walter Mandler), apodization filter (Minolta STF 135mm f/2.8) etc.
  • Taking advantage of motion blur (panning, slow exposure with tripod...)

...

\$\endgroup\$
1
\$\begingroup\$

Background blur has the "blur disk diameter" (also the size of specular highlight disks in aperture shape and distance far behind the subject) f/a where f is the actual focal length (not the effective one) and a is the aperture number, measured in the focus plane. Since it would be unusual for your subject not to be in the focus plane, this determines your background blur size in relation to the subject.

So basically use the longest focal length and the largest aperture. This will require you to move backwards solidly. Now here is the rub: while this does not affect the far distant blur size, stuff in vicinity of the subject then gets blurred proportionally less, eating up almost all of its focal length based blur.

So for stuff in vicinity to the subject, only increasing aperture will significantly increase blur, but with growing focal length, the blur of more distant objects will continue growing with the distance more than it would at shorter lengths.

Of course, increasing their relative distance can be done simply by increasing the absolute distance: make sure that you have lots of clear space behind the subject.

\$\endgroup\$
0
\$\begingroup\$

Bokeh is controlled by depth of field, the shallower the depth of field, the more bokeh effect you will get. So how do you get a shallow depth of field? The quickest way is to move the subject further away from the background. Combine that with a zoom lens, which moves you further away from the subject and you'll start to see more bokeh. The ideal way, however, is to purchase a lens with a larger aperture (think f/1.2 - f/1.8). If you shoot Nikon and are on a budget, I highly recommend the Nikon 50mm f/1.8D.

\$\endgroup\$
1
  • \$\begingroup\$ Note that the definition of a zoom lens is that it has a variable focal length. What you want to say is to use a lens with a high focal length (a tele lens for example. \$\endgroup\$
    – Hugo
    Commented Oct 1, 2015 at 2:26
0
\$\begingroup\$

For shallower depth of field, increase the distance between the subject and the background. Greater the distance between your subject and the background, the greater will be the blurring effect - sharp subject.

\$\endgroup\$

Not the answer you're looking for? Browse other questions tagged or ask your own question.