2
\$\begingroup\$

What would be best Gimp blur filter to make popcorn ceiling less noticeable?

I am using Gimp currently, used Photoshop/Lightroom years ago, but don't have access to a PC now. Definitely not a professional photographer/ editor though.

In Gimp: I've played with a bunch under Filter->Blur but all of them make ceiling look artificially blurred.

I'd like to remove visibility of the popcorn elements, so a) it looks a bit closer to a regular ceiling (to the extent possible), and b) make ceiling not look so obviously photo-edited.

Perhaps I don't need a blur filter, but something completely different, thanks

popcorn ceiling

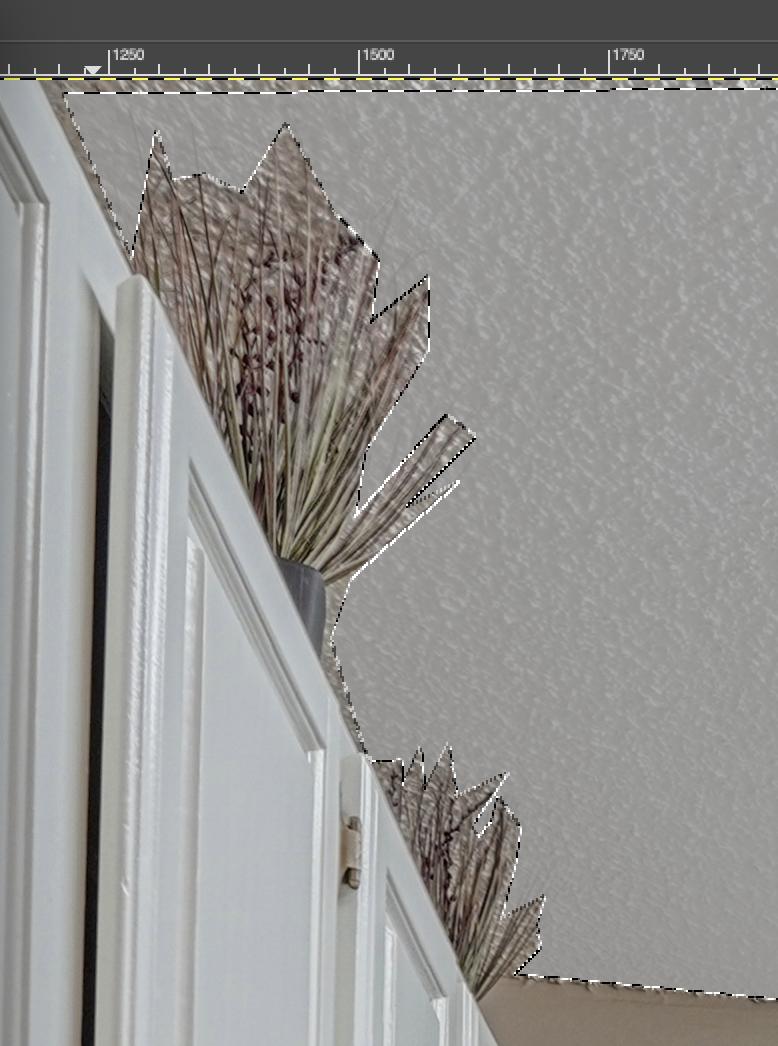
Edit: in some case it's not the filter part selection that's challenging but the selection like in this case some thin leaves of a plant drop to ceiling from this angle of view and it's nearly impossible to select around them?

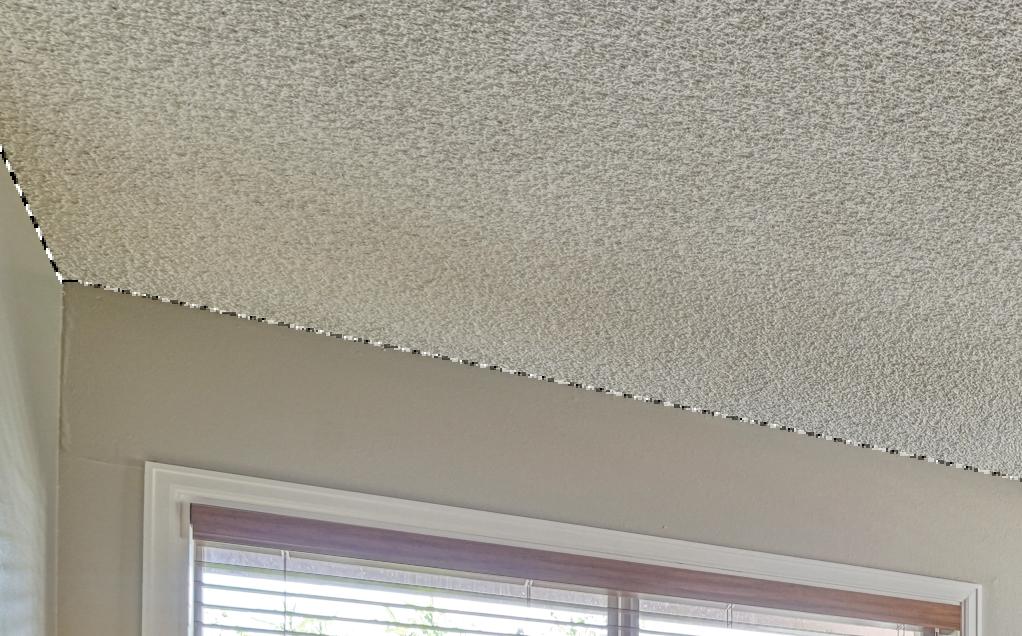
selecting over plants

\$\endgroup\$
3
  • 1
    \$\begingroup\$ About your edit: selecting low contrast detail over what is basically noise is going to be challenging. But if you want help with the challenge, please provide the original image (or a relevant extract) without any changes to it. \$\endgroup\$
    – xenoid
    Commented Jul 31, 2023 at 13:49
  • \$\begingroup\$ @xenoid really appreciate this! I don't want to overuse your kindness as I have 10+ photos to do same trick on. From what I gather it would be fairly manual process? I can do this on simpler shapes myself, but looks like for complex scenarios like in my update a generic approach would be hit-and-miss? Thanks \$\endgroup\$
    – Tagar
    Commented Aug 1, 2023 at 5:49
  • 1
    \$\begingroup\$ Depending on the purpose of the picture you can also just remove these things by cloning the ceiling over with a soft brush. Given it's all straight lines, doing a proper selection is quick and easy. \$\endgroup\$
    – xenoid
    Commented Aug 1, 2023 at 7:03

3 Answers 3

4
\$\begingroup\$

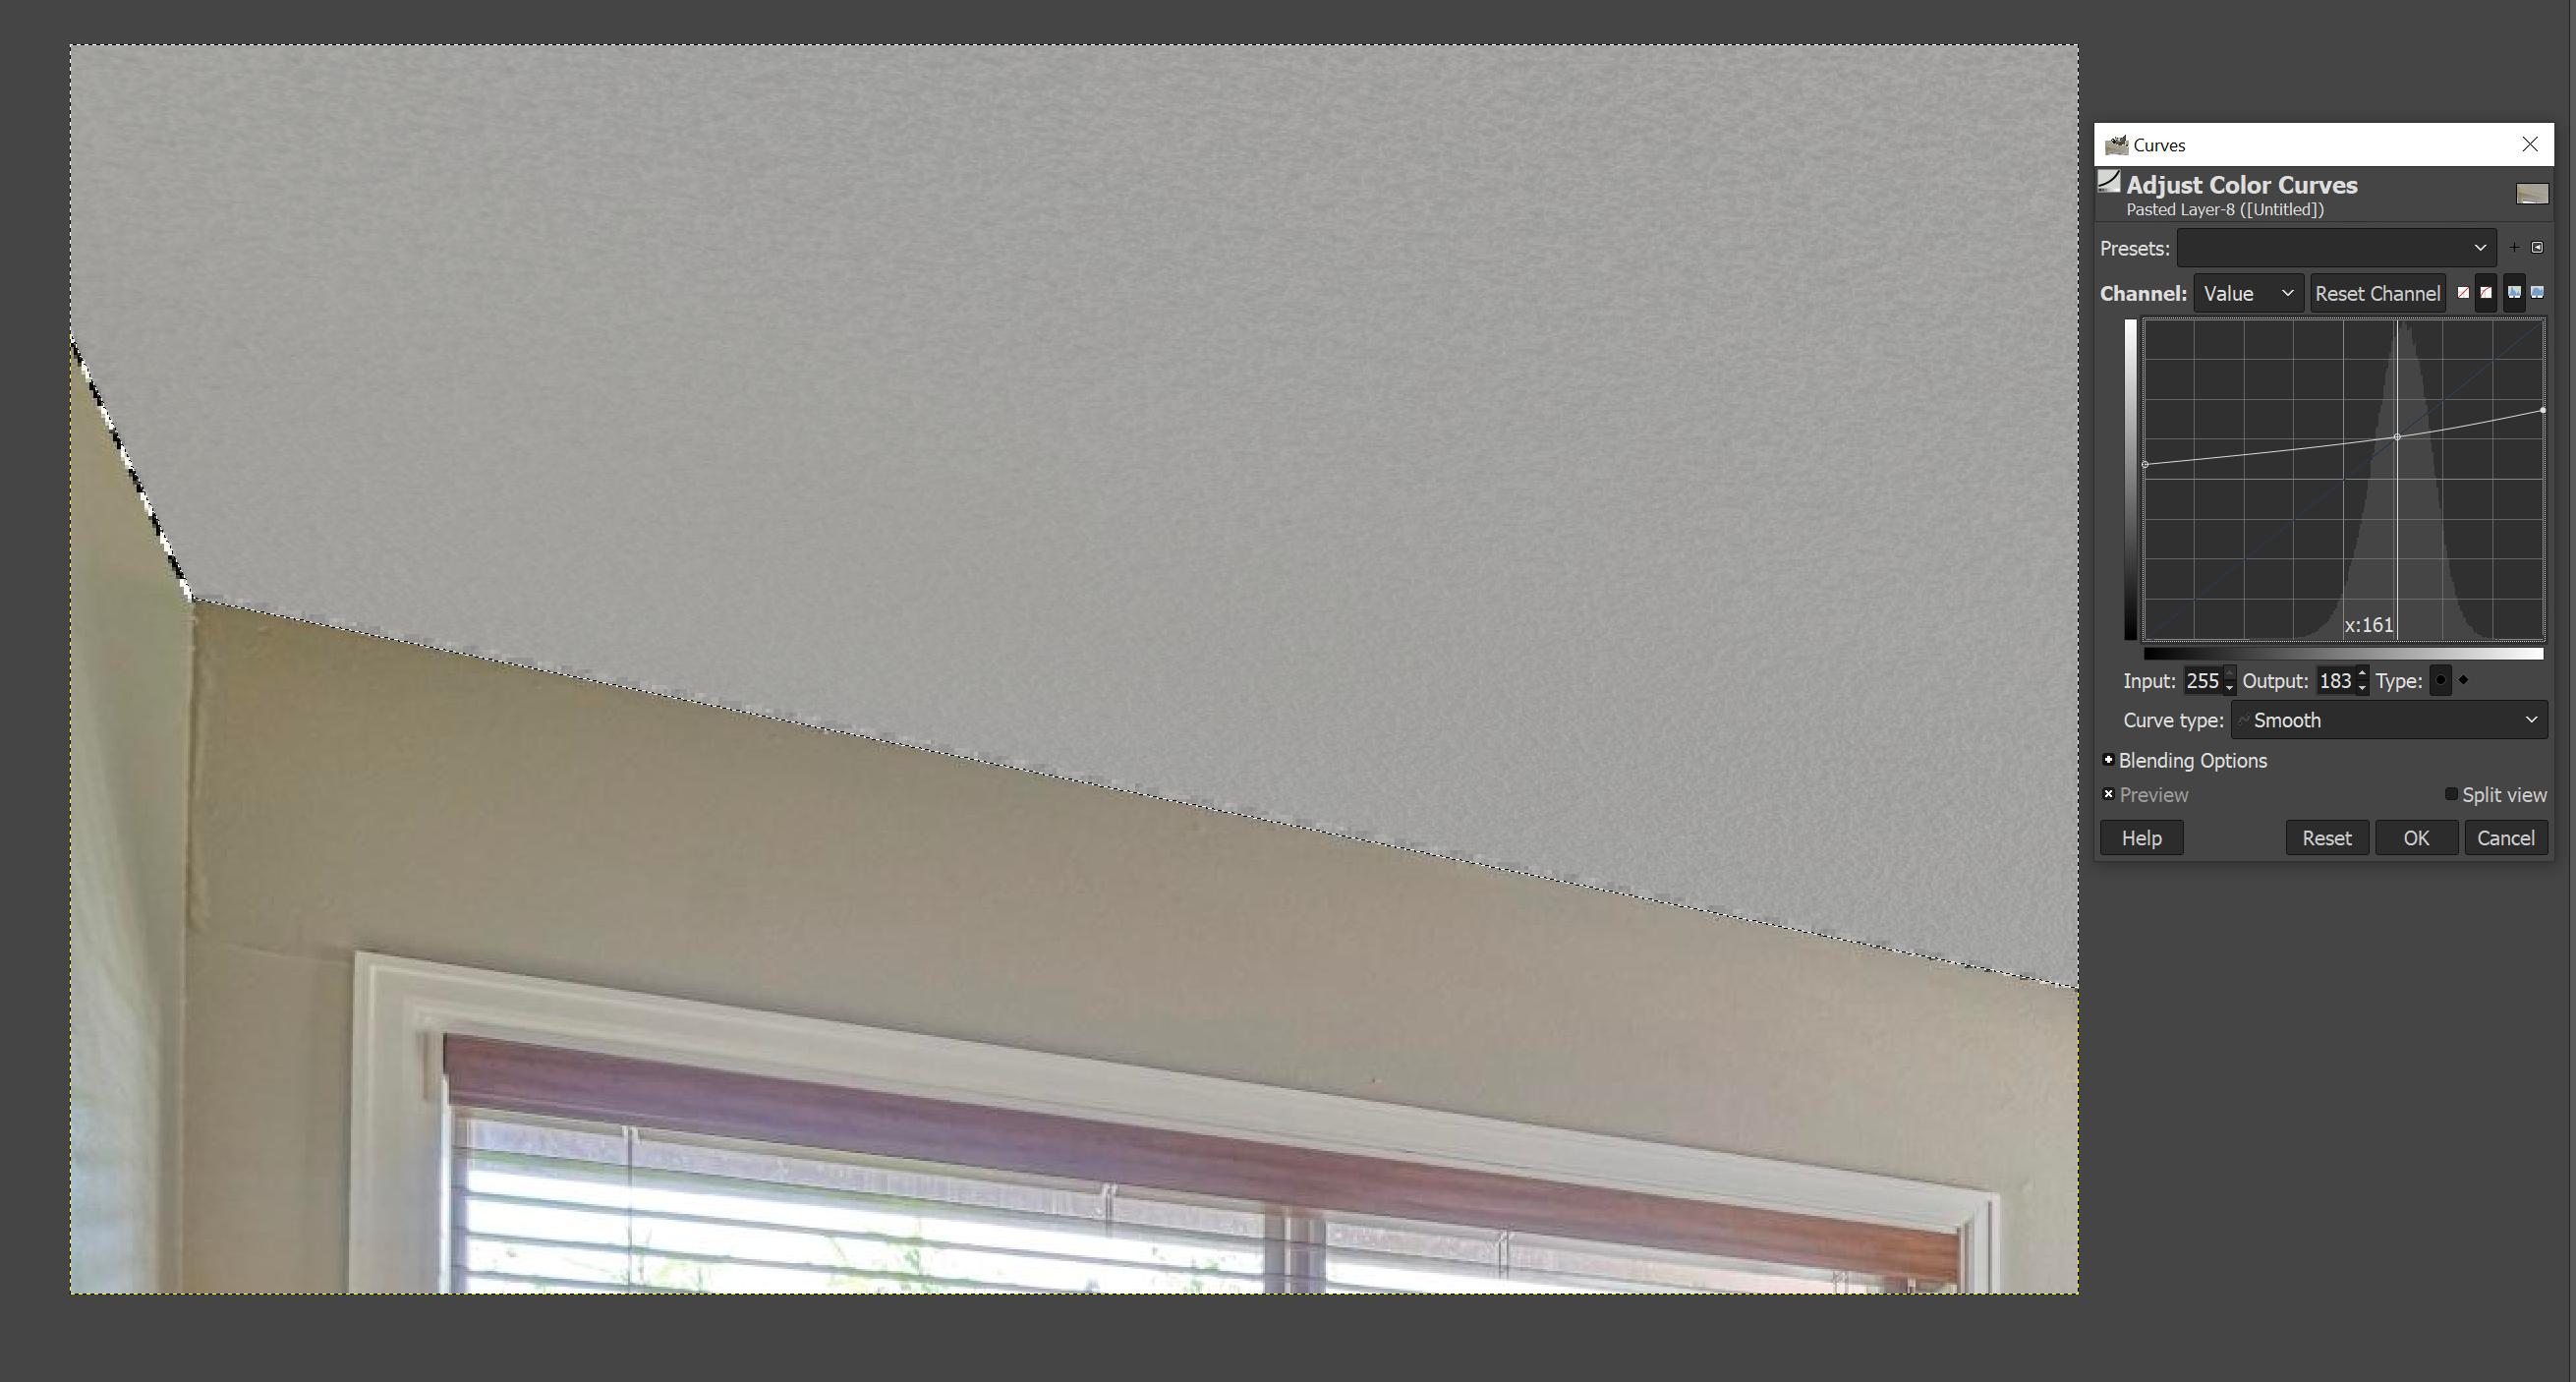
Personally I find that curves are much better for this.

  1. Select the ceiling (you might also feather selection to make transition smoother).
  2. Open Curves dialog.
  3. Ctrl+Click the point somewhere on the ceiling - it will create reference point
  4. Adjust the curve around the reference point so that it's less steep.

enter image description here

As for plants, I'd just clone-stamp over them since they do not play any important role anyways.

\$\endgroup\$
2
  • \$\begingroup\$ Euri thanks! I am still wrapping my head around this, what that curvature shows. I like this trick. Also how is this different from the other answer from @xenoid - it seems gives similar results? Or is this fundamentally different? \$\endgroup\$
    – Tagar
    Commented Jul 31, 2023 at 17:06
  • 1
    \$\begingroup\$ @Tagar xenoid's answer only difference is lack of flexibility. This approach will work for object with any brightness correctly because you are adjusting while keeping it's brightness constant. Also, you might adjust dark and light details separately, and all of that in one dialog. \$\endgroup\$ Commented Aug 1, 2023 at 5:41
3
\$\begingroup\$

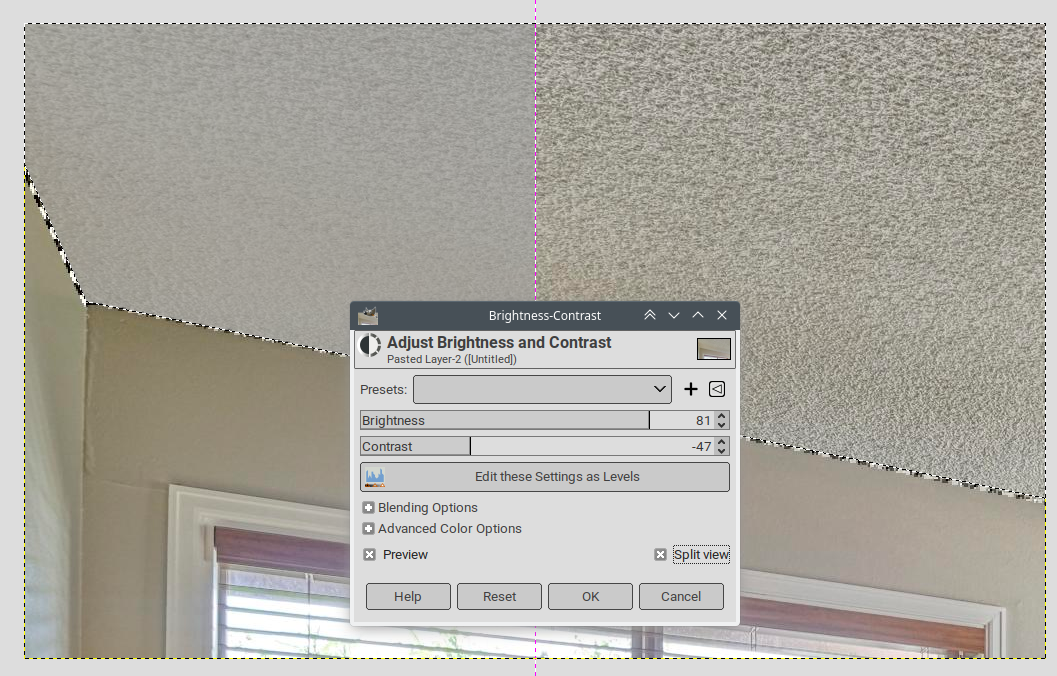
Personally I would just reduce the contrast and increase the brightness. THis keeps some texture while making it a lot less distracting:

enter image description here

\$\endgroup\$
1
\$\begingroup\$

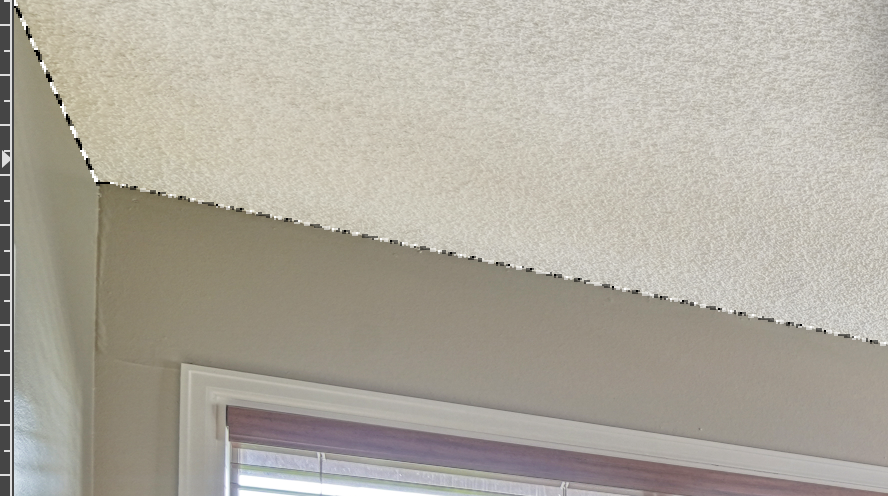
My current best option so far:

edited ceiling

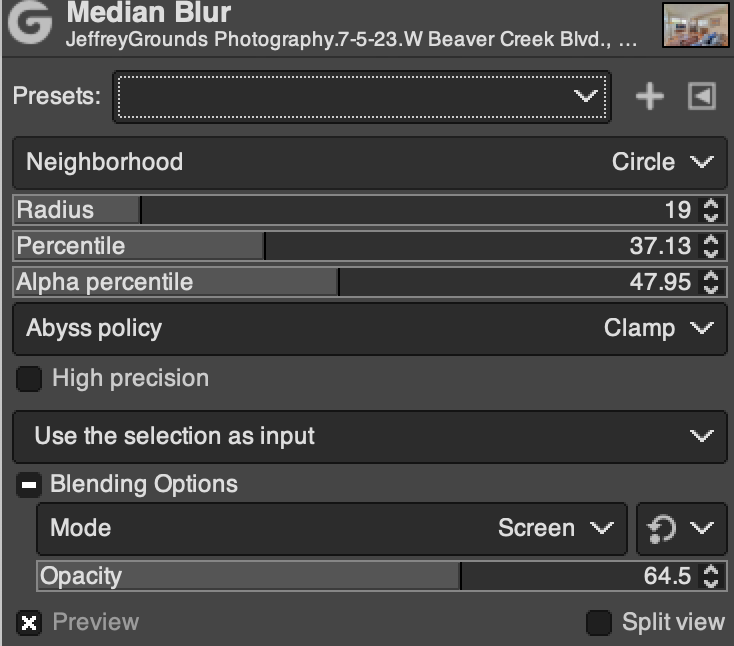
I've used Median Filter with higher Radius and Percentile, but I think the key for blurring to not become very noticeable is to use Blending=Screen and reduced Opacity. Snapshot of the settings:

gimp blur settings

Still far from ideal..

\$\endgroup\$

Your Answer

By clicking “Post Your Answer”, you agree to our terms of service and acknowledge you have read our privacy policy.

Not the answer you're looking for? Browse other questions tagged or ask your own question.