14
\$\begingroup\$

I have an opportunity to attend a Grand Prix later this summer, and am looking for some tips and advice on how to capture the action with my DSLR. I know little about racing, so this will be a unique experience for me.

There are a lot of places to seat myself around the course; does anyone know where the better locations may be will be? The map of the event is illustrated here: http://www.baltimoregrandprix.com/track.cfm

I expect there to be a ton of people, a lot of chaos, fast action, and a lot of things blocking my view, so any advice on how to get some interesting shots at this race would be greatly appreciated.

\$\endgroup\$
3
  • \$\begingroup\$ For clarification: are you attending as a spectator or will you be photographing in some official capacity (which would grant you special access) \$\endgroup\$
    – ahockley
    Commented Jun 8, 2011 at 14:36
  • \$\begingroup\$ Unfortunately, I will be a spectator. No special access. \$\endgroup\$ Commented Jun 8, 2011 at 14:39
  • \$\begingroup\$ ###Further Information Just FYI: A blogger and photographer whom I follow, Scott Bourne, is starting a site dedicated to car (including racing) photography: http://carloves.com/ \$\endgroup\$
    – AJ Finch
    Commented Jun 9, 2011 at 10:36

5 Answers 5

13
\$\begingroup\$

Location

Find a spot with a clear view of a turn or a curve on the race track, and get as close to the ground as you possibly can. However, there will be tall fences around the race course in Baltimore to keep spectators out and flying debris in, so the view from the lowest seats might be partially obstructed.

While the cars will be going faster on the straight segments, you'll probably see more interesting action around the curves due to braking and acceleration.

Try to get to the venue as early as you possibly can to beat the crowd. Inquire what it takes to get access as a news photographer if you're really serious about getting in. Who knows, maybe freelancing for a local news publication is all it takes, depending on the venue and organization that puts the event together.

Ideally, find a spot where you can stand up, but be conscious of people behind you so you don't obstruct their view.

Tripod

You might not be allowed to bring a tripod, but a monopod might be accepted by the event. Otherwise bring an umbrella and use that to support the camera when you pan slow-shutter shots of passing cars to freeze the car but get a nice motion-blurred background.

Mix it up

The cars will be passing many times, so take the opportunity to mix it up: Capture shots at super fast shutter times that freeze the motion and capture slow-shutter shots with and without panning so you get respectively motion-blurred cars and motion-blurred backgrounds.

Lens choice

You will want to bring a tele-lens with a long reach. If you can get close to a curve or corner then a 70-200 mm lens is sufficient, but a zoom with even longer reach will serve you better if you aren't able to scope out and reserve the spot beforehand. Unless thunderclouds roll in and darken the skies, then it should matter less whether you have a fast lens or not.

If you can't find a great spot up front, a lens with a long reach also gives you flexibility to try out the nosebleed seats where you might have a better chance at setting up without blocking the view of other spectators.

Examples

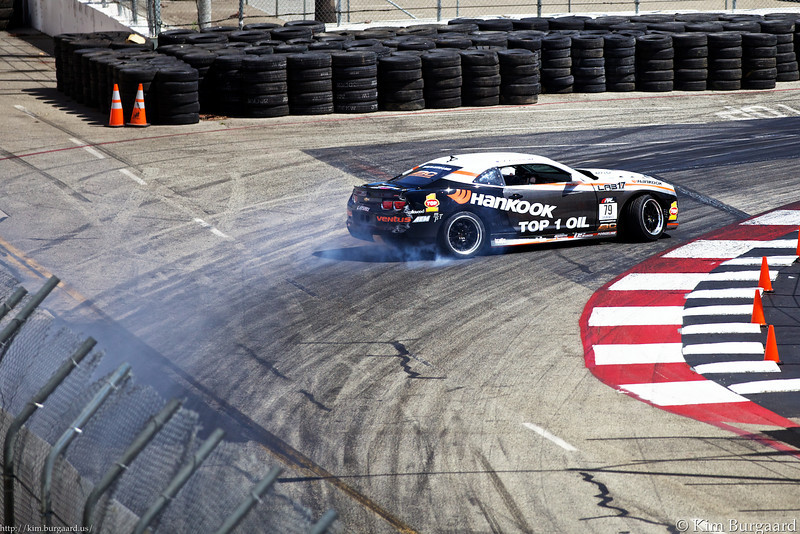
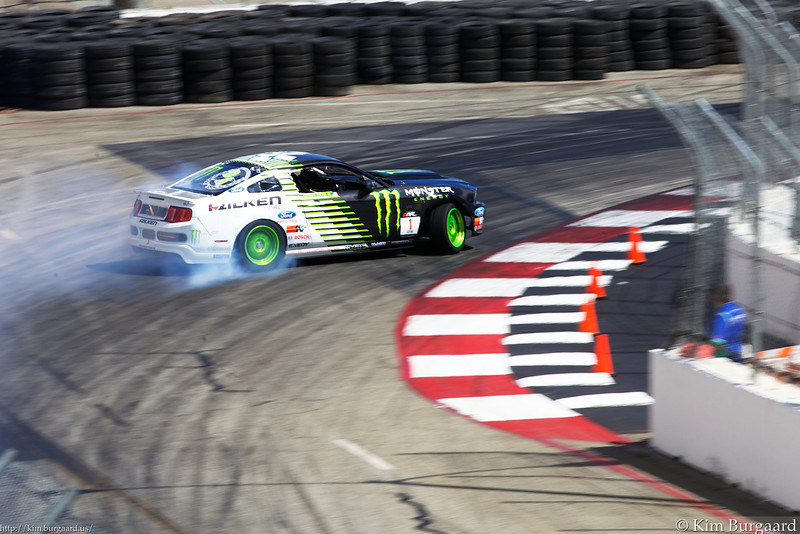
Below are two examples I shot from the Long Beach Grand Prix 2011 test runs. I was on my way to the waterfront in Long Beach, CA, when I heard the angry buzz of race cars so I followed the noise and got the chance to practice some high-speed action shots. I couldn't get right next to the track but an elevated viewpoint--maybe three stories up--turned out to work pretty well. I never leave without my 70-200 zoom lens, but a longer lens would have been better.

The Baltimore Grand Prix and the Long Beach Grand Prix are fairly close in concept; they are both races held on relatively narrow urban streets with many sharp turns.

Freezing the action: 200mm, f/2.8, ISO 160, 1/5000 Freezing the action: 200mm, f/2.8, ISO 160, 1/5000 (full size here)

Hand-held panning to blur the background: 200mm, f/18, ISO 100, 1/60 Hand-held panning to blur the background: 200mm, f/18, ISO 100, 1/60 (full size here)

\$\endgroup\$
2
  • 1
    \$\begingroup\$ Wow, I never thought about using an umbrella as a makeshift monopod. Thanks! \$\endgroup\$
    – NickAldwin
    Commented Aug 8, 2011 at 18:24
  • \$\begingroup\$ Walking sticks/canes can also do in a pinch if they are allowed inside the venue. There are even a few walking sticks that have a hidden 1/4-16 tripod socket screw under a removable knob on the top of the stick. Shhhhh... don't tell anyone! \$\endgroup\$
    – Michael C
    Commented Sep 10, 2018 at 23:07
3
\$\begingroup\$

If they'll let you go there (which I kind of doubt) the inside of turn 3 (the hairpin) would be great. Second choice (and should still be really good) would be the chicane, around grandstands 26 and 27. Another good choice (but apparently more expensive) be inside turn 9.

If at all possible I'd advise going to some sort of local races a bit first (doesn't matter all that much what sort) to get some practice at panning with a fast-moving subject and such. It takes a bit of practice, and you don't want to spend half of a big event just figuring out what you want to try to do.

\$\endgroup\$
1
  • 2
    \$\begingroup\$ Specifically, try to get to an event or two at Summit Point. It's a road course (not a street course) so the environment won't be quite the same, but if you can get to a kart event (racing karts are not the things they let you play with at five bucks a throw) you can get a really good "scale model" experience of open-wheel racing. \$\endgroup\$
    – user2719
    Commented Jun 8, 2011 at 16:24
3
\$\begingroup\$

That map is really pretty good as far as pointing out interesting spots around the track. Hard-braking zones (turns 1, 3, 5) offer the best chance to catch a pass, or even contact between cars, while high-speed areas like the main straight would be a place to try some panning shots if you're fast. Since these cars don't have anti-lock brakes, watch for drivers to occasionally lock a wheel in these braking zones when they're trying to dive under someone for a pass.

Street circuits are notoriously tight, with buildings and temporary walls hemming the cars in. Use a satellite view map (ie, google maps) to check out building or other obstacles that are going to get in your way, and try to envision where they're going to erect the grandstands. The areas down around turns 3 and 9 seem to be among the most wide-open. The hospitality areas inside turns 9-10 look interesting, too. I think the cars will be mostly follow-the-leader through here (no passing), but you might have a chance for some nice panning shots -- the cars should be moving relatively slowly (by their standards) coming out of 9.

It's a little more difficult to predict exactly where they'll erect fences relative to the grandstands, so if you can get there early (even the day before) and scout out the course, that would help. A couple of the artists renderings on the home page are actually pretty helpful in this respect. The first one appears to show a view from somewhere between turns 3 and 4, looking back toward the bridge over the track at Gate D. If you could get away with standing on that bridge, in fact, you might get some nice shots.

I'm not sure how much milling around you'll see there, vs. people finding one place to sit and parking, but you can be sure that good spots for photography will go quickly. You'll probably have as much trouble shooting around people as anything else, so if there's a stand you think you'll like, it would be smart to stake out a prime seat early.

If you can, be sure to check out the Indy Lights race, too. These guys are likely to make a few more mistakes, and they'll give you some practice for the Indycar race.

\$\endgroup\$
3
\$\begingroup\$

You have some good answers so far, but none really answer the "how to capture the action with a DSLR" part of your question. Here goes:

File format

Shooting JPEG will give you a faster burst rate, and you will fit more shots on your memory card.

Shooting mode

Use your camera's fastest continuous shooting speed. This will maximise your number of "keepers"

Focusing

Use AF servo mode to ensure continuous focus as the cars move towards or away from you.

Alternatively, you can pre-focus against a part of the track manually, then press the shutter as cars reach your zone of focus.

Image stabilisation (IS/VR)

If your lens has this, check whether it has a separate panning mode. This may happen automatically, or there may be a switch labelled "MODE 2" or similar. If it doesn't have a panning mode, switch image stabilisation off for panning shots.

Camera mode

Use manual mode so long as the light is relatively constant. By fixing your exposure, you ensure continuity between shots, regardless of whether a white car or a black car enters your frame. This makes any post processing much easier as you can can adjust the exposure in batches.

Exposure

To freeze action, use your lenses widest aperture combined with an ISO high enough to give you a shutter speed of 1/1000s or 1/2000s (depending on the speed of the cars).

For panning shots, use a low ISO combined with a wide enough aperture to get a shutter speed of 1/200s. This makes a good starting point, but check the result, adjusting the shutter speed if necessary to determine the length of the pan.

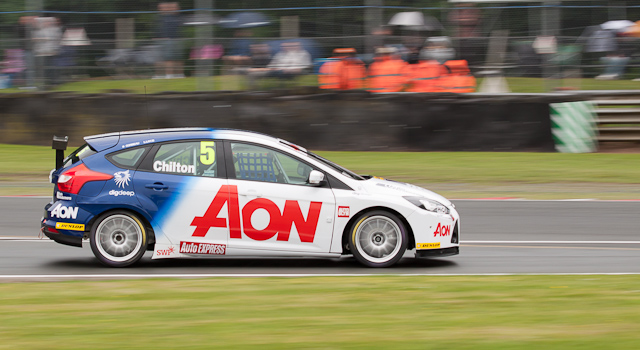
This is a shot I took last weekend:

BTCC Oulton Park 2011

Manual mode, 1/160s @ f5.6, ISO 100, AF servo, continuous shooting, IS mode 2.

If I hadn't been using manual mode, the fluorescent jackets of the marshals would probably have thrown the metering off, causing the shot to underexpose. I decided to reduce the luminosity of the jackets in post processing as they detracted from the subject.

\$\endgroup\$
3
\$\begingroup\$

The Baltimore race is new, and a street circuit changes often with respect to the barrier material, so it is impossible to tell you where to take shots. For that, you will need to wander around the track, which is usually fairly easy. Don't stay in one spot in the stands.

For IRL and ALMS races, credentialed photographers (those with proof they work for a publication) can apply for a get a photo badge/vest and they are allowed in special photographer areas that are inside the race track, so that they wall/fence is not in view. If you can swing this, you should, though Baltimore will likely be limited in badges and photo locations...bigger tracks like RoadAtlanta are less so.

For images, I recommend:

Camera: on Servo focus mode (or hybrid: for Canon this is AI Servo or AI Focus), and highest shot speed your camera supports.

Lens: I recommend a zoom, such as 70-200. 500mm is very nice for tight shots of the driver.

Stability: I recommend a monopod, as most of your shots will be done panning, for which tripods are useless. In a similar fashion, VR/IS is fairly useless as well, though comes in handy if there are evening shots.

Shooting: The technique you choose will depend on the type of shot you want 1) action or 2) motion.

1) action: Here you are shooting to show the physical and dynamic nature of autoracing, such as a wheel off the track, two cars fighting for position, a car spinning off road, or a wreck. You need high shutter speed to stop the motion, and you likely want higher aperture to ensure sharpness. I go above 1/1000th for these on bright days.

The technique is simply to get the car in the frame and fire away. Focus on composition and position yourself at critical corners like chicanes where there are plenty of offs, spins and rubbing fenders. If you are fairly close to the action, it is important to pan: you will be surprised at how fast the cars are, they do not stay in frame long, and at 200+mm focal length it is literally a blink of the eye.

Pre-frame your shot, and pre-focus. When your target cars arrive, just hold down the shutter button, maybe a bit of panning. You will take lots of photos that you will discard. Chimp only if you need the room on your cards, or you will miss the action.

2) motion: The trick here is to balance shutter speed to ensure sharpness, while also capturing some motion blur. The actual shutter speed depends on conditions, but is usually below the focal length of the lens (say less than 1/200th), so the monopod is critical here. I usually shoot between 1/80 - 1/160th. Shots that include wheels are the best, because they benefit most from the motion blur. Avoid shots moving directly toward or away from the camera with this technique.

The technique is to pre-frame and pre-focus the shot, and then as the car enters your target area, shoot and pan with the car as you fire off shots. This is where high frames per second pay the bills. You will need lots of practice and chimp to make sure you have the right shutter speed. You will get mostly shots of the car partially in the frame, but a few keepers.

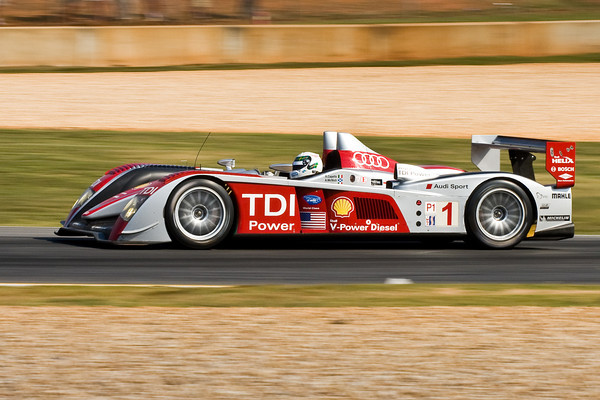
Here is an example of 1) Action:
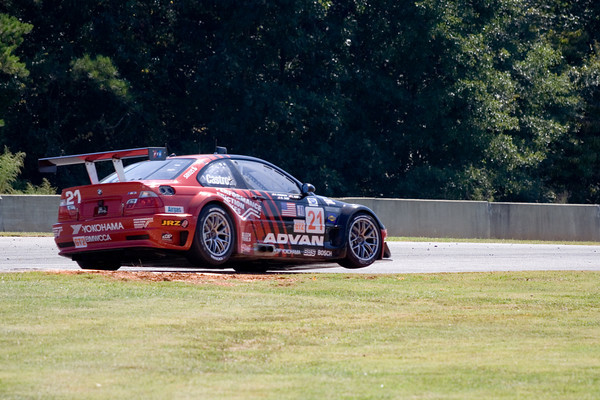
Action shot

And here is a shot of 2) Motion:

enter image description here

For more, visit my Auto Racing shots at:

http://digitalmason.smugmug.com/Auto-Racing

\$\endgroup\$
2
  • \$\begingroup\$ There are multiple answers that speak to my question, but I can only "accept" one as the final answer. Thank you for your tips though, they were very helpful! \$\endgroup\$ Commented Jun 18, 2011 at 19:54
  • \$\begingroup\$ NIce shots cmason \$\endgroup\$
    – GoodSp33d
    Commented Feb 8, 2013 at 6:45

Your Answer

By clicking “Post Your Answer”, you agree to our terms of service and acknowledge you have read our privacy policy.

Not the answer you're looking for? Browse other questions tagged or ask your own question.