35
\$\begingroup\$

Often i see portraits such as the one below and like the way they look. I wanted to know can I get this look in my shots.

I am sure there are professional materials you can get to outfit a studio that will deliver such results. I have no clue what these items would be, can i get clued in?

Also, I was wondering if there is a DIY way to achieve this as well. Maybe with a black bed sheet or something?

I want to set something up in a room in my house for studio type shots. I am looking to get an idea of what items I need to get this done and how the setup should go.

black background portrait enter image description here

\$\endgroup\$
2
  • \$\begingroup\$ @mattdm I note that the closing message says that the answers will be merged. Will this in fact happen or will these additional answers be lost?[Yes, I know the @... does not work here) \$\endgroup\$ Commented Feb 1, 2013 at 0:43
  • \$\begingroup\$ @RussellMcMahon A moderator needs to do the merge. When there are good answers (as here), flag the quinoa attention. \$\endgroup\$
    – mattdm
    Commented Mar 2, 2014 at 9:03

15 Answers 15

35
\$\begingroup\$

To get a pure black background you need space, not material. The easiest way to get a black background is to shoot outdoors at night. It doesn't matter what your background is like, provided it's not too close and doesn't have it's own lightsources. This was shot in my garden:

Distance is always key. If you are working indoors, even with a specialist photographic black backdrop it's really hard to get it jet black in your photos. "black" objects still reflect some light so if lighting from the front if any of your key light hits the background the effect is easily scuppered.

This is where the inverse square law comes in, if the light is twice the distance from your background as it is from the subject, the background gets 4 x less light. Three times further away and it's 9 x less. This allows you to make a white wall turn black if it's far enough away.

The above image was shot in front of a white projector screen! That's about as bright white as objects get. But due to the lighting being many times closer to the grey subject, the background appears absolutely jet black.

Now the flash in the elephant example was extremely close, however the effect scales up to people, the above image was shot in front of a white wall, which although it doesn't go pure black it's suitable for most purposes (this was actually part of a multi light setup with the background light off, I could have move further from the wall).

This image demonstrates the opposite effect - the background was substituted for a piece of black card, of similar reflectance to many commercial photographic backgrounds. Now enough light is hitting this "black" object for it to appear white!

Here's an example of what goes wrong if you don't have enough space, even with the right gear:

There wasn't sufficient space (or a large enough background) to have the background further from the subject, and the result is a not quite black background which shows up creases and other imperfections which need to be 'shopped out. Not ideal.


Now your actual question referred to creating a uniform background (not necessarily 100% pure black). Any black material could be used, but unless you get it jet black, the weave plus any creases are going to show up. This can be remedied by throwing the background out of focus with a fast lens. Unfortunately this also requires space (or a very big aperture) so ultimately I'm afraid there are few options for the space limited!

\$\endgroup\$
4
  • \$\begingroup\$ You mean, 3^2, not 2^3? so 9 x less light? \$\endgroup\$
    – Tom
    Commented Jan 27, 2011 at 17:21
  • \$\begingroup\$ @tom thanks, I meant to type "9" but missed the key by one! \$\endgroup\$
    – Matt Grum
    Commented Jan 27, 2011 at 17:27
  • \$\begingroup\$ well put, nice examples and a great help. \$\endgroup\$
    – kacalapy
    Commented Feb 1, 2011 at 21:16
  • \$\begingroup\$ I like the examples provided. I would like to say though, even though not ideal as stated, I don't mind to photoshop a little bit more darkness into a black muslin backdrop. I am getting ready for a newborn session in which the Mom requested a black backdrop. I already expect that I may have to tweak the "darkness" of the backdrop. You were completely right though. It is not ideal, yet do able? \$\endgroup\$
    – user24336
    Commented Nov 23, 2013 at 23:52
14
\$\begingroup\$

To make the inverse square law work for you, you need to get the light as close to the subject as possible, and move the subject away from the background as much as possible.

It will also help if you can "flag" the light so it doesn't strike the background, at least not in the angle of view of the camera.

\$\endgroup\$
10
\$\begingroup\$

I'm no expert in studio photography, but this look you are trying to achieve is all about lighting.

I recomend "Light: Science and Magic: An Introduction to Photographic Lighting". It will teach you the fundamentals to achieve this and much more.
I learned quite a bit with that book.

Additionally, some post work can't harm to improve results :)

\$\endgroup\$
3
  • \$\begingroup\$ +1. That book covers the principles and the techniques explicitly in its chapter on black-on-black subjects (of which the dog is a fine example). \$\endgroup\$
    – whuber
    Commented Jan 27, 2011 at 16:47
  • \$\begingroup\$ +1. If it isn't in the book, you don't need to know it. \$\endgroup\$
    – Staale S
    Commented Jan 27, 2011 at 17:06
  • \$\begingroup\$ I'll throw my hat in for LS&M, too. I don't think one necessarily needs a lot of space. It looks like some reflectors and gobos could achieve the looks of the sample photos in the OP's question. \$\endgroup\$
    – TroyR
    Commented Jun 28, 2013 at 7:10
9
\$\begingroup\$

If you want to take a portrait like this without blacking out the background in Photoshop, then there are a couple things to keep in mind. The big idea is that you need to make minimize the amount of light that hits your background. You mentioned the inverse square law, and the distance between the subject and the background helps. But the camera settings and directionality of the light also matter. Let's walk through a few steps, point by point.

First, make sure you're starting with camera settings that ensure true black. There should be absolutely no exposure with ambient light. If you turn off your strobe/speedlight and take a picture, you should get nothing but 100% black. This means turning up the shutter speed, turning down the ISO, or closing down the aperture until everything is pure black. If possible, you want to underexpose the background by a couple stops as well (i.e. close the aperture an extra one or two stops).

Second, place the subject with an eye towards the inverse square law. The intensity of light falls off exponentially as distance is increased. So, you need to increase the distance between the light and the background and decrease the distance between the light and the subject. You need to compromise here a bit, because you don't want your light to be 6" from your subject; but you want to maximize the distance between the subject and background compared to that between the light and subject.

Third, make your light focused. Light radiates out in all directions. A bare speedlight or strobe will shine in all directions. The use of a modifier - like a softbox, a grid, a snoot, or even just a piece of cardboard (a "gobo" more technically) - will point the light at your model and keep it off your background. You want to restrict the ability of light to spread out.

Fourth (and finally), make your light directional. Notice how your example image has a deep shadow on the model's neck and right cheek? This indicates the light is high and to the right. It's pointing down and to the left (and the model is facing up to minimize shadows). The light doesn't point anywhere near the background, and a light modifier (according to the point above) will make sure that no light ever hits the background. If, on the other hand, your key light is on axis you will never be able to get a perfectly black background.

Fifth (and an afterthought), make sure that you're not bouncing light onto a background. If there is a wall just to the left of your model and your light is pointing to the left, it will bounce off that wall and hit your background. Instead, you should make sure that there is an open area (so no light is bounced) or you should set up a temporary wall (basically, a giant gobo of cardboard, whiteboard, or black fabric). Any reflected light could potentially add a little exposure to your background and ruin the shot.

So, let's recap. Start by tightening your exposure to black out the exposure. Then, place the subject so it is close to your light and the light is relatively far from your background. Finally, make sure that the light is tightly focused and that it doesn't point towards your background.

\$\endgroup\$
7
\$\begingroup\$

Using the inverse square law is only part of the solution. If your background is white, for example, you'll likely find that it's still not quite pitch black. Using a dark background helps (such as a black bed sheet), but the real key is to get some black velvet (check local fabric/crafts stores) which does a great job of absorbing light and making things feel even darker.

\$\endgroup\$
1
  • 1
    \$\begingroup\$ Upvote for the velvet. using the same. \$\endgroup\$
    – uncovery
    Commented Jan 30, 2013 at 3:14
4
\$\begingroup\$

The key is to light the subject separately from the background.

If you can create a 2-3 stop difference between your subject and the backdrop, then the background will be dark no matter what color it is.

To make things a little easier, a dark backdrop will decrease the difference that is required.

This is actually very similar to creating a white background, but instead of overexposing, you want to underexpose the background, while keeping your subject properly exposed.

\$\endgroup\$
2
  • \$\begingroup\$ See my comment to AJ Finch's response. \$\endgroup\$
    – whuber
    Commented Jan 27, 2011 at 16:45
  • 1
    \$\begingroup\$ Subject-backdrop distance and the inverse square law is your friend! \$\endgroup\$
    – Staale S
    Commented Jan 27, 2011 at 17:08
4
\$\begingroup\$

Film or digital?

If this is is digital, you just fire up your photo-editing program, select the shape of the subject, invert the selection, and fill the selected area with color value #000000.

Done.

That is quite possibly how the example photo was produced.

A simple edit is easier than fiddling with the lighting and environment to naturally obtain an ink-black background.

Then again, if you have to do it repetitively over a hundred shots, maybe getting it done right at the source once, and then just shooting a hundred shots that don't require editing, is more economical.

One way might be to get the subject to stand in the doorway of a large, dark room, facing out, and take care not to illuminate any surface in that room through the doorway. Perhaps some troublesome surfaces can draped with some black cloth.

The most perfectly black object is infinite, empty space. No light which enters it bounces back. An approximation of this is the hohlraum: a tiny aperture into a large cavity which is otherwise closed. Such an aperture radiates and absorbs almost like a perfect black body.

\$\endgroup\$
1
  • \$\begingroup\$ Small correction: a cavity with a small hole is not perfectly black, but radiates depending on the temperature in the cavity, approximating a perfect black body. Only at close to absolute zero is it absolutely black. But we are talking about "visible light black", not "zero radiation black". \$\endgroup\$
    – anon
    Commented Jan 31, 2013 at 3:21
3
\$\begingroup\$

What you need is a black seamless backdrop. You can buy a photo-oriented one or make one yourself (depending in the subject's size) from DIY art supplies. The seamless is usually long enough so it covers the floor as well as the back wall, and such that there is no "corner" in the connection between the floor and wall parts - just a smooth transition.

Additionally, if you are shooting in a relatively dark space, using strobes or flashes, then the inverse square law comes to your help and you can do with a dark, but not necessarily black background if you place it far enough from your subject.

Update - as for the material, really anything that is big and flexible enough can do. In the image below you can see a similar setup, only made with white background instead of black. The seamless was merely my window's blind...

enter image description here

\$\endgroup\$
3
\$\begingroup\$

It's very easy to do - all you need is a flash and space! You can shoot on a very brightly lit day outdoors and still get a black background.

Firstly, meter your background. Shoot a couple pictures with your camera and adjust the aperture and shutter speed until you get a completely black screen/image.

Then get a flash and power it up to it's highest output (or whatever is needed, highest output most likely the only level that'll light up your subject enough) and aim it towards your subject and shoot! If you're in a small space wrap something around the end of the flash so the light doesn't bleed out anywhere and is going directly where you want it to.

There's a video on YouTube explaining this exact method - try typing in photography, it's one of the first videos that come up.

I haven't tried this yet but will be this weekend for a shoot. Very handy method and more or less makes needing a studio for this style shoot almost obsolete.

\$\endgroup\$
2
\$\begingroup\$

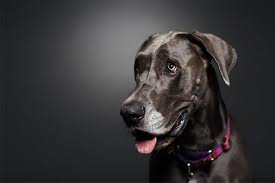
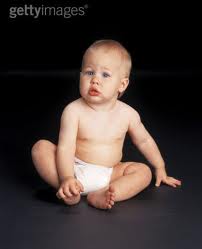
That's just grey "seamless" paper (or, likely, vinyl in the case of the baby's picture, given both the apparent reflectivity and the propensity for subject leakage) with carefully controlled lighting. The dog picture looks like the background was lit separately with a snoot (a cylindrical or pointy-end-toward-the-subject conical restrictor), probably with a grid. In the case of the baby, a gobo (a card or opaque fabric flag) is keeping the light off of the background while allowing it to fall on the baby.

ADDED: "Seamless", by the way, is an expensive photographer's word for "big roll of construction paper", and for table-top shooting, it can be a whole lot cheaper to go to your local arts & crafts and pick up a sheet or two of the ordinary stuff (they come pretty big). And a cheap fleece blanket from the local bargain store makes a decent substitute if you don't need to go to the floor.

\$\endgroup\$
1
\$\begingroup\$

Basically, anything black

Anything black should work fine for you.

It doesn't have to be totally black, just blacker than the subject by a few stops (off the top of my head, 3 stops might be enough, 4 would be better).

It certainly doesn't have to be expensive. A length of black fabric from your local store will work fine.

More expensive backgrounds are available, which may be more convenient to use, or more matt, but you can certainly get great effects cheaply.

\$\endgroup\$
1
  • 4
    \$\begingroup\$ It's crucial that the material not be subject to specular and direct reflections. (Imagine the bad effect black plastic garbage bags could have. :-) Velvet is often chosen for this reason, or at least something with a matte finish. Lighting the background to keep any potential direct reflections out of the field of view helps, too. Stan Rogers (in this thread) mentions some practical ways to keep such light off the background. \$\endgroup\$
    – whuber
    Commented Jan 27, 2011 at 16:44
1
\$\begingroup\$

Choose a combination of aperture, shutter speed, and ISO to underexpose the background and produce a deep black. Then add strobes or other light sources to properly expose the subject. Keeping the subject a good distance from the background will help you avoid spilling light onto it.

\$\endgroup\$
0
\$\begingroup\$

Here's something you can do, regardless of the background material.

Increase your shutter speed.

That can help remove ambient background light, assuming you're still using a strobe to light your subject. If a small aperture and 1/250s is still too slow to achieve that, a camera and flashes that do high-speed sync can make a bright background black.

An example... http://www.flickr.com/photos/carpeicthus/5079781743/

Taken at 1/8000s at f/11 with a pair of SB-800s on full power. Of course, this is an extreme example that requires a lot power, but an indoor studio should be no problem.

\$\endgroup\$
0
\$\begingroup\$

This is about a related aspect of the question - ie not "how to do it" but "is this effect that I am trying to emulate really done this way?". Learning how to do what someone else has achieved is good. Trying to copy something which wasn't actually done the way you thought it was can be "annoying".

In some cases,

  • it may be claimed to be done in-camera but in fact be done using post-processing, or

  • the camera may be applying adjustments which affect the result.
    If so, the user may not be aware of such effects or may be using them to advantage.

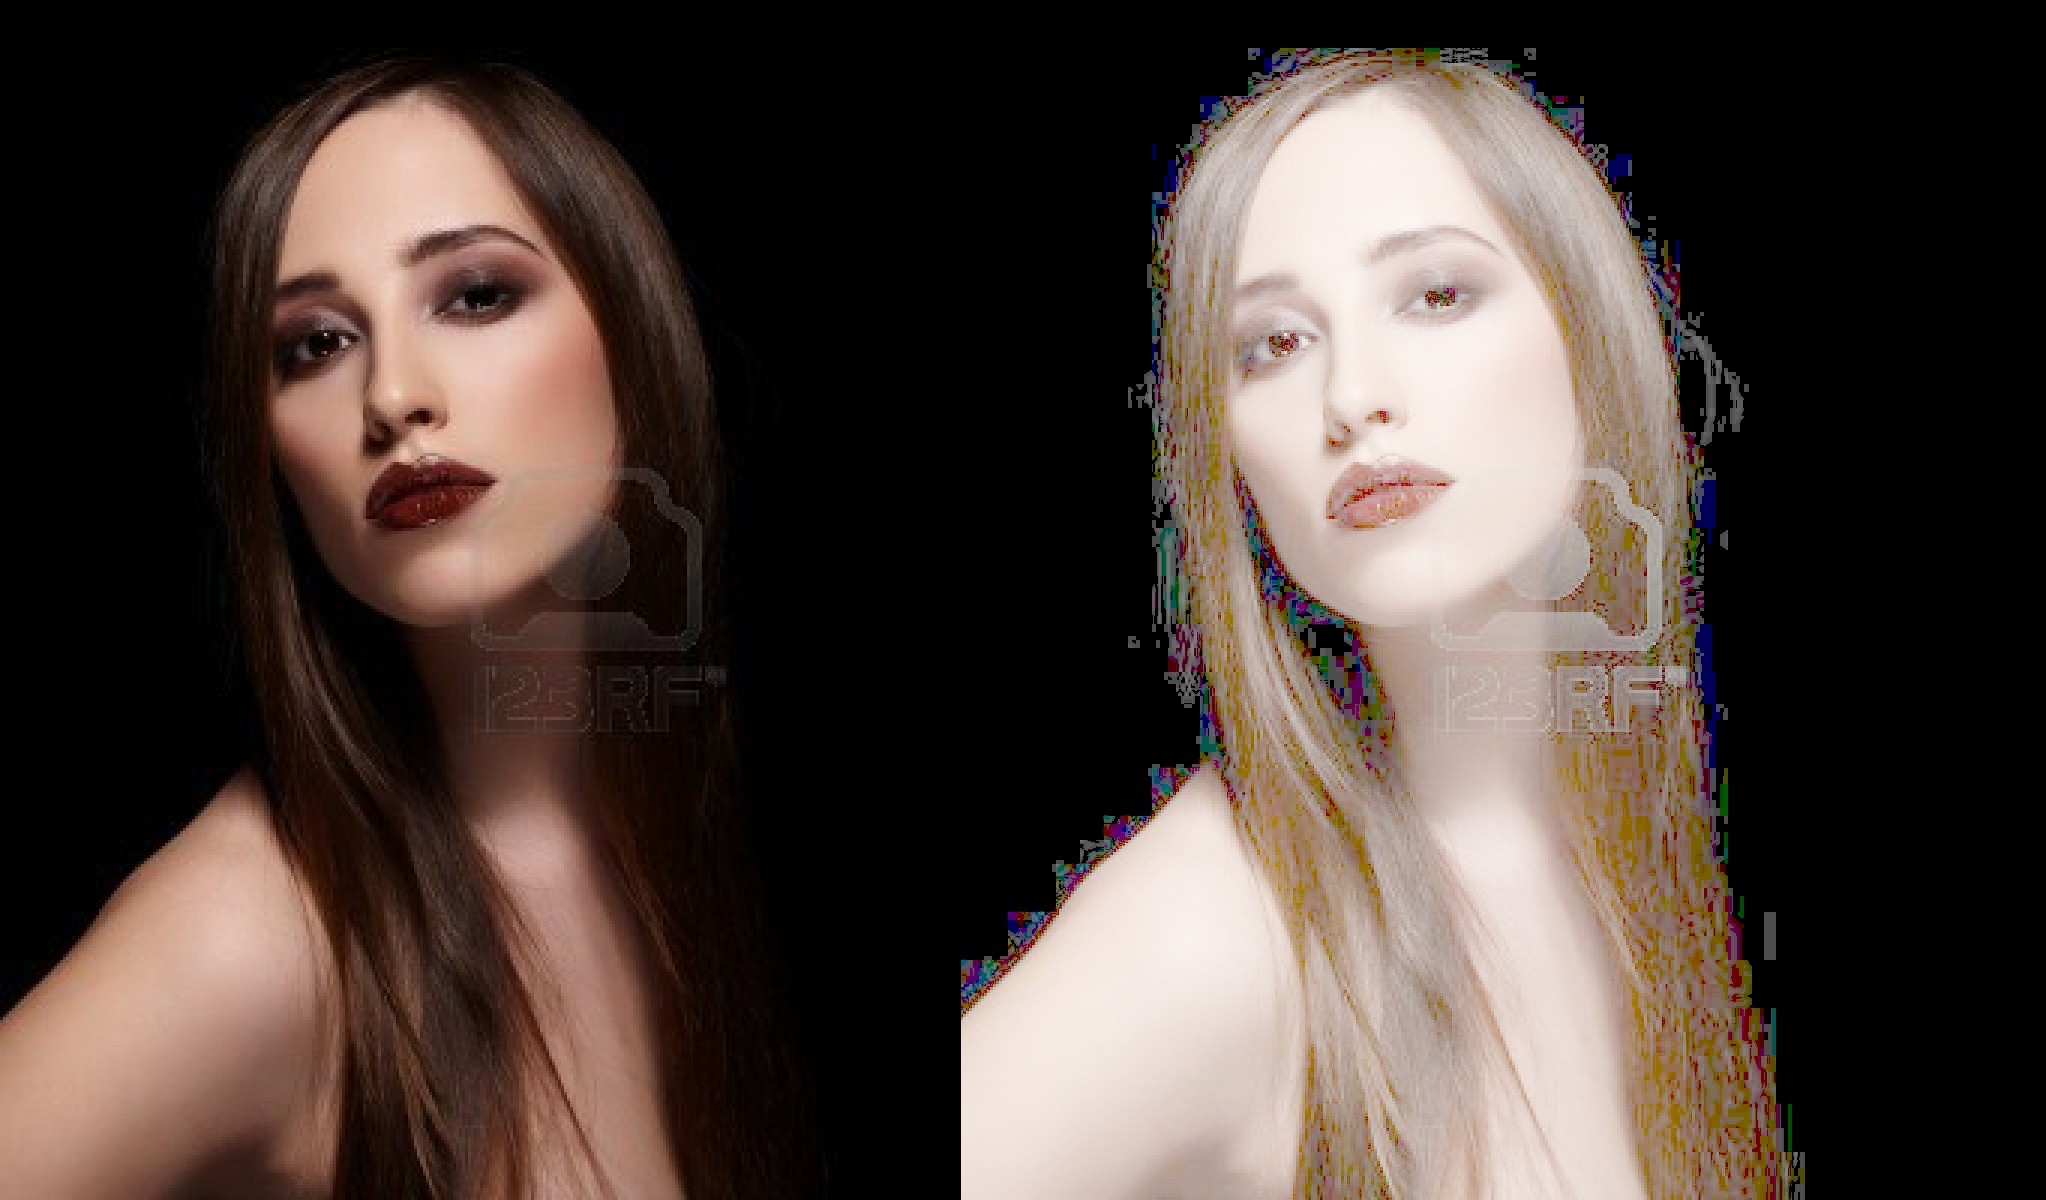
  • Quick and useful test - Increase Gamma substantially so the image is pale and very washed out overall (as in example below). Now inspect the "black". Much can be learned.

The example below at left was copied from Stack Exchange question
How do I get a really black background?
as an example of claimed in-camera processing.

While this is conceivably the case, simply increasing the Gamma level 'somewhat' brings up artefacts and main-image boundary conditions which strongly suggest post processing.

  • If true black level (0, 0, 0) is present in the image, as it is here in the "black" areas well away from the central subject, then increasing Gamma will bring up anything that is not truly black, while leaving true black still as true black).

There are relevant comments at the end under "Comments on image:" , but I suggest you read the following first.

Near black pixels in the black regions adjacent to the model's hair could be due to light falling on individual hair strands or groups of hair such that light levels very near to black were returned. However, the low level pixels all along the length of the shoulder and upper arm cannot be explained in this manner. If you look at the original image these can be seen as non black areas. Conceivably these could be caused by lens flare or other optical effects, or by unwanted in-camera processing from eg a selective contrast enhancing mechanism such as Nikon's 'Active D Lighting'. D-Lighting and other mechanisms which adjust light levels in subareas in images can create boundary effects which are not in the original. A well documented and very visible example of this is shown here Nikon's "Active D-Lighting's" dirty little secret

But the impression I gain is that some form of 'fill' or black level cutoff has been used with a "reach" or "radius" of more than just the adjacent pixel. In the case of the model's shoulder & arm, the large bright areas to the right has affected pixels in what is mean to be completely black causing a "graded" edge. Again, this could have been done in-camera, but gives the impression of having been applied subsequently.

Notice the area of black just below and to the left (as viewed) of the model's chin. This 'suffers from' a similar proximity-to-brightness grading effect with only a very few pixels in the area actually being black. That this area should not be true-black is entirely reasonable as the area contains shoulder and hair with perhaps a peep of background, but the grading effect is clearly seen.
enter image description here

Note: This image is subject to imgur & stack exchanges's licence terms as long as the original was uploaded legally.

Comments on image:

Pixel peeping (or a good eye as shown) reveals that this image has been heavily and non expertly manipulated out of camera. No camera, and no automated editing process would do some of the things that have been done. So any claim that the background black is achieved in-camera are suspect (at least) especially given the factors mentioned above.

Look at the pupil of the model's right eye (on our left). The top of the pupil is truncated and it seems that a block may have been pasted in.

Her mouth has either been pasted on or significantly manipulated. This can be clearly seen even as presented in the original image (eg dark thin loop at top of mouth and more). A block of visibly different - material extends from the left 2/3 of her mouth to part way up her nose. No software in or out of camera would do this (or, if it did, you should bin it immediately).

Her left eyebrow has significant editing on the upper inner half.

More ...

Other images which appear to have a fully black background in fact do not have one as can bee seen by increasing Gamma. In some cases the gradations visible lend credence to the appearance of the image being untouched. In others, just the opposite.
\$\endgroup\$
0
\$\begingroup\$

Update for 2019: Some specialized paints (eg Semple Black 2.0) that were not available to the general public in 2011 (when the original question was asked) are available since recently, and come pretty close to a solution for the original problem.

\$\endgroup\$

Your Answer

By clicking “Post Your Answer”, you agree to our terms of service and acknowledge you have read our privacy policy.

Not the answer you're looking for? Browse other questions tagged or ask your own question.