9
\$\begingroup\$

Have been going crazy trying to wrap our heads around our problem for the past 2 weeks trying to find the right equipment settings, position our camera and lights for photoshoot. We need to take pictures of glass jars with embossment over a white background so it can be easily swapped for transparent color and turned to .png image.

Our equipment is Canon EOS 5D Mark II and 2 flashes - Raylab Sprint II RTD-400 SS Creative Kit.

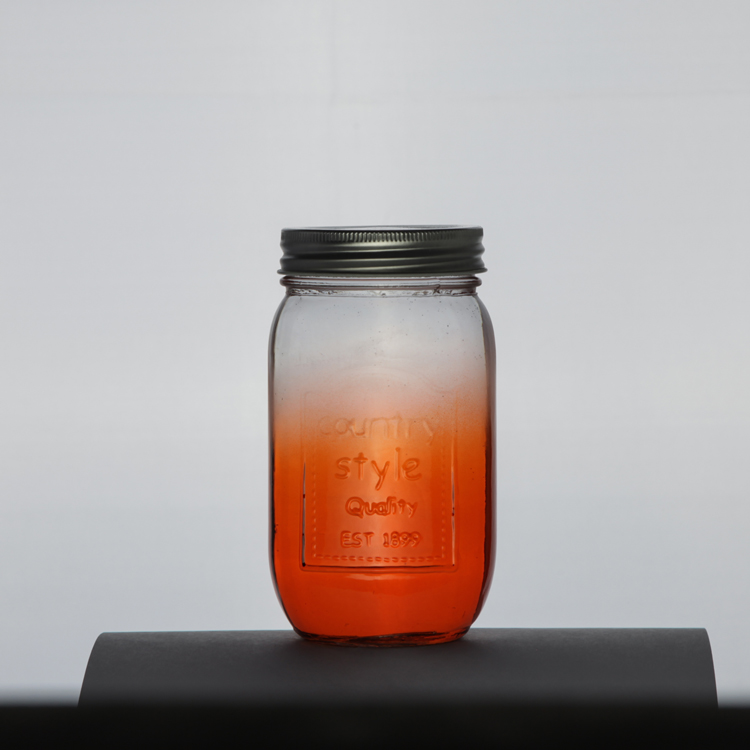
Problem is that embossment on the jars is not very sharp itself and thus when we photoshoot it tends to become invisible. We have tried to shoot with the background lighting set up behind our white background and front lighting set at the same time pointing towards the jar on the same level as the camera but get very poor results:

enter image description here

The embossment is being visible and the whole jar seems to be over-exposed or there is some problem with contrast and some problem with how object volume is perceived from the photo. We can't really identify the problem with this photo and tell what is wrong with it so any help with pointing that out is appreciated.

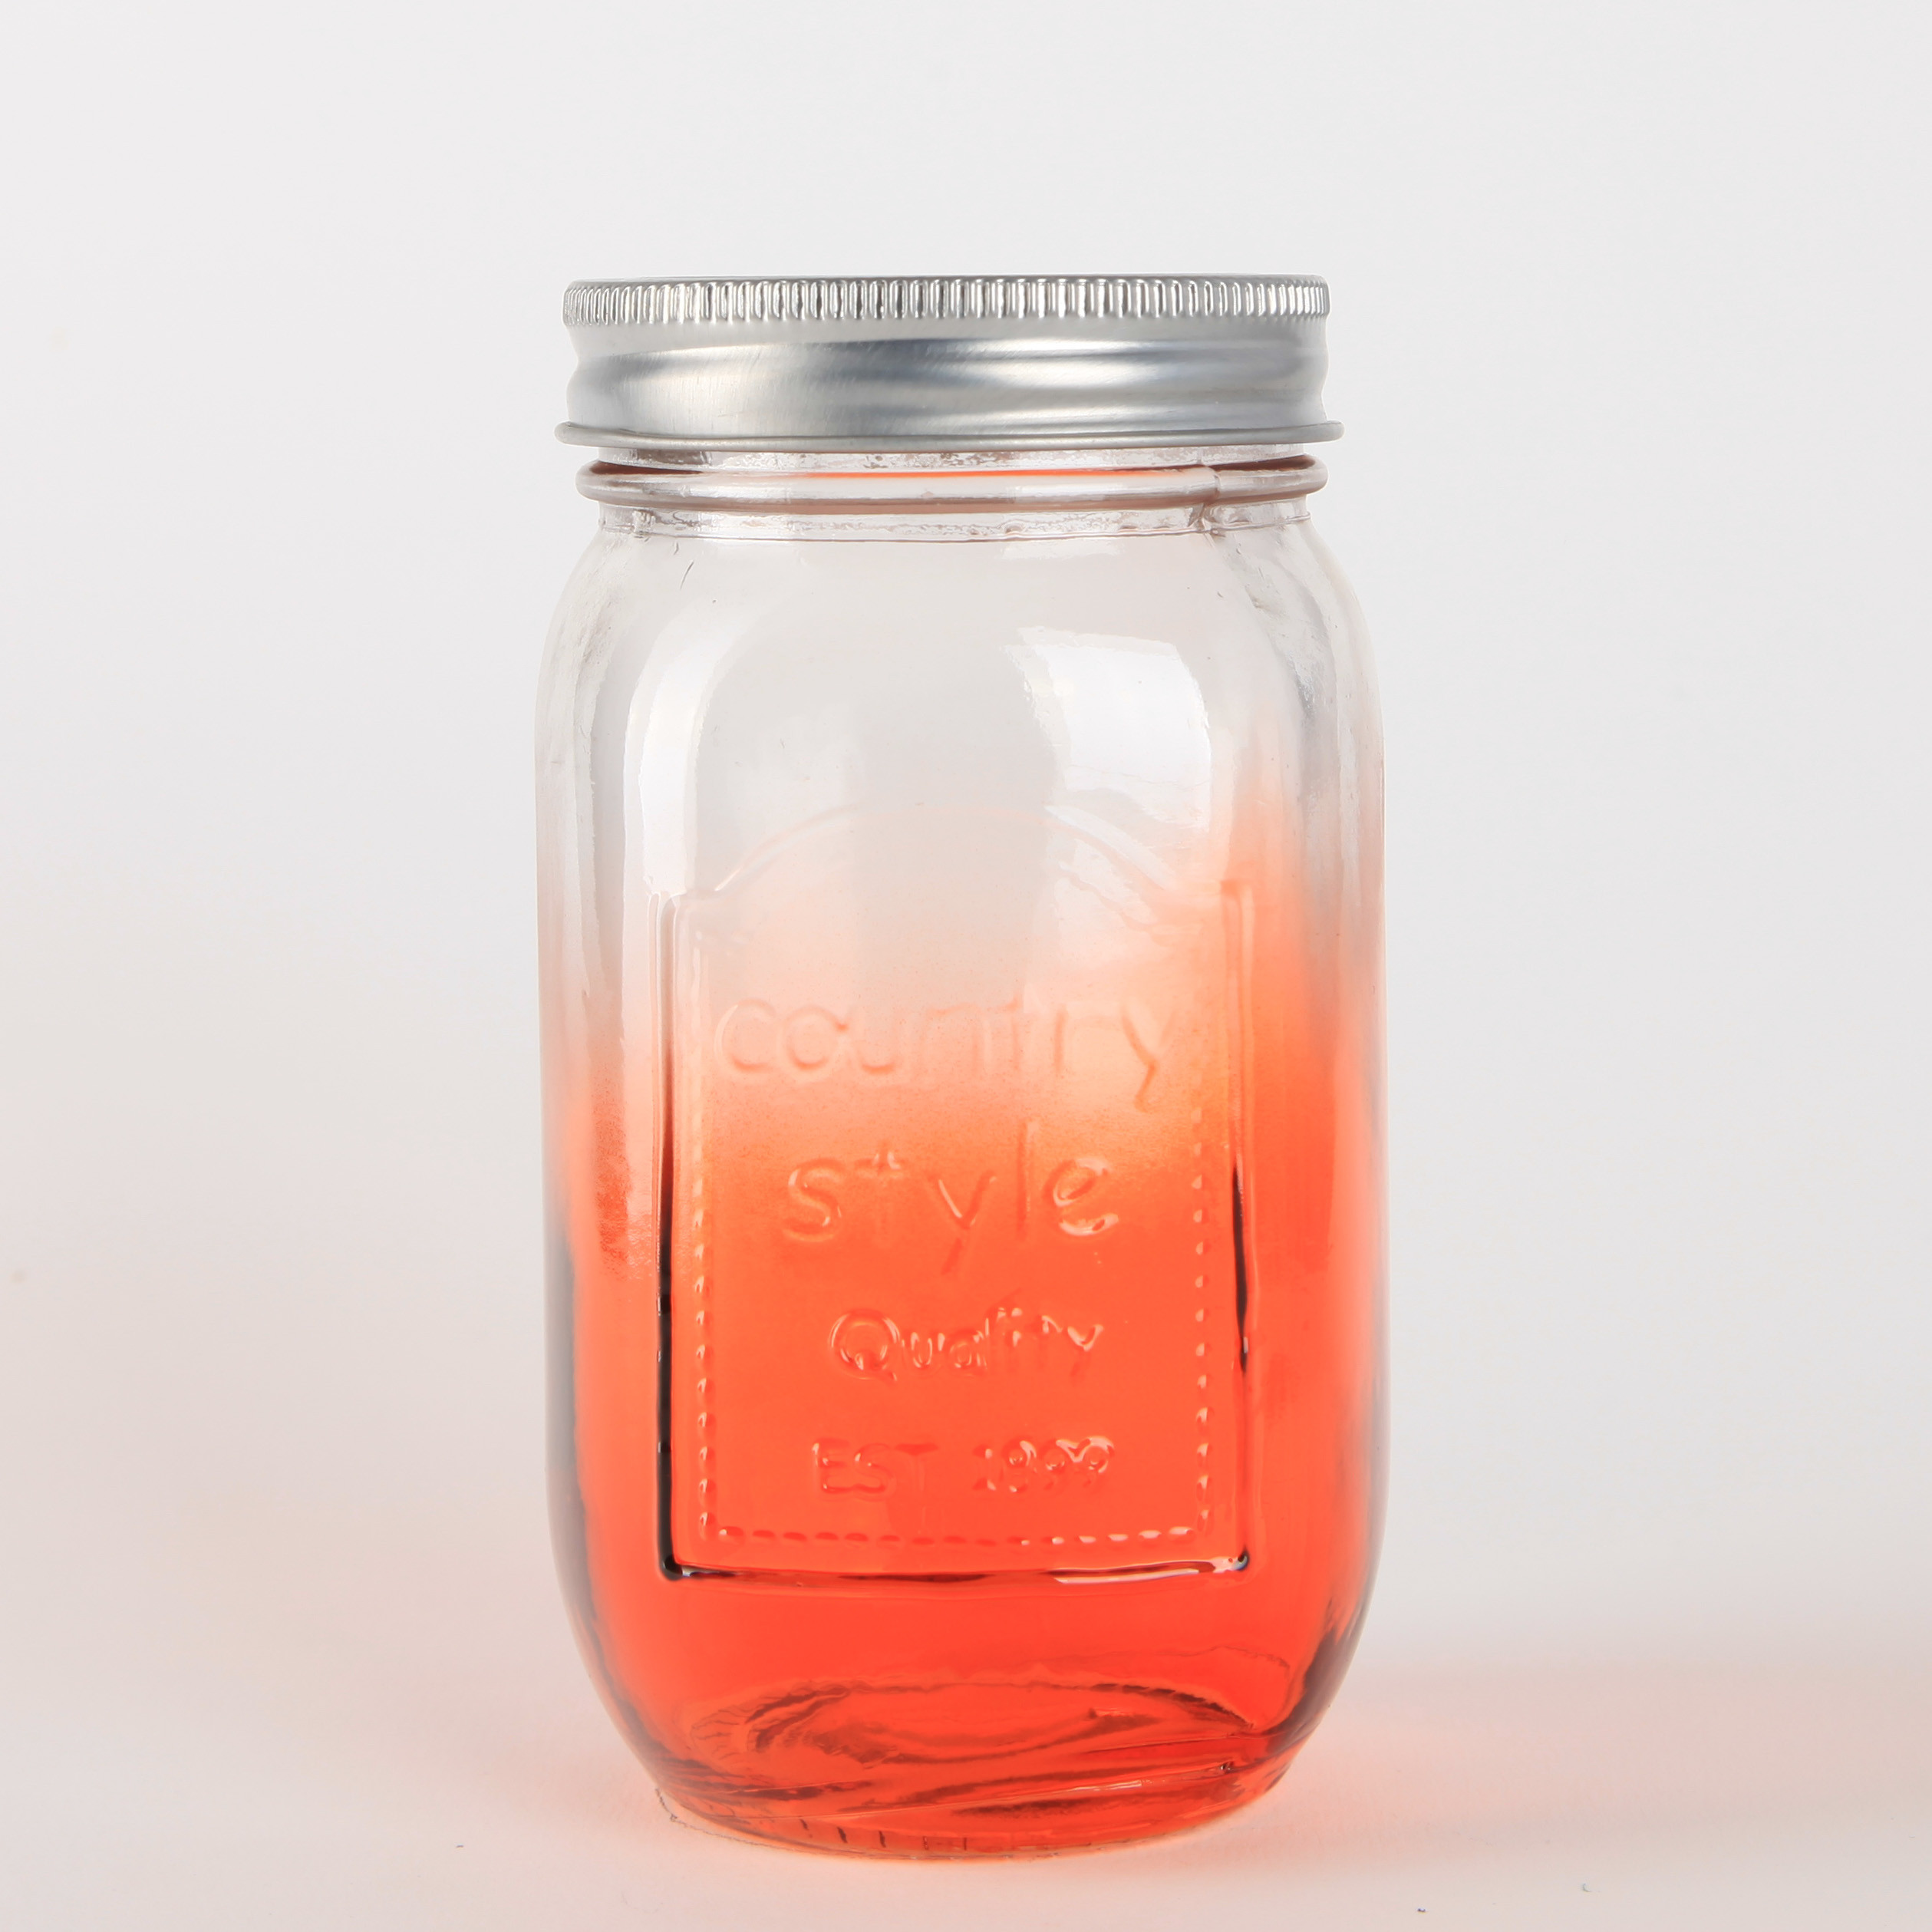
In the contrary we have tried other setting for our photo which is putting our 2 flashes on both sides of the object so it would form 45 degrees with both camera and the object itself looking on the object from the front side. If we got it right it is called accent lightning:

enter image description here

With this setting the embossment visibility is very poor but the overall object perception seems better. However flash create very strong effect on the jar itself which is not very pleasant for the final result as well as we want it to put less accent on the flash showing up on the jar body just enough to show the object shape.

What we are trying to reproduce can be easily depicted by the following picture: enter image description here
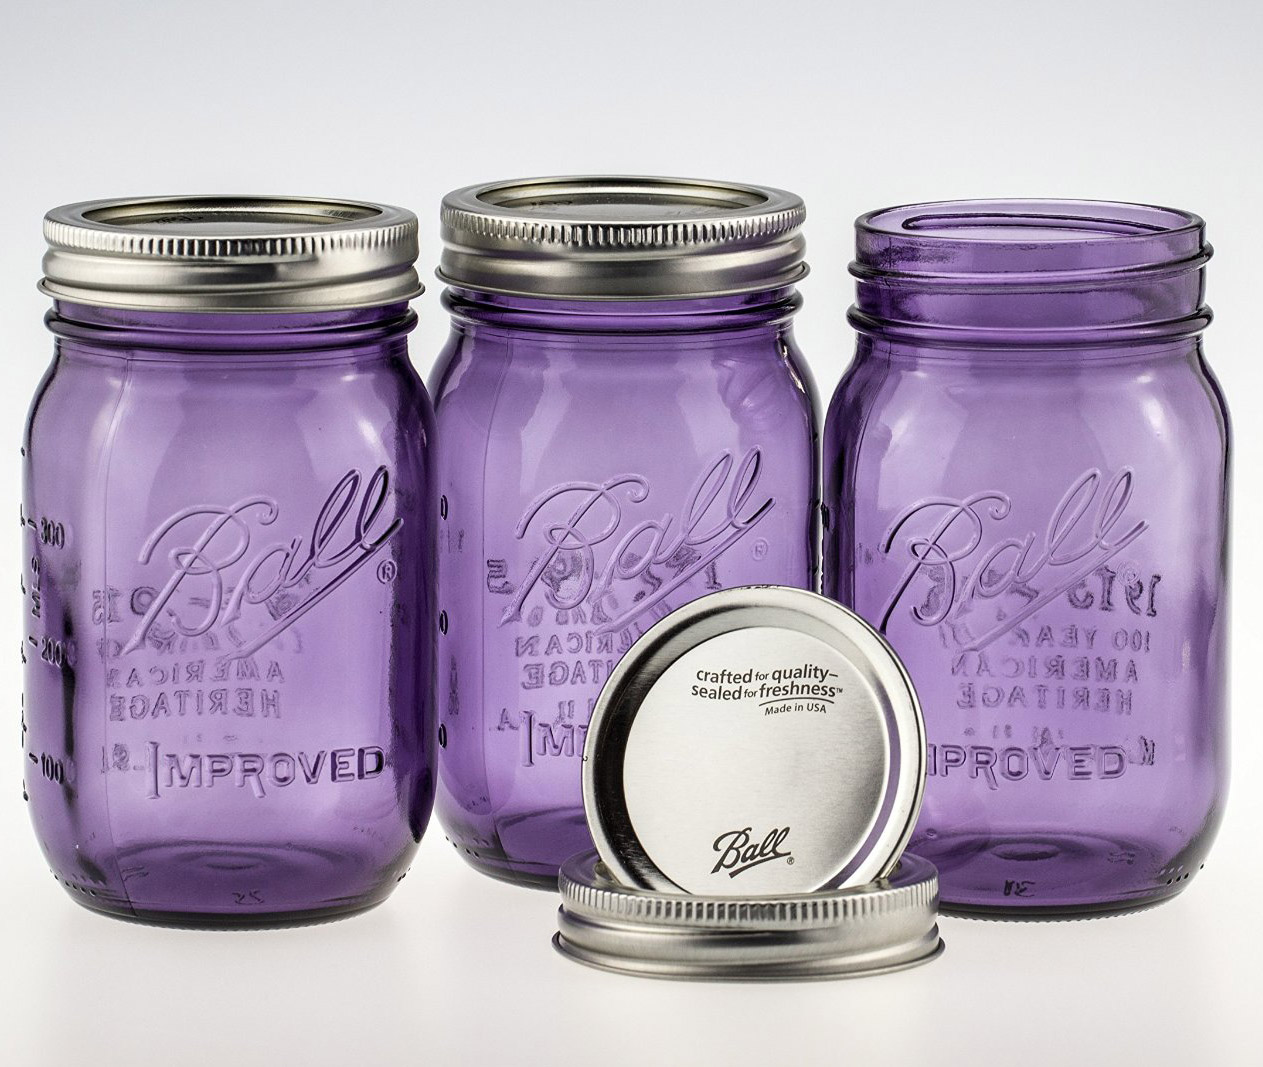
Please suggest us what changes to our light scheme we should make to get as close to the result as possible.

P.s. Please excuse us for probably noob question. Any help is highly appreciated!

\$\endgroup\$
6
  • 2
    \$\begingroup\$ Word NAZI: Engraved is carved or cut into the surface of an object. Engraving is the word to express the visual effect. Embossed is raised from the surface of an object. Embossing is the word to express the visual effect. Your sample has embossed design. \$\endgroup\$
    – Stan
    Commented May 12, 2016 at 20:21
  • \$\begingroup\$ There is a chance that thoose images are 3D renders. At least some elements look composited to me. \$\endgroup\$
    – Rafael
    Commented May 12, 2016 at 20:47
  • 1
    \$\begingroup\$ @Rafael according to what a one can come to such conclusion? \$\endgroup\$
    – canufeel
    Commented May 12, 2016 at 20:49
  • 1
    \$\begingroup\$ @Rafael Even though it might be a render the question still seems valid. We want at least to get close to the result as close as possible. \$\endgroup\$
    – canufeel
    Commented May 12, 2016 at 20:51
  • 1
    \$\begingroup\$ After you successfully solve this problem, don't forget to raise your fee. \$\endgroup\$
    – Stan
    Commented May 13, 2016 at 0:29

3 Answers 3

9
\$\begingroup\$

Two things seem apparent to me looking at this setup.

First, the position of the subject appears to be a little further from the camera than the lights. Before you fool with the position of any equipment which can take hours to do or : ( re-do, move the subject slightly to and fro. Once you get the optimal contrast in the edges, you could move your lighting set-up slightly, to and fro without changing the angle to optimize the appearance of sharpness.

Second, the seamless background appears to be white plexiglass with some illumination from the bottom to kill any subject shadows that result from the side lighting.

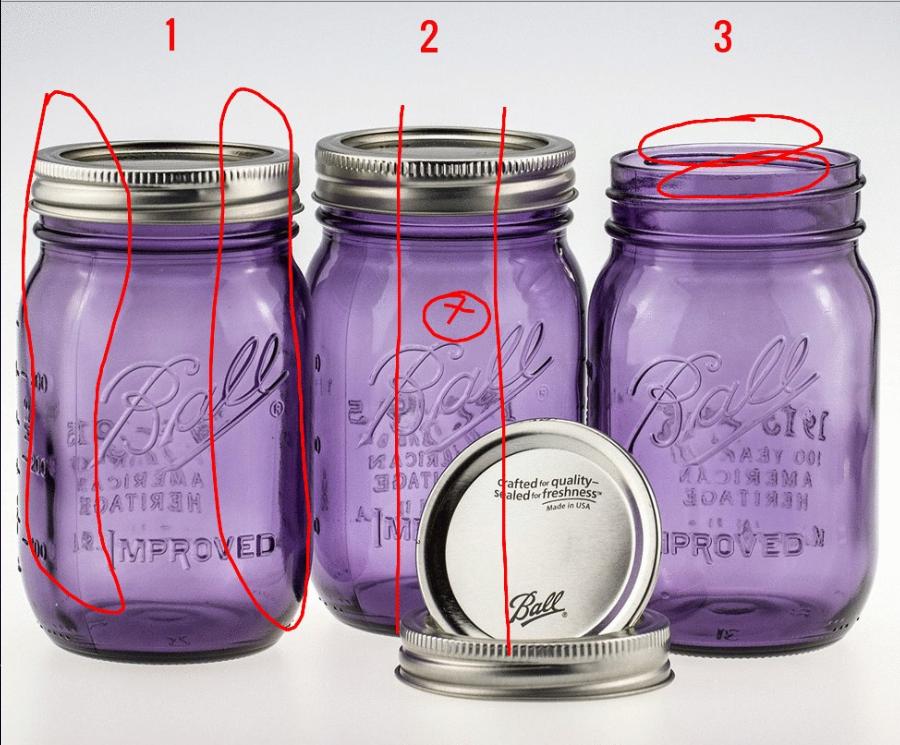
Let's have a close look at the competition:
– Sorry about the wobbly lines. I ran out of scotch this morning.

3 Balls

1 There is clearly two sources of light. There's a hot-spot in the centre of each one. There are no other highlights indicating no other sources were used in the front of this shot.

2 Here where the X-circled indicates the lens. Down the centre is a dark area that serves two purposes. It hides the reflection of the camera lens; but, more important—It creates a dark accent to the otherwise even high-key illumination.

3 Here's where you'd expect to find a highlight from an overhead light source. No highlight. There's none.

EDIT: Looking at your problem example I've noticed a couple more details. Your photos are hot (slightly over-exposed) AND there is too much ambient light in your studio. The difference between the highlights and the shadow is not as much as the Ball™ example. Darken your studio to remove all sources of illumination you don't control.

EDIT 2.0: Did you notice that the Ball™ example is below the level of the lens. The photographer has a "camera-superior" position looking down (slightly) on the product. You can see the tops of the containers.
Notice that your shots are at the same level as the jar which puts the embossed glass right in the middle of the highlight.
REMEDY: Lift the camera and tilt down to accentuate the embossed texture of the glass

It's not a noob question. Simple set-ups can be tough to shoot.

\$\endgroup\$
2
  • \$\begingroup\$ With our setup we are currently using simple white paper on the bottom of the object and on the back. Should we try swapping them both for plexiglass? Any suggestion on how we should position our lights? Should we try using the light scheme from the first example, or from the second one or they are both wrong and something else should be considered? \$\endgroup\$
    – canufeel
    Commented May 12, 2016 at 20:42
  • \$\begingroup\$ @canufeel - It might be more expedient to solve the appearance of the design and then concentrate on the shadow problem that may result. The "Ball" brand shot has two not-very-even-with-a-hot-spot-in-them diffuse sources that are above the camera lens as the main balanced lighting. \$\endgroup\$
    – Stan
    Commented May 12, 2016 at 23:02
4
\$\begingroup\$

The shot you're trying to emulate has two light banks above & slightly to the front of the jars. There is a big white reflector card propped between the two light banks & just above the camera position. The jars are sitting on translucent white plexiglass that's lit strongly & directly from behind and possibly also from below. And this was all done in a room with no ambient light.

The reflections & highlights in the jars & their caps reveal the light banks and reflector positioning. The dark areas on the shiny metal caps reveal that there are black spaces above & directly to the front at camera position. The dark edges of the jars reveal that they're strongly backlit. This backlighting technique also causes the embossed (or engraved) areas to refract the light transmitted through them giving those areas the definition needed to make them stand out.

\$\endgroup\$
2
  • \$\begingroup\$ @canufeel - KarlC makes a very good point. "And this was all done in a room with no ambient light". This makes lighting a subject easier to control as there are no unwanted light from reflections of your placed lighting from the ceiling, walls, lighting stands, objects, clients, legal council, etc., \$\endgroup\$
    – Stan
    Commented May 13, 2016 at 0:47
  • \$\begingroup\$ @Stan we are going to try to implement these suggestions as close as we can and would follow up with results. Thanks for all thoughts on the subject \$\endgroup\$
    – canufeel
    Commented May 13, 2016 at 1:43
3
\$\begingroup\$

My first thought is that because you are lighting the glass from both the front and the rear, you need some shadow on the edges to add definition. Positioning some black card just out of shot to the rear sides of the should help. I've not tried lighting glass to display the embossing, but I suspect that shadow defining the edges will also show up to help define the texture in the embossing.

It's generally the edges of the glass that you need to light (or not light) to get it to look right.

I'd recommend reading the book Light: Science and Magic by Hunter, Fuqua, and Biver. There is a whole chapter dedicated to lighting glass in various ways.

(I'll add that I've no connection to the book or authors, other than being a satisfied reader).

\$\endgroup\$

Your Answer

By clicking “Post Your Answer”, you agree to our terms of service and acknowledge you have read our privacy policy.

Not the answer you're looking for? Browse other questions tagged or ask your own question.