19
\$\begingroup\$

I recently shot an event using just a standard Nikon D3200 with kit lens. Nothing special, but it did the job.

The only obstacle was that the event made heavy use of a strong purple lighting which while easily correctable at the start of the night quickly became difficult to work with as the venue darkened through the evening.

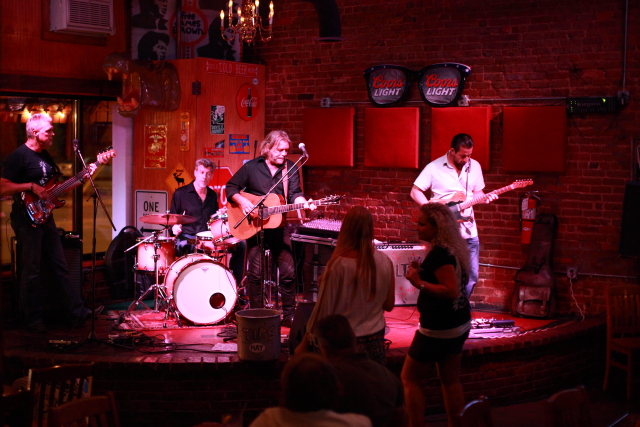
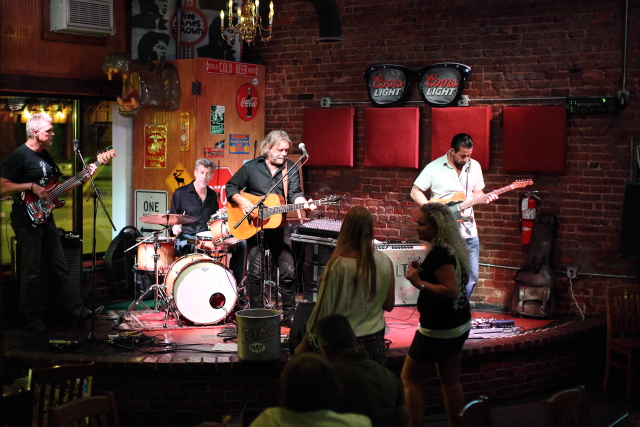
I've cleaned up the shots the best I can, but a lot of the skin tones are still heavily purple and even with cleaning up people still look a little strange (see below).

Example shot under purple light

I wasn't shooting using a flash, and I only had a simple UV filter on all night.

My question is as follows:

  1. Is there anything I could've done at the event to prevent the purple tint?

  2. Is there anything more I can do in Lightroom to reduce the purpling without leaving the people with a strange skin colour?

\$\endgroup\$
6
  • \$\begingroup\$ Did you save your files as RAW or JPEG? \$\endgroup\$
    – Michael C
    Commented Sep 14, 2015 at 10:24
  • \$\begingroup\$ @MichaelClark They're saved as RAW on my machine but the client wanted JPEG files \$\endgroup\$ Commented Sep 14, 2015 at 12:59
  • \$\begingroup\$ @HourglassPhoto, as you have RAW files use one of the methods below in your post-processing software and try. \$\endgroup\$ Commented Sep 14, 2015 at 13:21
  • \$\begingroup\$ Can you post a raw on a file sharing site? I'll try my own approach and see how it compares with your situation. \$\endgroup\$
    – JDługosz
    Commented Sep 14, 2015 at 16:12
  • \$\begingroup\$ Hey people, what's up? a good question, with answer, from a new user with a clear explanation of what's the problem, and no upvotes? Please rememeber to act as a good stackexchange citizen and vote up or down as needed :-) Btw, welcome HourglassPhoto \$\endgroup\$
    – Francesco
    Commented Sep 14, 2015 at 17:31

7 Answers 7

24
\$\begingroup\$

You need to adjust for the color temperature of the light source. Additionally. when the light source is of such a limited spectrum as appears to be the case here, you need to add more light that covers a wider portion of the visible spectrum. The relatively bright sky in the background fooled your camera's Auto White Balance into thinking that is what needed to be the correct color, not the much dimmer part of the scene in the foreground.

Here's the best I could do with the JPEG you uploaded as a starting point. If all of the information contained in a raw file were available, it could be corrected to a much better degree, but much of the information needed to fix the image was thrown away when the file was converted to JPEG either by your camera before saving the file or by you when you edited and converted the file later.

The problem with trying to change white balance with a JPEG is that you can only take away the parts of the color spectrum that you don't want that are contained in the JPEG. You can't add the parts that may have been in the raw data but were discarded in the conversion to JPEG and are not contained in the JPEG image. In the case of lighting that is very limited spectrum, such as appears to be the case with your purple light, you have to throw almost all of the light in the JPEG away to even get the color anywhere in the ballpark of realistic. That forces you to increase brightness to the point that almost all contrast is lost. Increase the contrast and all of the dark areas of the picture start going very dark again...

enter image description here

Here's an example I shot a while back of a band performing under limited spectrum LED lighting. The first shot is with Auto White Balance and standard Portrait picture style settings. If I had shot this as a jpeg in camera, this is what it would have looked like.

Unedited

And here is what I was able to do using a raw editor. Notice that I didn't have to give up contrast and saturation to make a fairly significant correction to the white balance because not only was I removing information contained in the first jpeg that I didn't want, but I was also able to replace information I did need that was contained in the raw data but was not used in the creation of the original jpeg!

enter image description here

If you've never used a raw editor to adjust white balance before, look here. The instructions are for Adobe Camera Raw from within Photoshop, but Lightroom is very similar. And here's a video that covers both Lr and PS.

\$\endgroup\$
7
  • \$\begingroup\$ Thanks for the help, I understand your point about the background being light but I'm having the same problem with dark backgrounds from the same shoot. Is the same idea around the colour temperature the answer here? Also do I want to make the light warmer or cooler in this case? \$\endgroup\$ Commented Sep 14, 2015 at 13:03
  • \$\begingroup\$ You need to use the "eyedropper" tool. Click it on a white or gray item. The light in the room isn't just warmer or cooler (along the amber/blue axis). It is also heavily magenta along the green/magenta axis. And it is also missing a lot of the visible spectrum, especially green. You also need to reduce total color saturation quite a bit. Since you have the raw files, this is manageable. You won't get results as good as you could have with flash, but you should be able to improve them significantly. \$\endgroup\$
    – Michael C
    Commented Sep 14, 2015 at 13:22
  • \$\begingroup\$ If you've never used a raw editor to adjust color, take a look here. layersmagazine.com/… \$\endgroup\$
    – Michael C
    Commented Sep 14, 2015 at 13:31
  • \$\begingroup\$ Thanks for the help, think I've got it nailed in now pretty much dead on. Would use of flash help prevent this in future? \$\endgroup\$ Commented Sep 14, 2015 at 13:37
  • 2
    \$\begingroup\$ If it is done correctly flash would help a great deal. You must decide whether to try to match the ambient light (by using a colored gel over your flash head) or to overpower it by using the flash unfiltered. Both have their advantages and disadvantages. Even when you filter your flash you are still going to add parts of the light spectrum that the poor quality ambient light is missing. \$\endgroup\$
    – Michael C
    Commented Sep 14, 2015 at 13:45
20
\$\begingroup\$

In case

  • there are multiple crazy lights casting different tones from different directions;
  • you only have JPEGs;
  • or you just need a quick solution,

an easy way to fix color cast is to go for black and white.

Here's what I got in Gimp under a minute (Colors -> Desaturate -> Average), including some increase of contrast using Curves tool:

black and white edit

\$\endgroup\$
2
  • \$\begingroup\$ Even so, there are places where the skin was completely blown out in the blue and/or red channel. This is also the case with some parts of the shirts. If you could apply a red and/or blue filter to remove the offending colors you could get even better tonal values for the skin. \$\endgroup\$
    – Michael C
    Commented Sep 16, 2015 at 7:53
  • \$\begingroup\$ @MichaelClark No, skin isn't actually blown out in any channel. Red channel histogram fades off below 220, and blue is only blown in moderate amount on some shirts - nothing too bad, detailed out nicely by other channels. Removing the blue channel would mean, with this kind of lighting, eliminating the most useful (least noisy) channel. \$\endgroup\$
    – Imre
    Commented Sep 16, 2015 at 12:59
18
\$\begingroup\$

I think I would have used flash to overpower the extreme purple. But sometimes you can't do that, which can mean a lot of work in post. Here is what I would do in lightroom or photoshop camera raw. First thing I would do, which everyone else seems to have mentioned is to adjust the white balance. I then added a neutral gradient with even more white balance correction. Go into the HSL panel and move the purple and magenta luminosity up and the saturation on both of them down. From there I would use some radial filters to fix some of the underexposed people in the shot. Brightening there faces also has the effect of lowering the saturation of there faces. Next, I would add some noise and color noise reduction. I would go into the camera calibration panel and adjust the blue saturation to a negative value which will also have an effect on the purples and magenta; I used -17 in this edited picture. Lastly I would go into the split tones panel and add some orange into the highlight to give a more natural skin color. If you did this to a RAW picture it would come out looking okay, but not as good as just using a flash. If you were dealing with a different color you would have to adjust different colors in the HSL panel and the camera calibration panel to get the best results.

enter image description here

\$\endgroup\$
2
  • \$\begingroup\$ This is the best edit I've seen - I think this really demonstrates just how strong the color cast was, with the strong green light behind the subjects obviously further confusing the camera's auto white balance. Even setting a custom white balance with a gray card would be difficult in this environment because the light is different throughout the room. Flash would indeed make things easier. \$\endgroup\$ Commented Sep 16, 2015 at 0:46
  • 3
    \$\begingroup\$ I don't think that is strong green light behind the subjects. That is daylight coming through the window that looks green when the color cast of the purple lights that contains virtually no green is corrected. If you remove almost all of the blue and most of the red from daylight, what you have left is a lot of green. \$\endgroup\$
    – Michael C
    Commented Sep 16, 2015 at 2:09
3
\$\begingroup\$

With strange mood lights, color temperature and tint won't fix it because it doesn't follow that pattern.

Your problem is that if you turn down the blue, you have an ambiguity in whether or not the object had any blue for real. Consider two shirts, one grey and one blue, that look the same under that light.

I had a similar issue a short time ago, with crazy colored lights in a hotel convention meeting room.

enter image description here

I started with the white eyedropper and fiddled with the sliders to get the skin looking something in the pink range.

I thought this was (still) terrible, but drew acclaim from others who were using just smartphones and "auto" white balance. :)

Then in PS I used the hue filter to adjust only pink to dial in the skin tone. I decided to go with a desaturated overall look to better deal with lack of strong accurate color: just use less overall!

Then move on to other identifyable colors: without uniforms, who cares if a shirt is purple or cranberry? You might not even know or recall. In my case, the green leaves needed to look like leaves, so I adjusted a hue range again, and happily this had no affect on skin tones so I did not have to mask.

You get the idea: fix the skin tone, then adjust hue on anything else that draws attention. Never mind if the rest of it is accurate, just unobtrusive.

If you have very low saturation in some colors (as explained above) reduce the others to match, or artisticly add them back in where needed.

Not shown here, I also that weekend completely replaced skin tone and clothes by using a Photoshop adjustment to paint color whike leaving the hue and saturation unchanged.

\$\endgroup\$
1
  • 13
    \$\begingroup\$ You might want to show the before and after here to illustrate the difference. \$\endgroup\$
    – Lilienthal
    Commented Sep 14, 2015 at 21:59
1
\$\begingroup\$

It looks like some of the people are wearing white shirts. You could use the white balance dropper tool in Lightroom - select it and click on a white shirt to set the white balance.

\$\endgroup\$
2
  • 4
    \$\begingroup\$ Have you ever tried that with a JPEG with white balance that far off? Download the image and try it. \$\endgroup\$
    – Michael C
    Commented Sep 14, 2015 at 11:14
  • \$\begingroup\$ This one in Adobe Camera Raw (Lightroom, Photoshop, or Elements), clicking a white shirt with the White Balance tool is definitely at the limits, with Temperature +100 and Tint -100, but it comes out pretty good, very decent and normal. In contrast, Photoshop Levels eyedropper (different old algorithm) fails badly. \$\endgroup\$
    – WayneF
    Commented Sep 14, 2015 at 13:51
1
\$\begingroup\$

From what I see on the example you have wrong colour temperature/white balance. To avoid this you can use few ways:

  • Make special presets in Lightroom with different colour temperatures and apply them (this work on jpegs also)
  • Set colour temperature before shot. Here you can use custom set (shooting something really white and use this picture to tell camera this is white). Also you can set it by hand selecting exact number
  • Or you can shoot in RAW and later in your post-processing software set the proper temperature
  • Additionaly you can use so named "white balance filter". This will help you expose one image with filter and use this image as reference for in-camera custom white balance or later in post processing

To deal with the problem in post-processing

  • open you image and use instrument to select object which is white
  • or play with slider (of colour temperature) to catch the exact value which will give you the correct colours.

Also consider to use tint slider to "tune" the colours

\$\endgroup\$
0
\$\begingroup\$

As it has only recently become free, I'd now experiment with the Nik Collection (of plug-ins to LR and PS) - they do also work standalone. The collection is from Google.

It is early days practising here, but instead of using a WB blanket adjustment, start in PS / LR in RAW, then work in Nik, then return a masking layer from Nik into PS. Then you only allow the changes into the areas where you want them by painting the mask. I like the level of control of the image that is possible this way. I've some experimentation lined up. The jury is still out but so far the Nik approach looks a contender for the image problems mentioned in this post.

\$\endgroup\$

Your Answer

By clicking “Post Your Answer”, you agree to our terms of service and acknowledge you have read our privacy policy.

Not the answer you're looking for? Browse other questions tagged or ask your own question.