8
\$\begingroup\$

I have lots of Lightroom presets that are great, but some of them are a bit to severe.

Is there a way to apply a preset at 50% strength for example?

\$\endgroup\$

2 Answers 2

9
\$\begingroup\$

There is a plugin for Lightroom 3 which does exactly that: http://www.knobroom.com/thefader/

\$\endgroup\$
2
  • \$\begingroup\$ Wow, thanks for the find! Works great. The only minor inconvenience is that it generates an entry in the History each time you move the slider and it regenerates the view, but nothing that can't be removed. The full screen preview is actually pretty fast on my system. \$\endgroup\$ Commented Oct 3, 2010 at 15:23
  • 1
    \$\begingroup\$ Current link: capturemonkey.com/thefader \$\endgroup\$ Commented Apr 12, 2020 at 2:47
7
\$\begingroup\$

Unfortunately no, there is no direct way to partially apply a preset in LR3. A "Fade preset" slider is sorely missing, in my opinion.

It is however pretty easy to achieve if you have Photoshop. There are a few ways to do it, but at the end of the day it boils down to sending your original file to PS as a layer A, then sending your file with the preset fully applied to PS as a layer B, and fading the top layer to reveal more or less of the original A. By fading B, you are essentially displaying something "in-between" A and B.

Step by step, using virtual copy:

  1. Go to the Develop module.
  2. Select your photo (in this example, a color photo).
  3. Right-click and create a virtual copy.
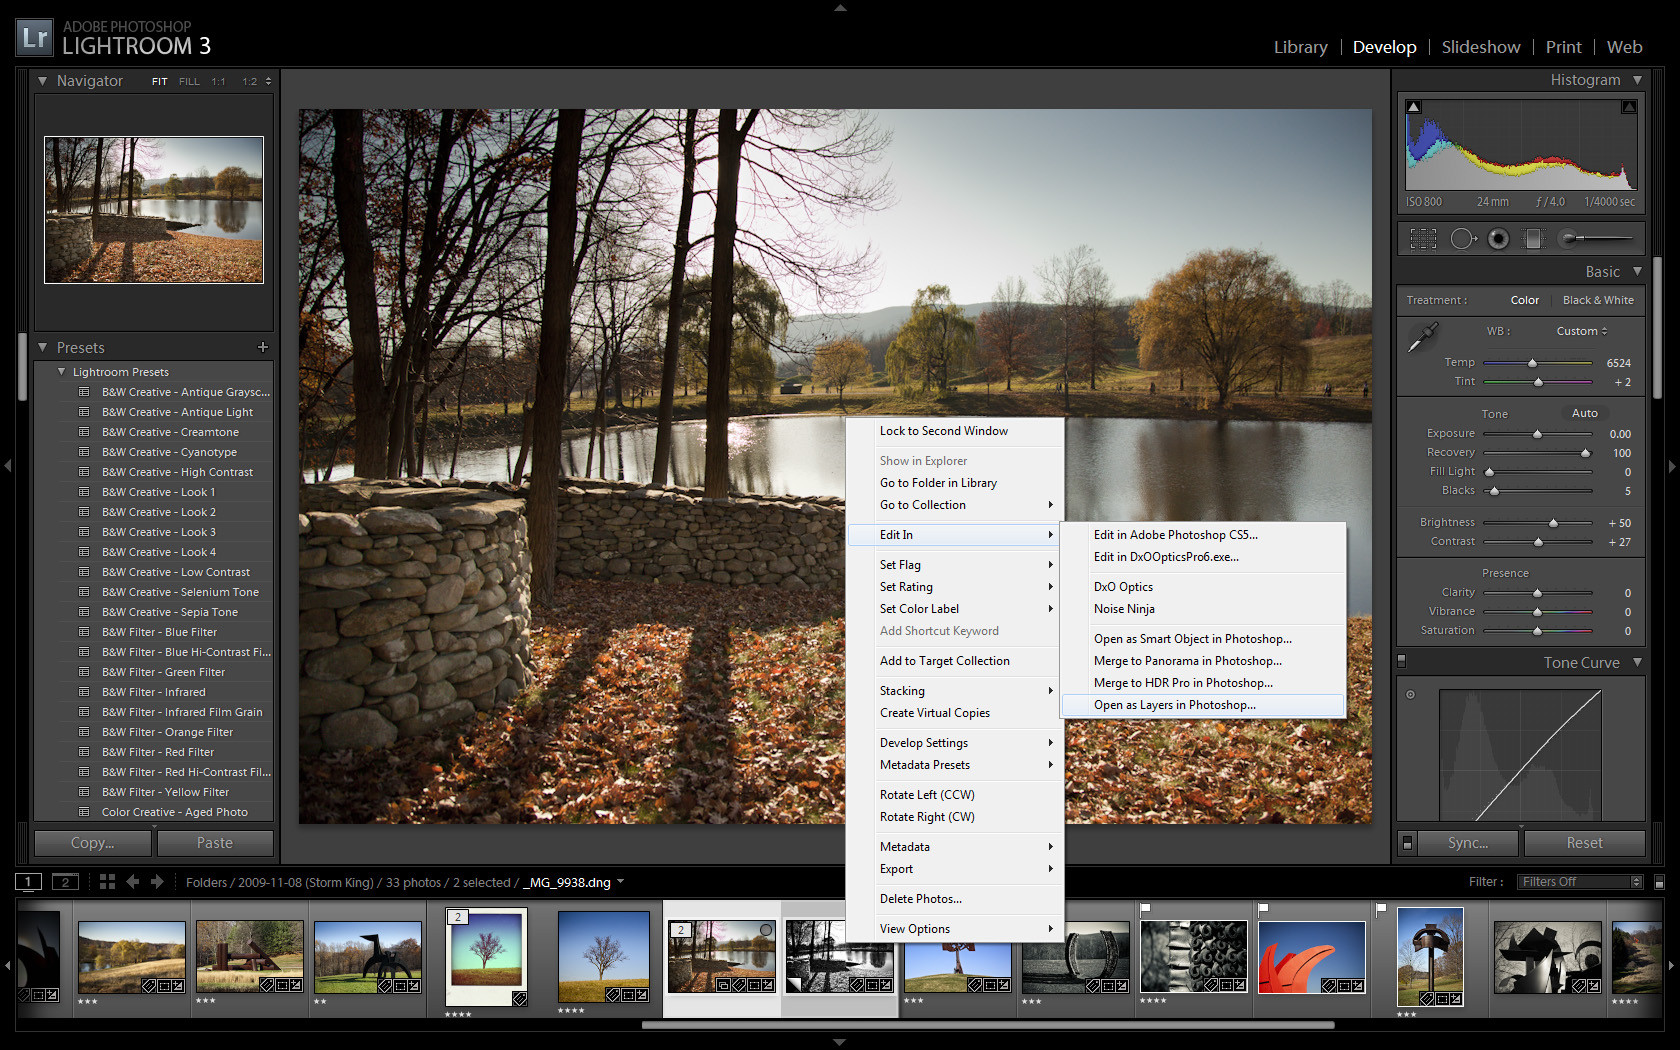
  4. Apply the preset to the virtual copy (in this example the 'B&W Creative - Look 1' preset for illustration purposes).
  5. In the film strip at the bottom (or from the Grid in the Library module), select both the original and the virtual copy, either by using Control+Click on each, or Shift+Click since they should be next to each other.
  6. Right-click on any of those 2 photos and select 'Edit in -> Open as Layers in Photoshop' (see screenshot, look at how the virtual copy in the film strip is completely B&W).
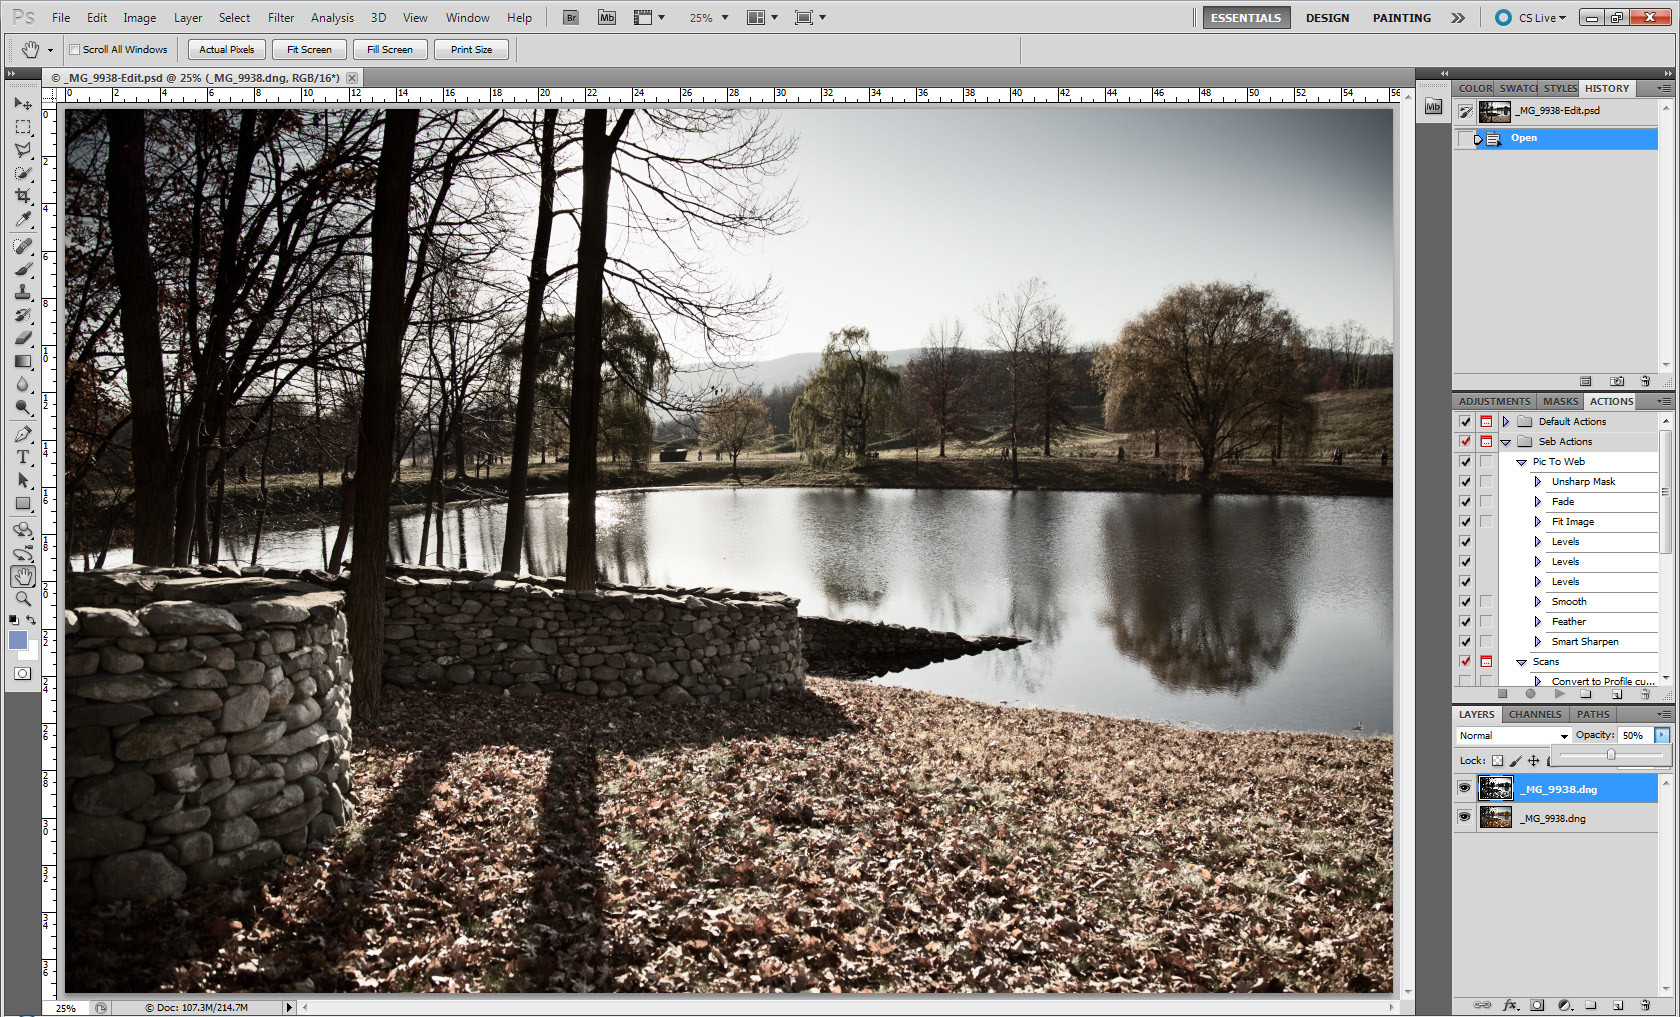
  7. In Photoshop, you should now have one single file opened with 2 layers, one containing the original, the other containing the virtual copy with the preset applied.
  8. Make sure the virtual copy is the top layer by dragging/reordering the layers as needed.
  9. Select the top layer and drag the opacity slider on top of the layer panel to the strength you are looking for. In your case, 50%. Check the screenshot, the resulting image is a blend between the two layers (in this example, a sepia blend between the color original and the B&W virtual copy).
  10. Exit Photoshop, don't forget to 'Save Changes' when you are asked to.
  11. Back in LR, a new PSD image should be in your catalog. If it's not, right-click on the folder containing your original file in the Library module and select "Synchronize folder" to bring the new PSD file. This is your resulting image.

There you have it. It's actually pretty easy to do, practice makes perfect.

If you are unhappy with the blend, right-click on the PSD file in LR, select "Edit in Adobe Photoshop", "Edit Original", then re-adjust the opacity to apply more or less of the virtual copy preset. Save and go back to LR to watch the result.

Once you are satisfied with the blend and if you are short on disk-space, you may want to open the PSD file once more and merge both layers. You won't be able to adjust the blend after that but your file will be significantly smaller. You can also get rid of the virtual copy at this point but they are really cheap to keep around.

Hope this helps.
alt text

alt text

\$\endgroup\$
4
  • 1
    \$\begingroup\$ Fantastic answer. However thefader looks easier to use! \$\endgroup\$
    – Daniel O
    Commented Oct 4, 2010 at 13:07
  • \$\begingroup\$ @Dan: definitely, I didn't know about it, thefader is only a few weeks old, great addition. \$\endgroup\$ Commented Oct 4, 2010 at 16:54
  • \$\begingroup\$ I feel bad about changing the accepted answer :( Your solution will work great for scenario where i need to blend images \$\endgroup\$
    – Daniel O
    Commented Oct 4, 2010 at 22:58
  • \$\begingroup\$ No problem Dan. I think my solution is still fine for Lightroom 2 users, since thefader is LR3 only. I like thefader because it's so much more convenient, but as its author stated, it does only interpolate the preset values that are scalable (numeric). Remember that you will get a different output than applying the whole preset manually and applying what I described. In most cases I'm sure this is fine, time will tell, I'm going to use it myself. So my answer is technically more accurate, but thefader is way more convenient, it really depends what you are looking for, it's your question :) \$\endgroup\$ Commented Oct 5, 2010 at 14:39

Your Answer

By clicking “Post Your Answer”, you agree to our terms of service and acknowledge you have read our privacy policy.

Not the answer you're looking for? Browse other questions tagged or ask your own question.