2
\$\begingroup\$

I am headed out soon (a few weeks) on a trip that will include waterfalls, beaches, and a volcano. I've read about neutral density filters and got a set for my camera. But I'm sure there's a significant amount of practise required to be good at it. I want some of those lovely arches-of-orange pictures at the volcano and some smooth white waterfalls.

Opinions seem to vary on the whole setting-your-aperture story with some sites saying the camera can do it, and others listing out math involving knowing how many f stops each filter represents. It seems to me the smart thing to do is to practice. But if I had easy access to waterfalls, beaches, and a volcano I wouldn't need to go on this trip! So what scenarios can I use as a substitute to get comfortable with the ND setup?

\$\endgroup\$

3 Answers 3

2
\$\begingroup\$

This might sound lame but you could use a hose or tap to make your own "waterfalls". Even putting objects in the way to change the path of the water and see what it does to the water trails. Try it at different times of day or different light to see how it affects the outcome.

All my long exposures have always been a very digital age way of doing it. Try some settings, check the results and adjust as needed. Not going to work in every scenario but it's worked well for me.

\$\endgroup\$
1
  • \$\begingroup\$ In the end this is what we did - used a hose in the yard and played a little. I'm now confident that (a) I need another even darker filter (excellent thing to discover now) and (b) my camera can work out good auto exposures at least for daylight water shots. I don't think there's any way to practice for the volcano. \$\endgroup\$ Commented Jun 25, 2015 at 17:01
3
\$\begingroup\$

You don't need waterfalls, beaches, or volcanos to test what exposure length your camera can handle without excessive noise, ISO settings, tripod issues, sunlight versus cloudy, etc. You can test all that in your back yard.

The only thing you can't test that way is optimal length of exposure for the effect you are trying to achieve. However, that is easily done on the spot. Simply try a few different exposure lengths, within the range you have previously determined your camera can handle. Most of these scenes work well from a few seconds to maybe 30 seconds, which is often the limit where digital cameras start introducing artifacts. Perhaps you can get away with 60 seconds. Beyond that, you either need to combine multiple exposures with a short shutter close time in between them, or use film.

Since the exposure times will be relatively short, you can simply try a range and see what you get by looking at the preview. Actually, I'd take a large range anyway, since the look of the picture will be different for different exposure times, and you may like having the different views of the scene later.

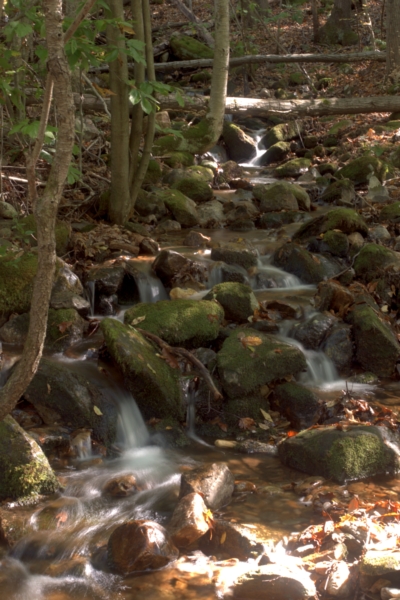
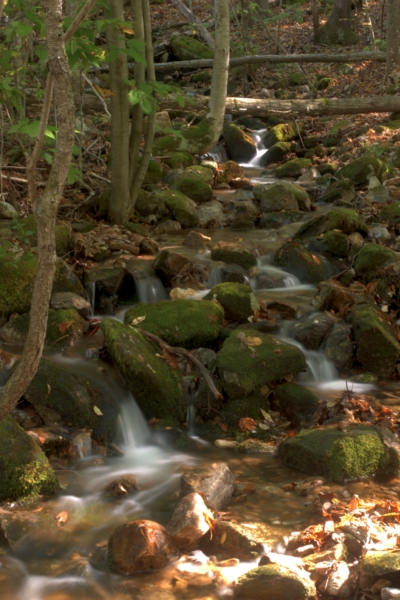
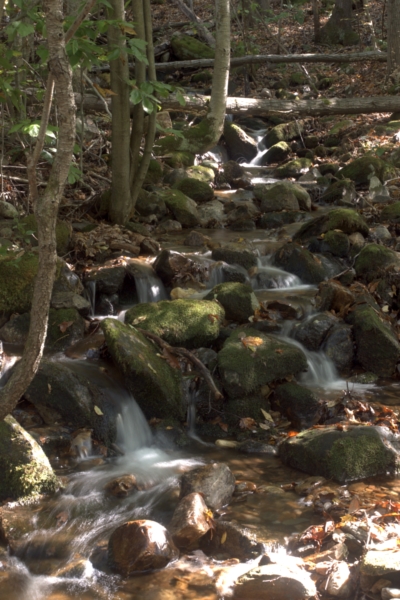
That said, a few years ago I happened to have my camera and a tripod with me as I came across a small cascade. I didn't have a ND filter, so my longest exposure was limited by ISO and f-stop. I took a few pictures just to have a record of the effect over a small range of exposure times.

This is 1/2 second:

1 second:

4 seconds:

In case anyone cares, this was 7 Oct 2011 in October Mountain State Park in western Massachusetts.

\$\endgroup\$
3
  • \$\begingroup\$ Nice pictures, but are you sure they're in the right order? To me, the 1/2 second one looks more "smoothed" than the 1 second one... \$\endgroup\$ Commented Jun 21, 2015 at 17:21
  • \$\begingroup\$ @junk: Hmm, it does look backwards. I just checked the EXIF data on the original pictures though, and that's what they say. However, I replaced the 1/2 second one with a different 1/2 second one I took in the same sequence. Both say 1/2 second in the EXIF data, but this one seems more consistant with others in terms of motion blur relative to exposure length. \$\endgroup\$ Commented Jun 21, 2015 at 22:53
  • \$\begingroup\$ I suppose it could also be related to different degrees of clipping in the specular areas creating a less smooth look... in any case, the progression does look more like what I would expect now. Sorry for nitpicking. :) \$\endgroup\$ Commented Jun 21, 2015 at 23:09
3
\$\begingroup\$

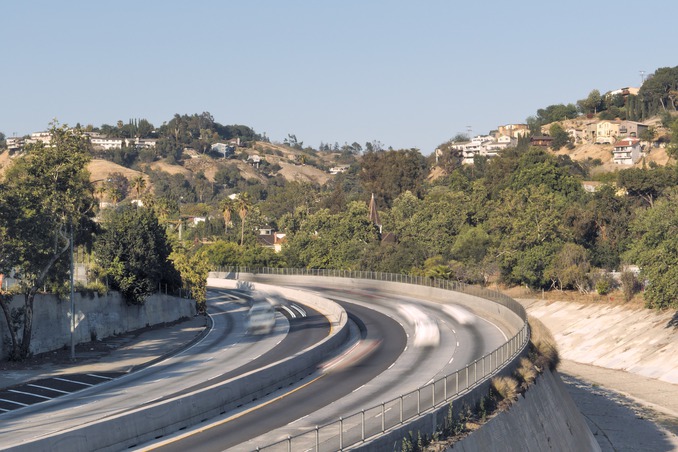
You could practice getting long exposures of roadways with moving cars, assuming you have some of those available... that's probably my most common reason for messing with an ND filter, since I don't really like the look of moving cars frozen in place. Image below is a 1-second exposure of the Arroyo Seco Parkway.

1 second exposure of moving cars.

Something that I just thought of to add is that if you shoot JPEG and don't use auto-white-balance, you may need to create new custom white balance settings to account for any slight color cast of the ND filter. This is another thing you probably want to have figured out in advance.

\$\endgroup\$
1
  • 1
    \$\begingroup\$ oddly, roadways full of moving cars are also pretty scarce around here, but not at the waterfall/volcano level of scarcity, so I'll see what I can do. \$\endgroup\$ Commented Jun 22, 2015 at 12:20

Your Answer

By clicking “Post Your Answer”, you agree to our terms of service and acknowledge you have read our privacy policy.

Not the answer you're looking for? Browse other questions tagged or ask your own question.