I often hear studio photographers talk about 'Rembrandt Lighting' when they're setting up lights and doing studio portrait photography. What is Rembrandt Lighting, and when do I use it?
4 Answers
What is Rembrandt Lighting?
Rembrandt Lighting is one of the 5 basic lighting setups used in studio portrait photography. There are two things that make up Rembrandt Lighting… A light on one half the face, and a triangle of light on the shadowed side of the face (called a chiaroscuro, but only lighting nerds need to remember that… most of us just call it ‘the triangle shadow’). If it’s ‘real’ Rembrandt lighting, the triangle shadow should be no wider than the eye, and no longer than the nose. The thing that distinguishes Rembrandt Lighting from simple short lighting is the triangle of light (also see 'In portrait photography, what is 'broad' lighting? What is 'short' lighting'). That’s the technical…
In the real world, when it comes to portrait photography, Rembrandt Lighting is often confused with Short Lighting and is used as loose shorthand for ‘using a single light source to light roughly half the face, while leaving the other half of the face in some level of shadow.’ This is because it can often be quite 'fiddly' to get the triangle of light just right on a subject.
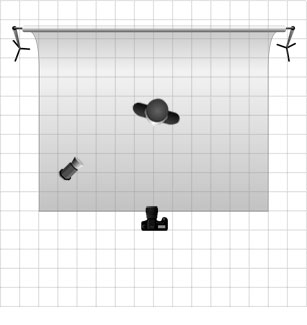
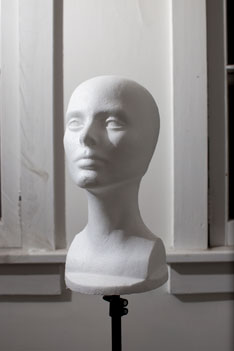
Rembrandt lighting at its most basic level is constructed with a single light source placed approximately 45 degrees offset from the subject and a bit higher than eye level, lighting the side of the face that is farthest from the camera.
One-light Rembrandt Lighting setup:
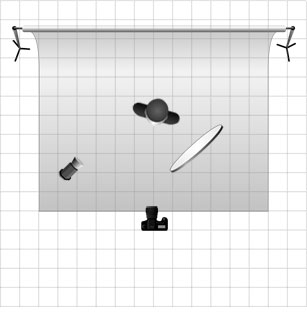
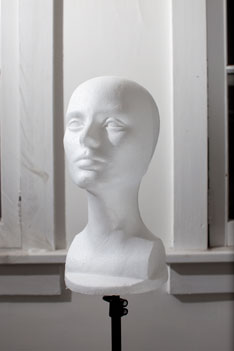
Often times the single light source is augmented with a reflector or another light placed approximately 45 degrees offset to the shadowed side of the face and at ½ the power of the main light source (called the key light). This is used to lighten the shadows on the dark side of the face.
One-light with reflector Rembrandt Lighting setup:
When do I use Rembrandt Lighting?
One of the reasons many photographers use Rembrandt Lighting is that it is relatively simple to set up, and requires only a single light source (though it’s often supplemented with a reflector in order to bring detail back into the shadows on the subject’s face). This lighting pattern works well for subjects will full or round faces (because it adds definition and slims the face), but is generally not a good choice for narrow faces. Often times ‘old school’ photographers will refer to Rembrandt Lighting as ‘masculine’ and some really old school portrait photographers will insist that a woman should never be lit with Rembrandt Lighting. This seems to be a relatively arbitrary distinction, however, and since Rembrandt himself painted women using basic Rembrandt Lighting, it’s safe to say that this ‘rule’ is a ‘guideline’ at best, and is something that many photographers regularly ignore.
-
\$\begingroup\$ Does Rembrandt lighting have to be short? Could you keep the subject and light static, but photograph more from the lit side, thus making a broad Rembrandt lighting setup? \$\endgroup\$ Commented Jan 8, 2011 at 8:27
-
4\$\begingroup\$ Well, short and broad are their own distinct styles of lighting. Rembrandt is just Rembrandt whichever side you place in the shadow. That aside, it is generally more difficult and 'fiddly' to light the side closest to the camera for two reasons, the first is that the 45-degree thing doesn't work the same if you're lighting closest to the camera, the correct angle is more like 65 degrees off axis from the subject, which is harder to just eyeball. The second is that because the nose is covering a good chunk of the triangle of light, you have to position the camera juuuust right \$\endgroup\$ Commented Jan 8, 2011 at 9:44
-
\$\begingroup\$ ...in order for the camera to be able to see it, and if you rotate the camera around the axis of your subject too far you end up catching the light (or a nasty lens flare) in your shot. The real power of the basic Rembrandt setup is that a monkey can set Rembrandt lighting up in its sleep with one arm tied behind its back. You can get some interesting results by reversing it, but you take away everything that's 'easy' about the setup when you do. That's not a reason not to do it (necessarily), just something to be aware of before you go in... \$\endgroup\$ Commented Jan 8, 2011 at 9:47
-
\$\begingroup\$ @Jay Lance Photography - What software are you using to do the diagrams? \$\endgroup\$– rfuscaCommented Jan 9, 2011 at 3:36
-
1\$\begingroup\$ @Jay Lance Photography - flickr.com/photos/55358132@N05/5338348966 \$\endgroup\$– rfuscaCommented Jan 9, 2011 at 6:12
One reason to use Rembrandt lighting is to contrast the subject lighting with the background to obtain a chiaroscuro effect (strong contrasts, shape defining light). The dark side of the face is defined in silhouette against a bright(er) background:
Here two lights are used, one for the subject and one for the background. The background light is placed close and to an angle so as to fade out across the subject. Here's the setup:
This can be done with one light if you place it just right so that the subject itself shades part of the background. Here's another example of the same set up:
And for contrast, here is a Rembrandt setup with no background light, notice how the unlit side is not defined and gets lost in the background. This gives the photo a different appearance, less striking due to the lack of background contrast and more withdrawn as the subject fades out.
-
2\$\begingroup\$ These are great examples and inspired me to try a lighting on the background similarly. Thanks! \$\endgroup\$– rfuscaCommented Jan 9, 2011 at 7:11
Due to our wonderful population on photo.stackexchange, the above answers are comprehensive and extremely useful. I just wanted to chime in with the historical/etymological perspective.(mostly because Rembrandt is my favorite artist)
I just wanted to give a few striking examples of Rembrandt using this style in his paintings.
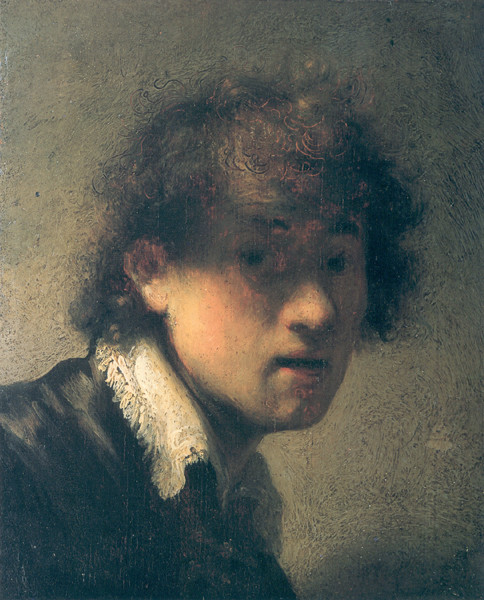
Here you notice the single off-axis light source. Compare with the first of Matt Grum's photos. Same light pattern on the face, although in Rembrandts "Self Portrait as a Young Man in 1629" the background light shares a side with the face light. This works for Rembrandt because he allows this background light to stretch to the other darker side also.
As a second example 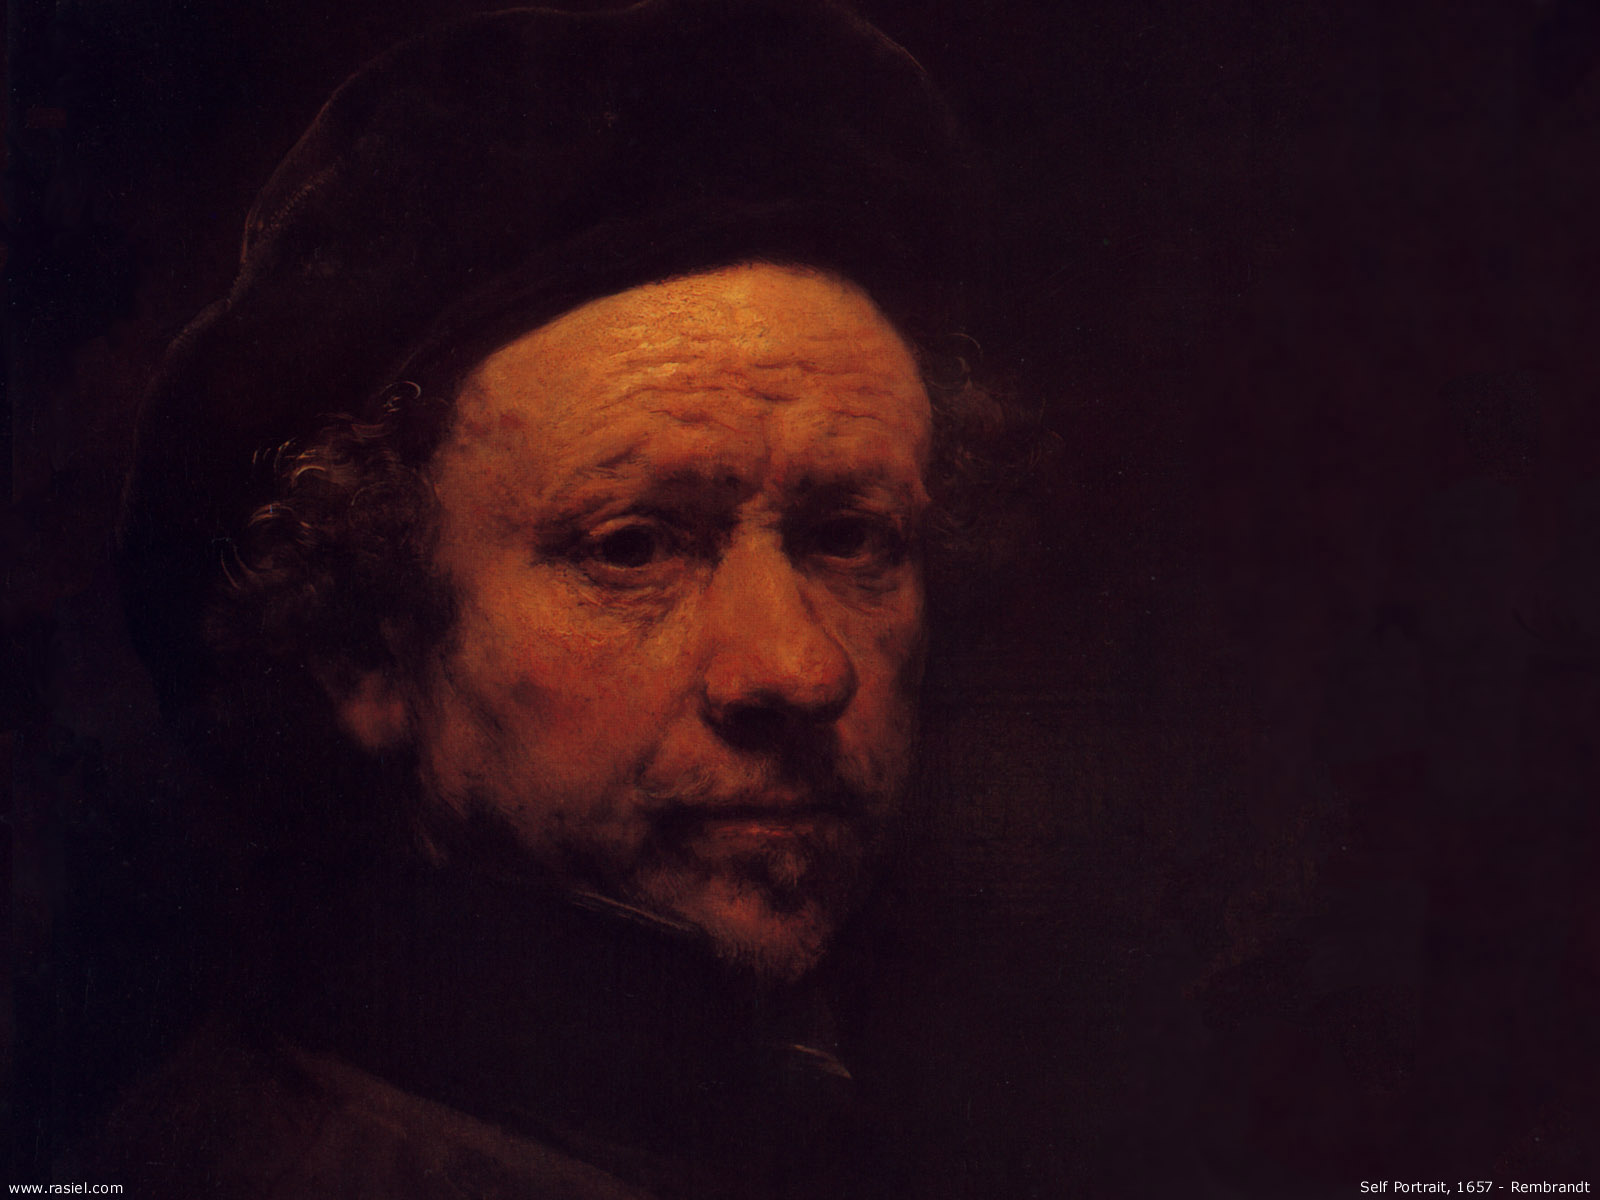 Here is an example from 1657 with the background light on the dark side, and a higher face-light. Similar to Matt Grum's second photo.
-
2\$\begingroup\$ Can't see the famous triangle of light in any of these... \$\endgroup\$– RekinCommented Aug 16, 2019 at 14:40
-
\$\begingroup\$ Thank you for the answer. When I saw the question I was pretty sure that it is a technique pioneered by Rembrandt. Thanks you confirming that. \$\endgroup\$– userCommented Dec 7, 2021 at 17:13
The best example of Rembrandt is on the dummy head. What is referred to as Rembrandt is the style of lighting which often appears on subjects painted by Rembrandt the famous artist. It was one of his "trademarks". The triangle patch of light in Rembrandt will be on the side of the face most prominent to camera. When the reverse is the case, this is referred to as "Basic" lighting - not Rembrandt. Rembrandt is usually used on men's faces or women when in dramatic and low key scenes. Rembrandt can be used successfully in portraiture using varying degrees of fill light to decrease the contrast of the shadow created by the key. Again, this is most favored for men's faces. The Key light is first placed at 45 degrees height from the axis of the subject's head and 45 degrees off axis of their nose to light the side of the face most off axis (distant) from camera. The mood of Rembrandt lighting is more serious, dignified, mysterious and dark. It can be achieved with both hard and diffused light. With a very soft key and a ratio of 1 1/2:1 to the fill light (1/2 stop difference) it can be a flattering lighting for a lady.


